The development process of any machine is filled with excitement, first you get an idea, then you develop that out into a plan and then work towards making that a reality.
But how could something so simple become so complicated? I mean it’s just a bike right?
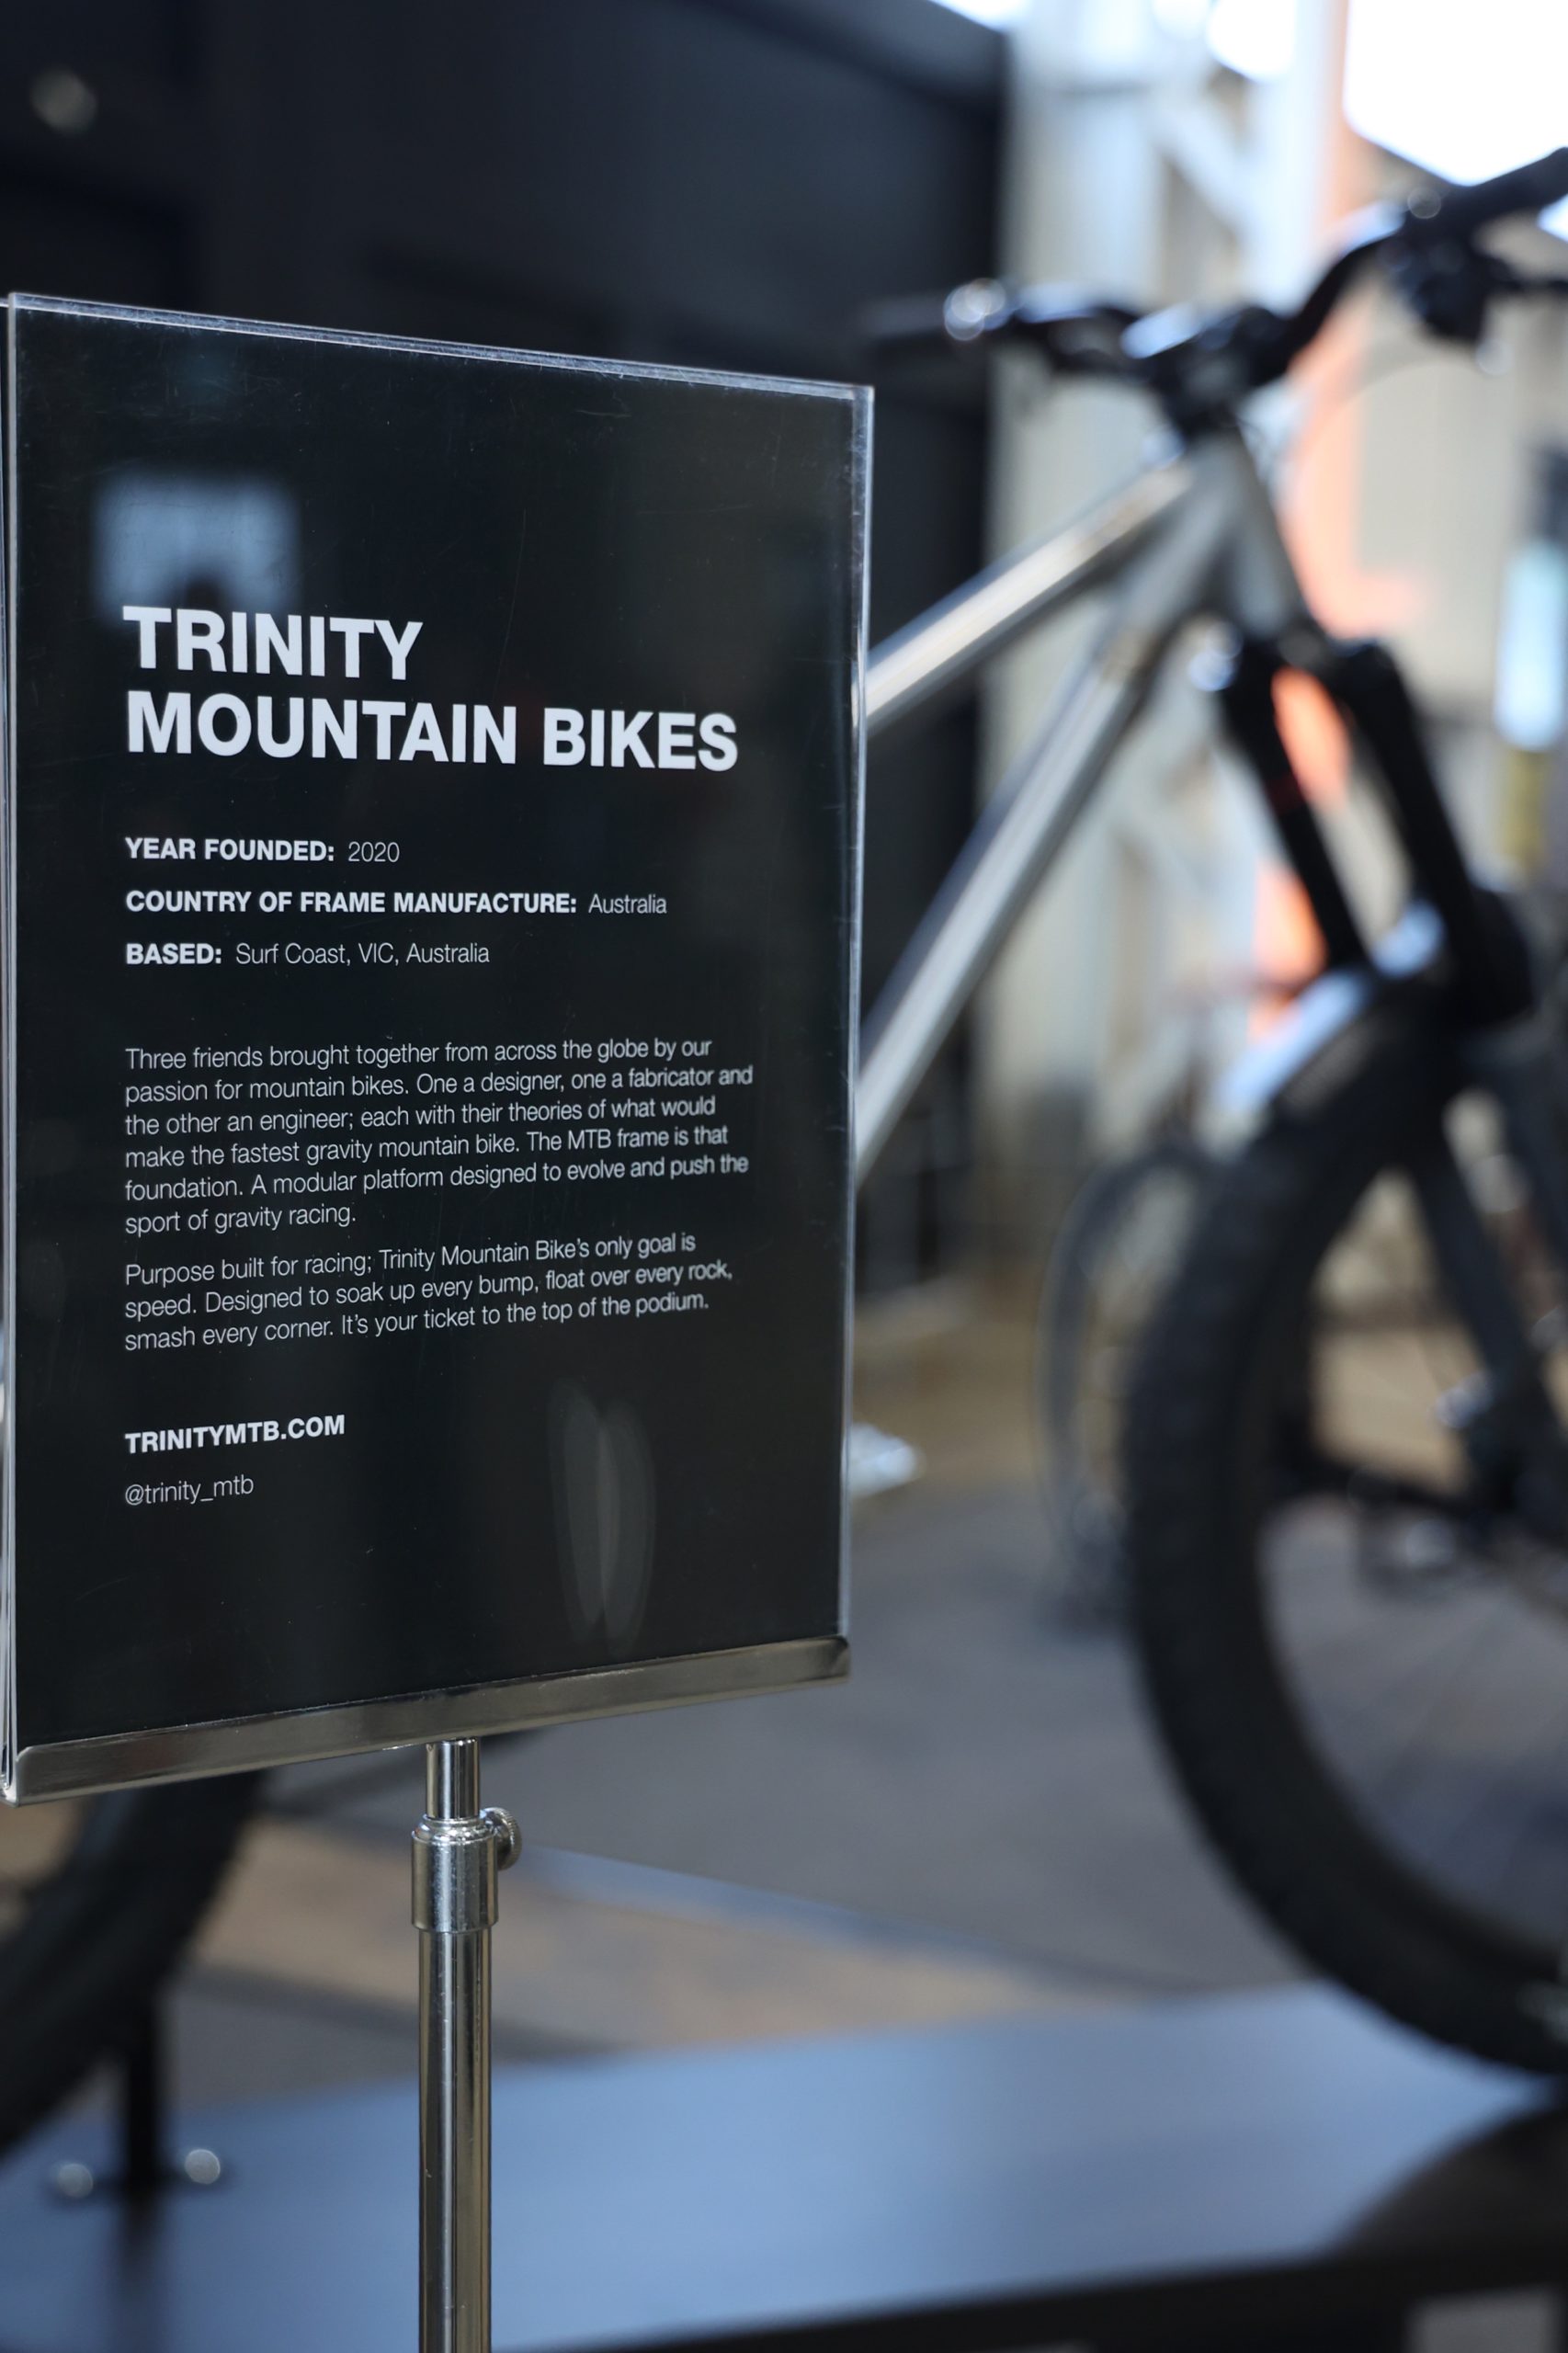
If it were any other bike I would agree, but not this one! Have a read of our Trinity MTB geometry charts and you will start to understand what goes into creating a bike that handles the steepest descents, biggest jumps all while having the ability to climb back up to the top and do it all over again and again.
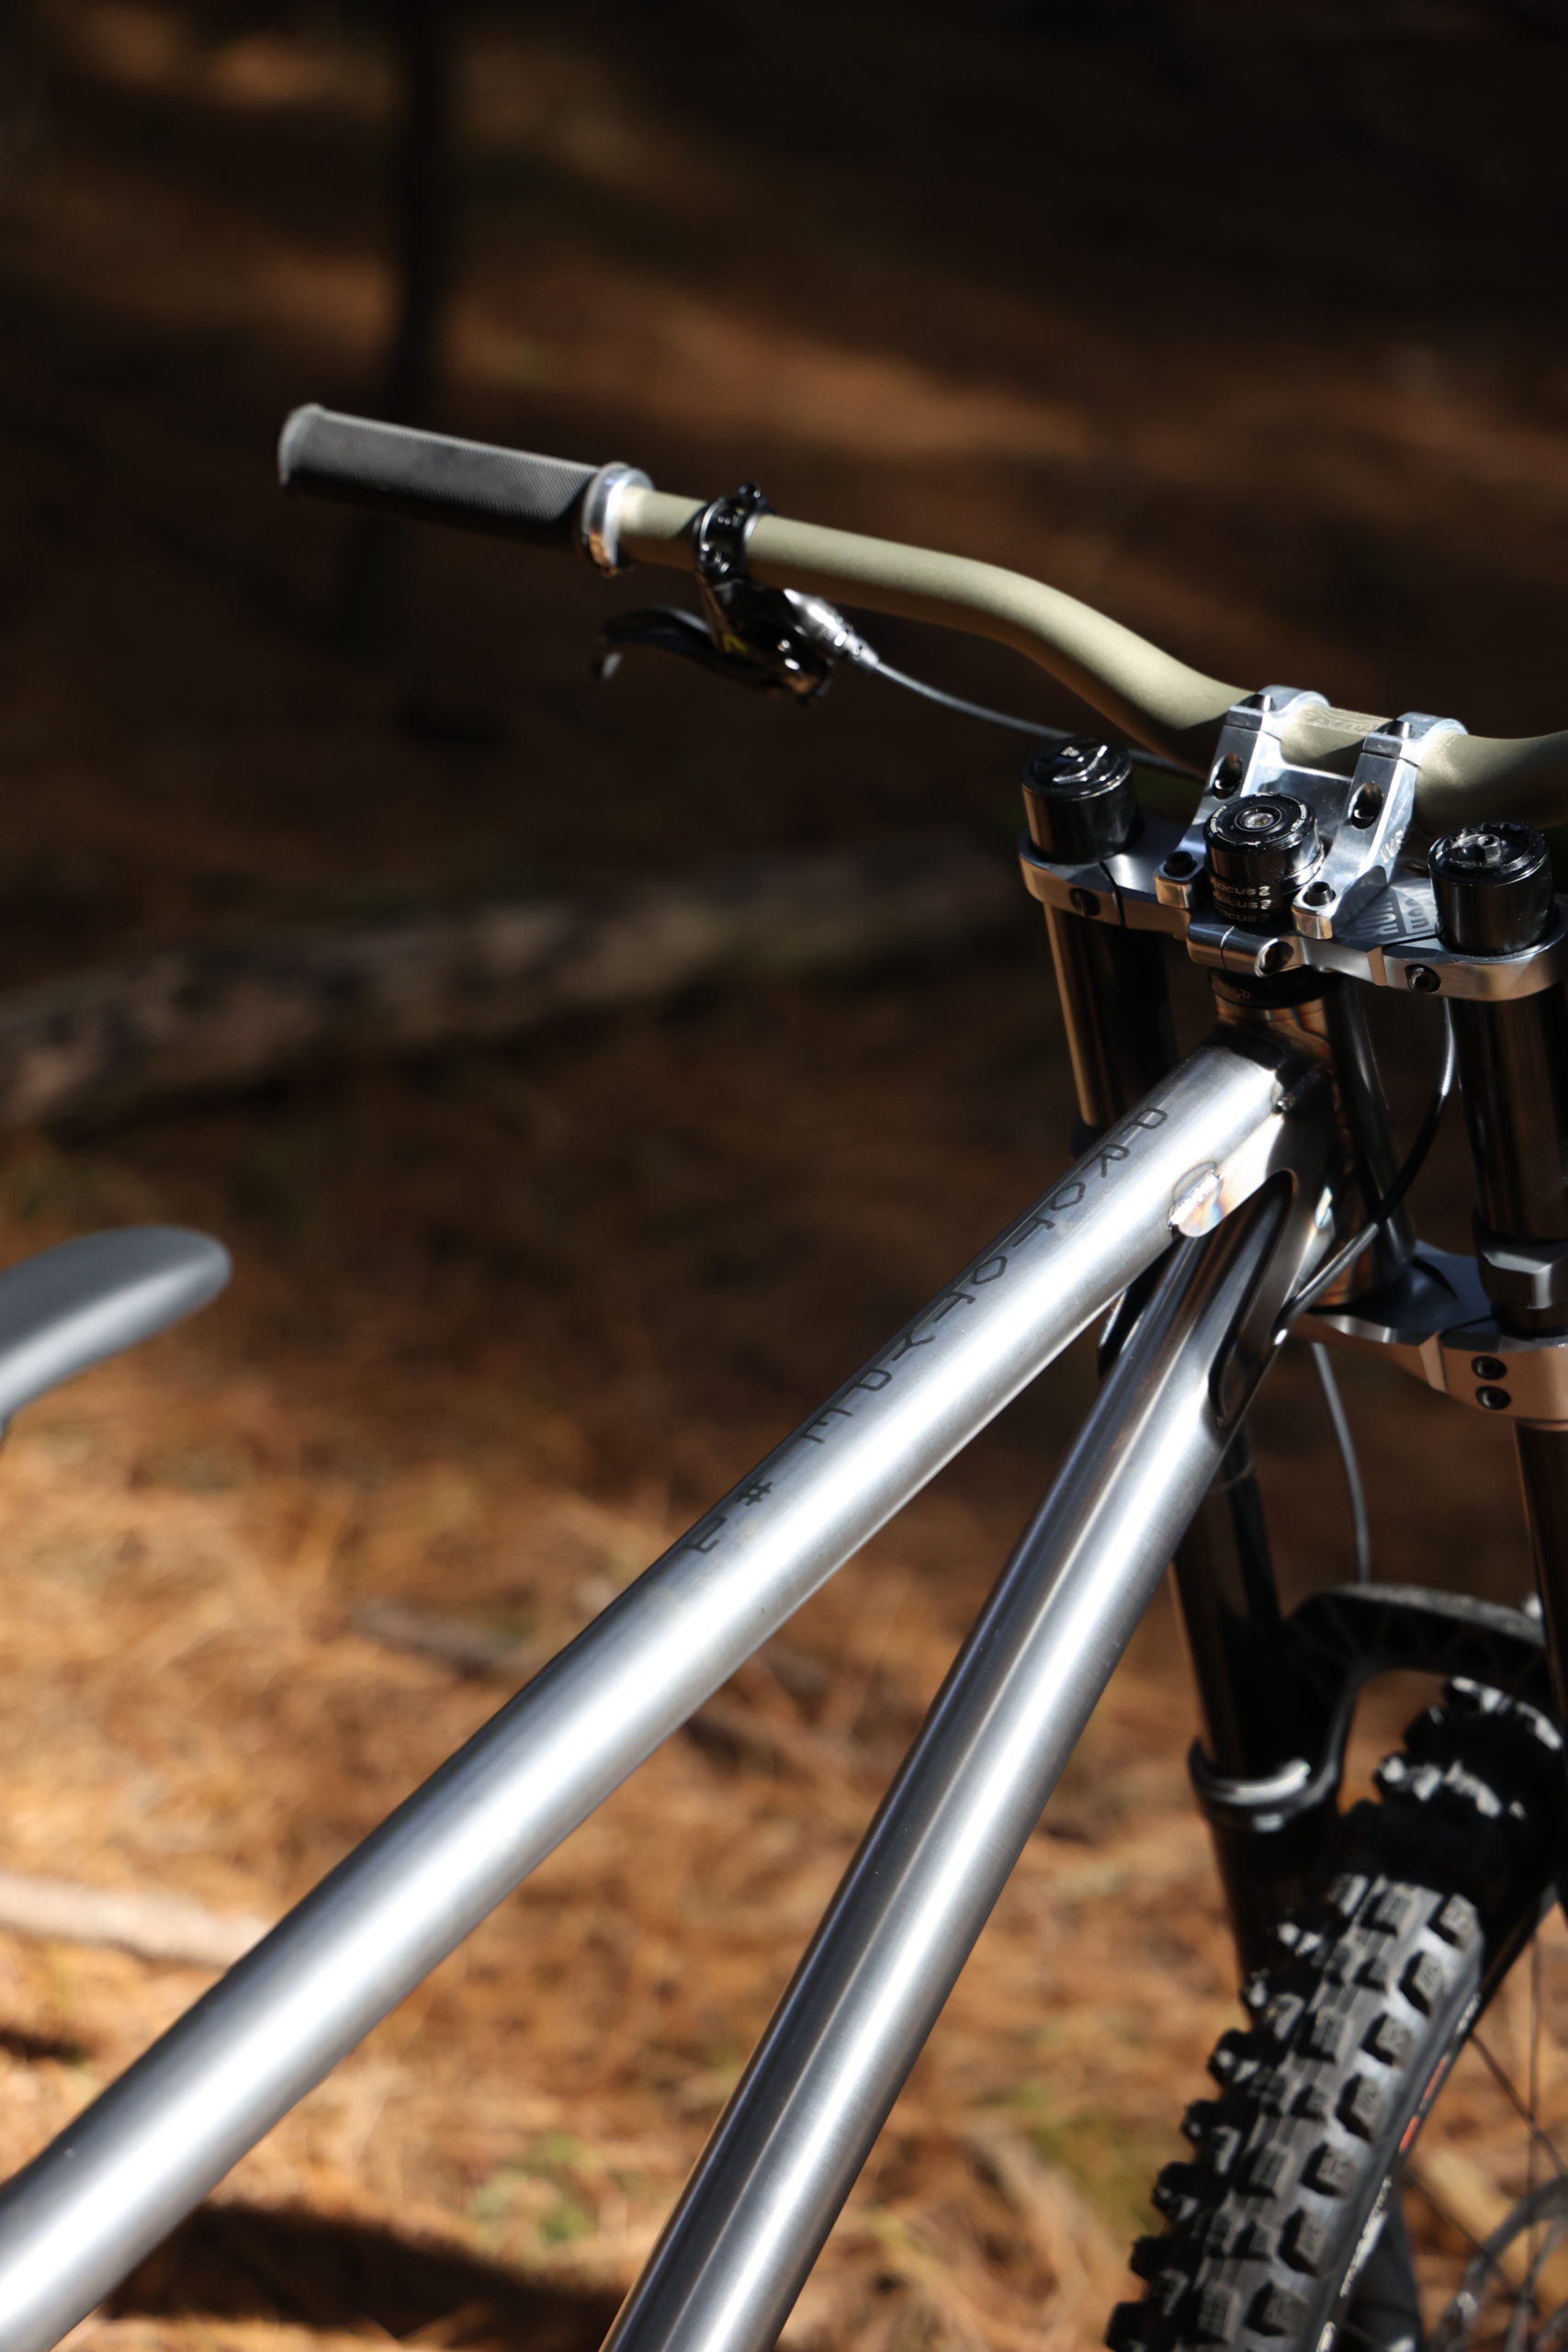
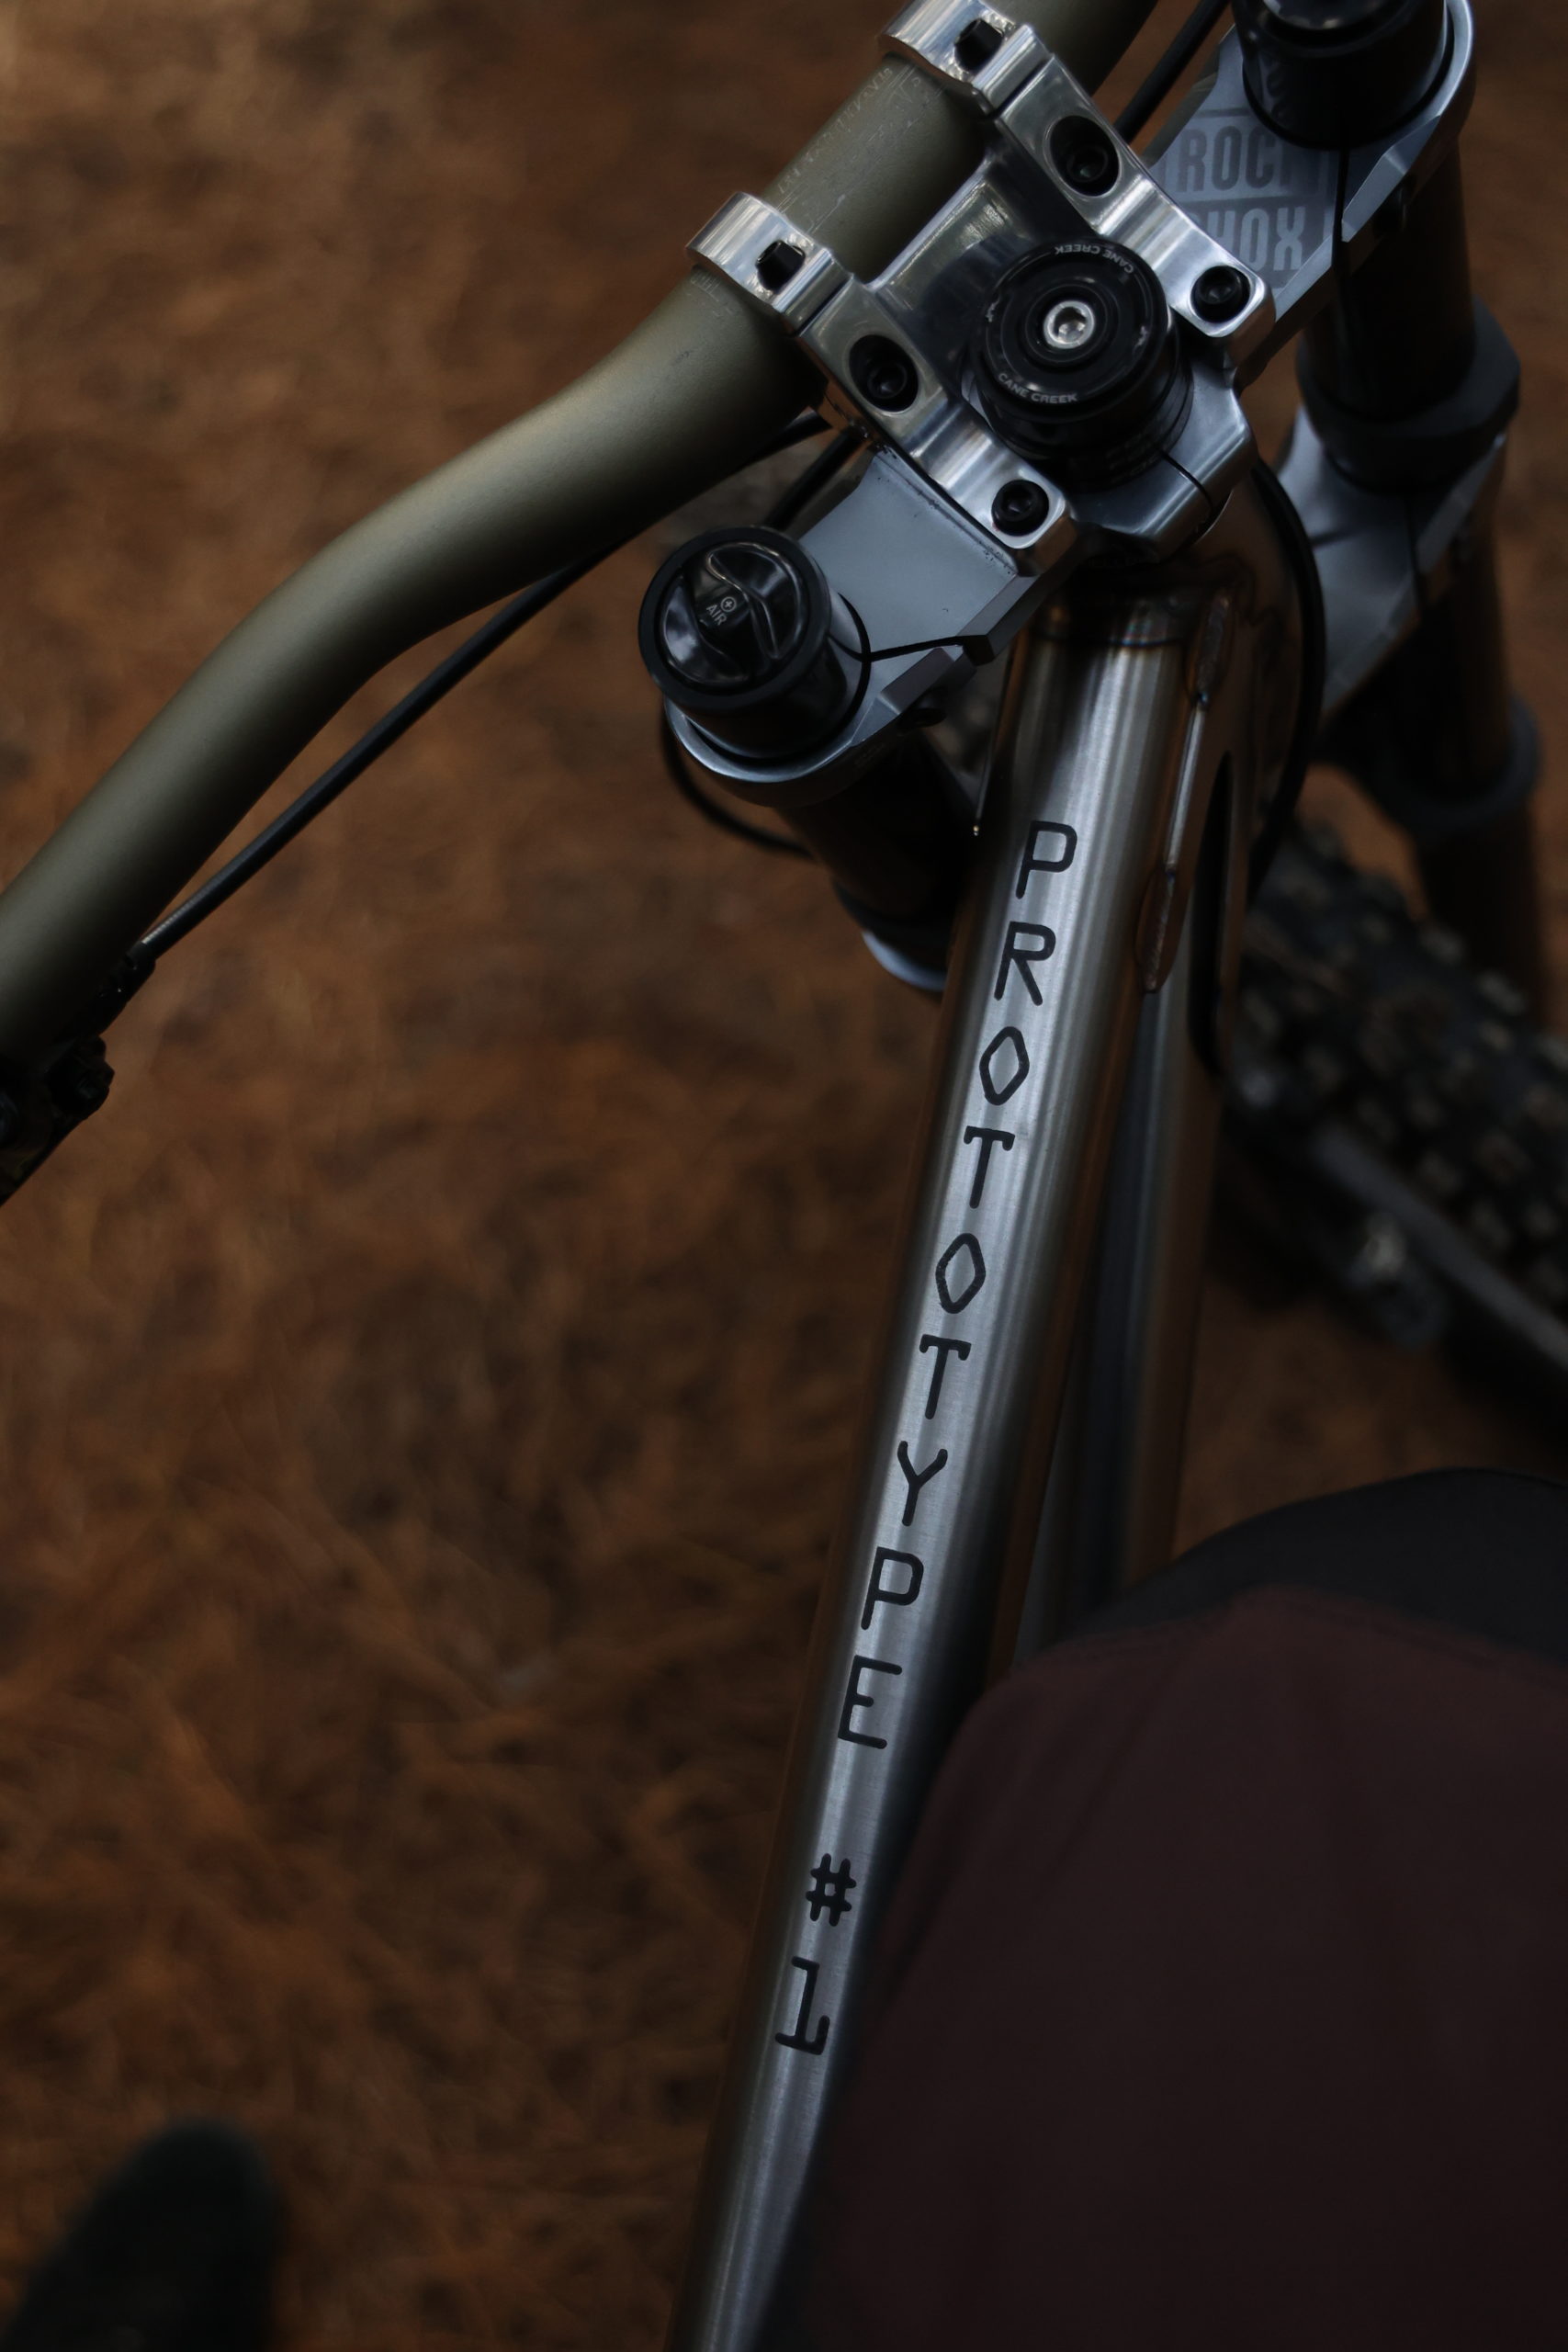
Fortunately I leave that mathematical nightmare to my good friend Chase who spent years figuring out the perfect kinematics for the chosen genre of bike we are building. Speaking of building you may have seen the Version 1 Prototype I built last year, one year on we took all the lessons learned from Version 1 to complete Version 2.
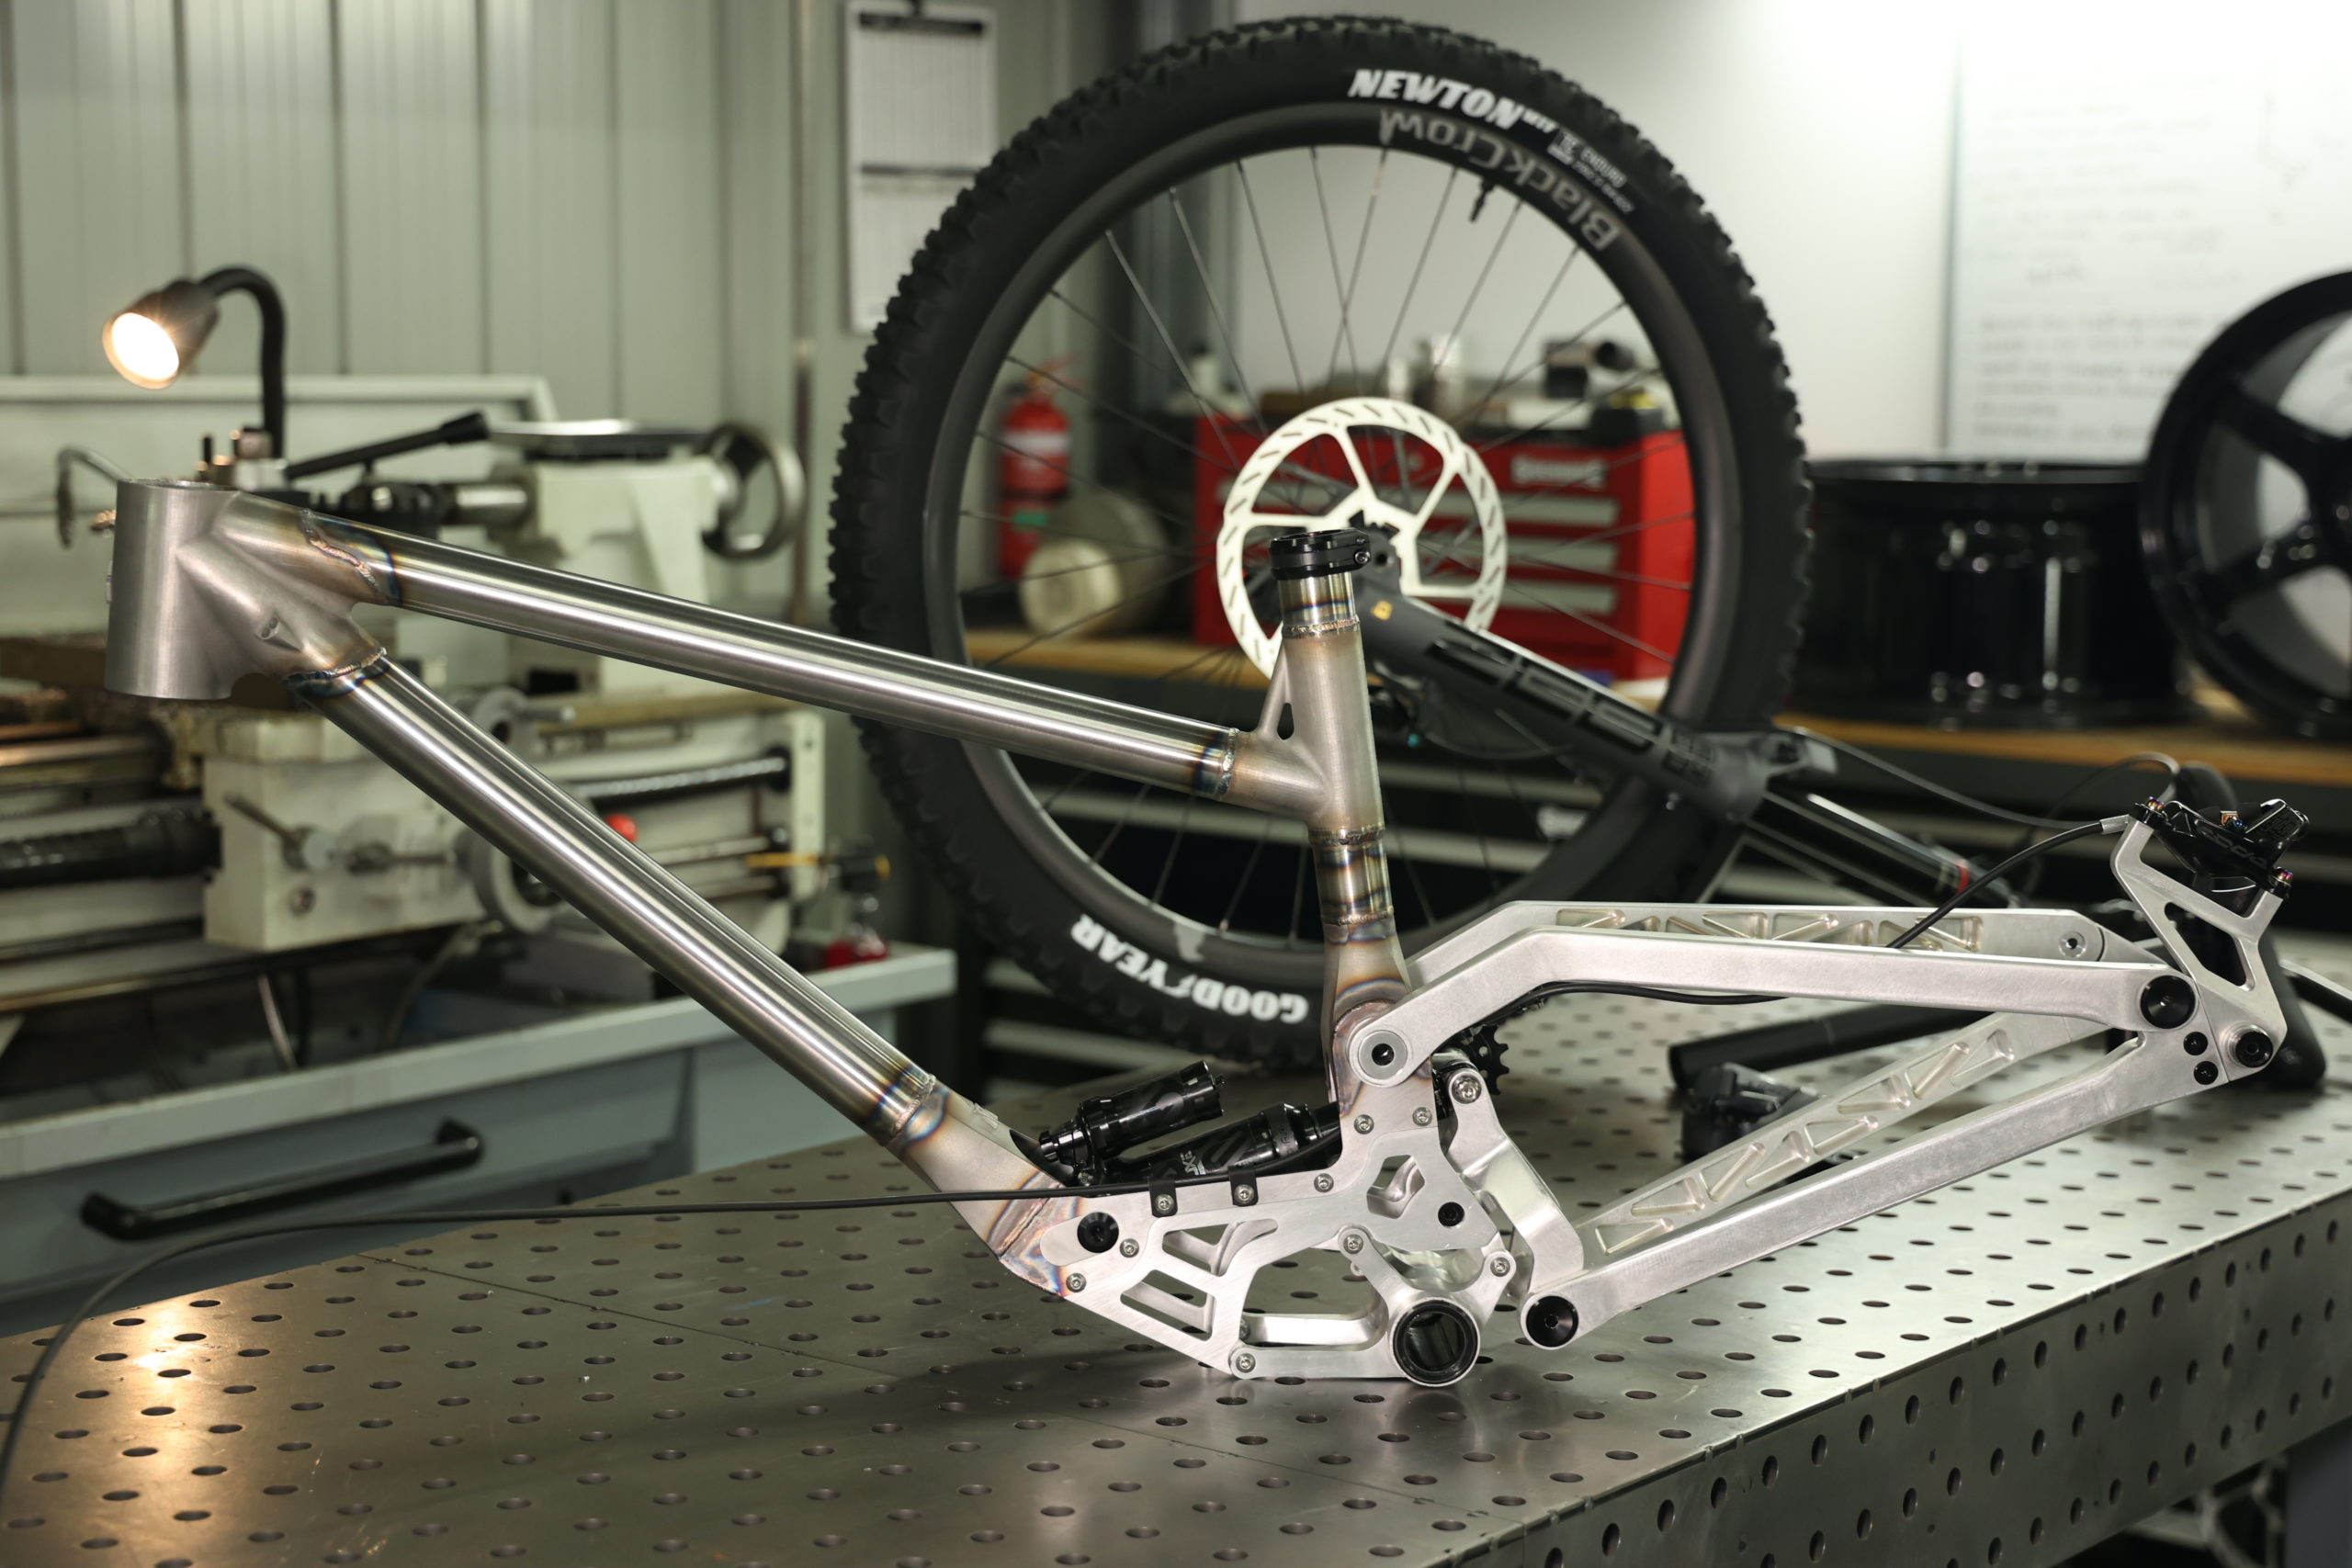
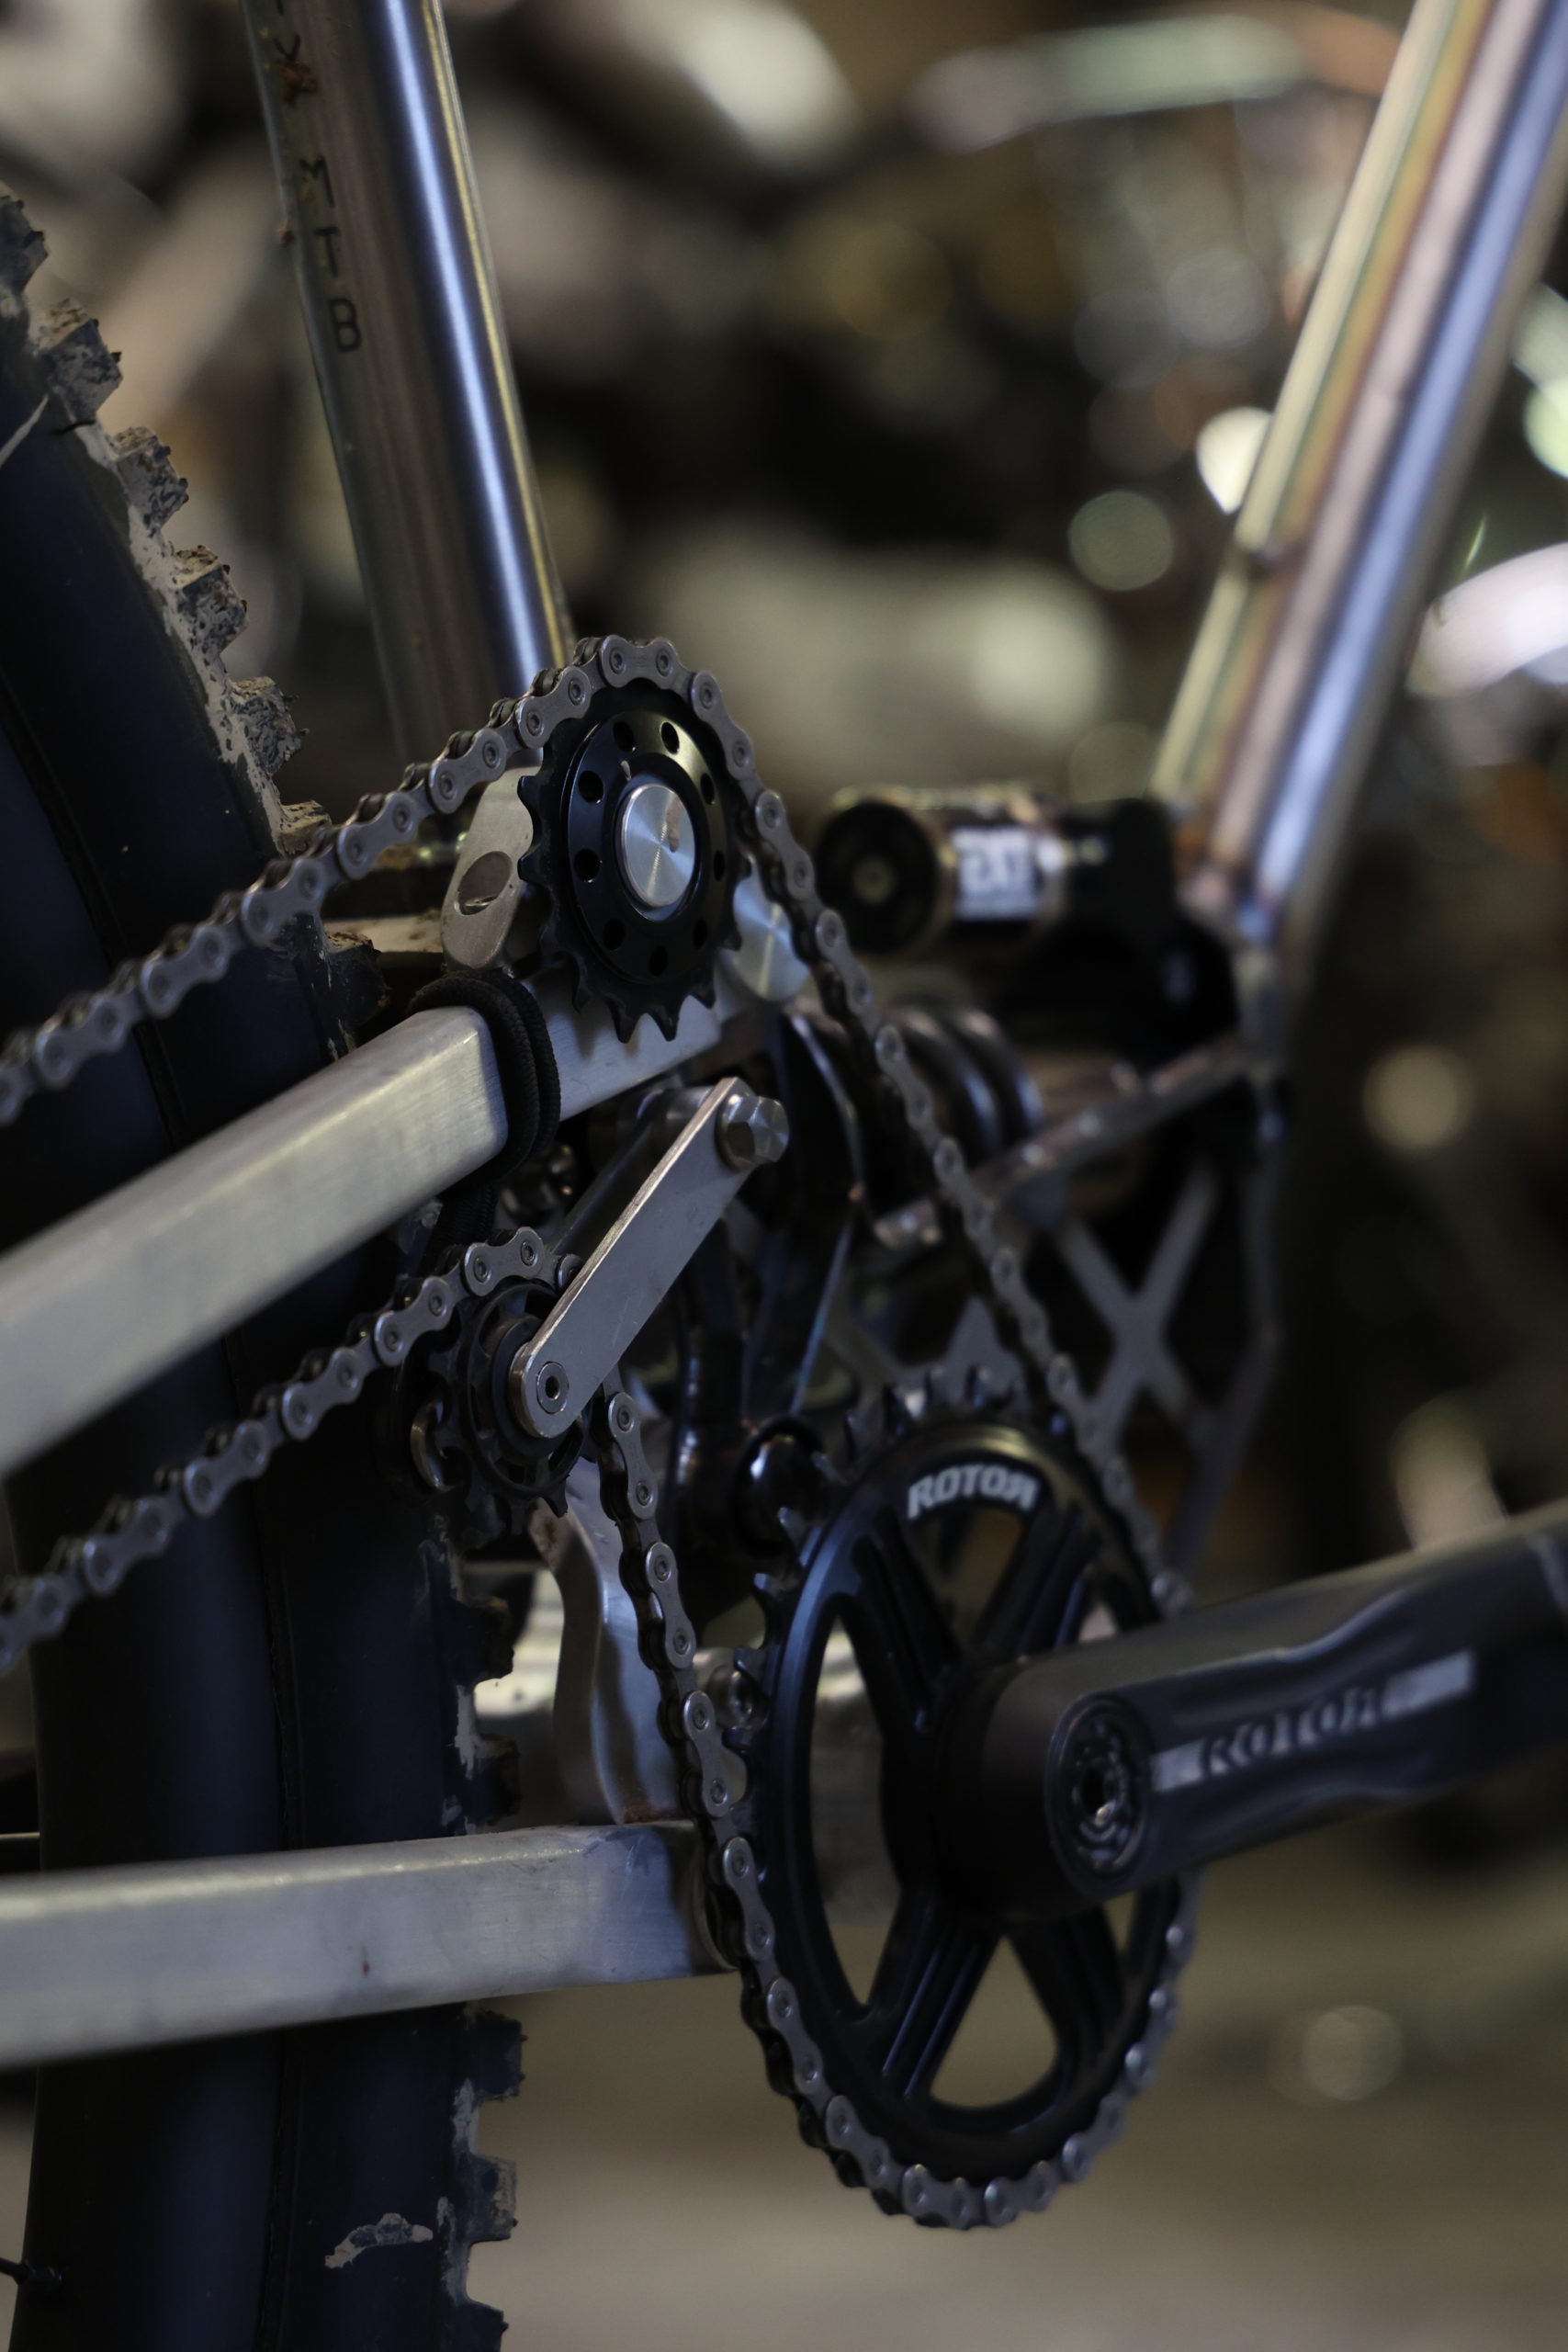
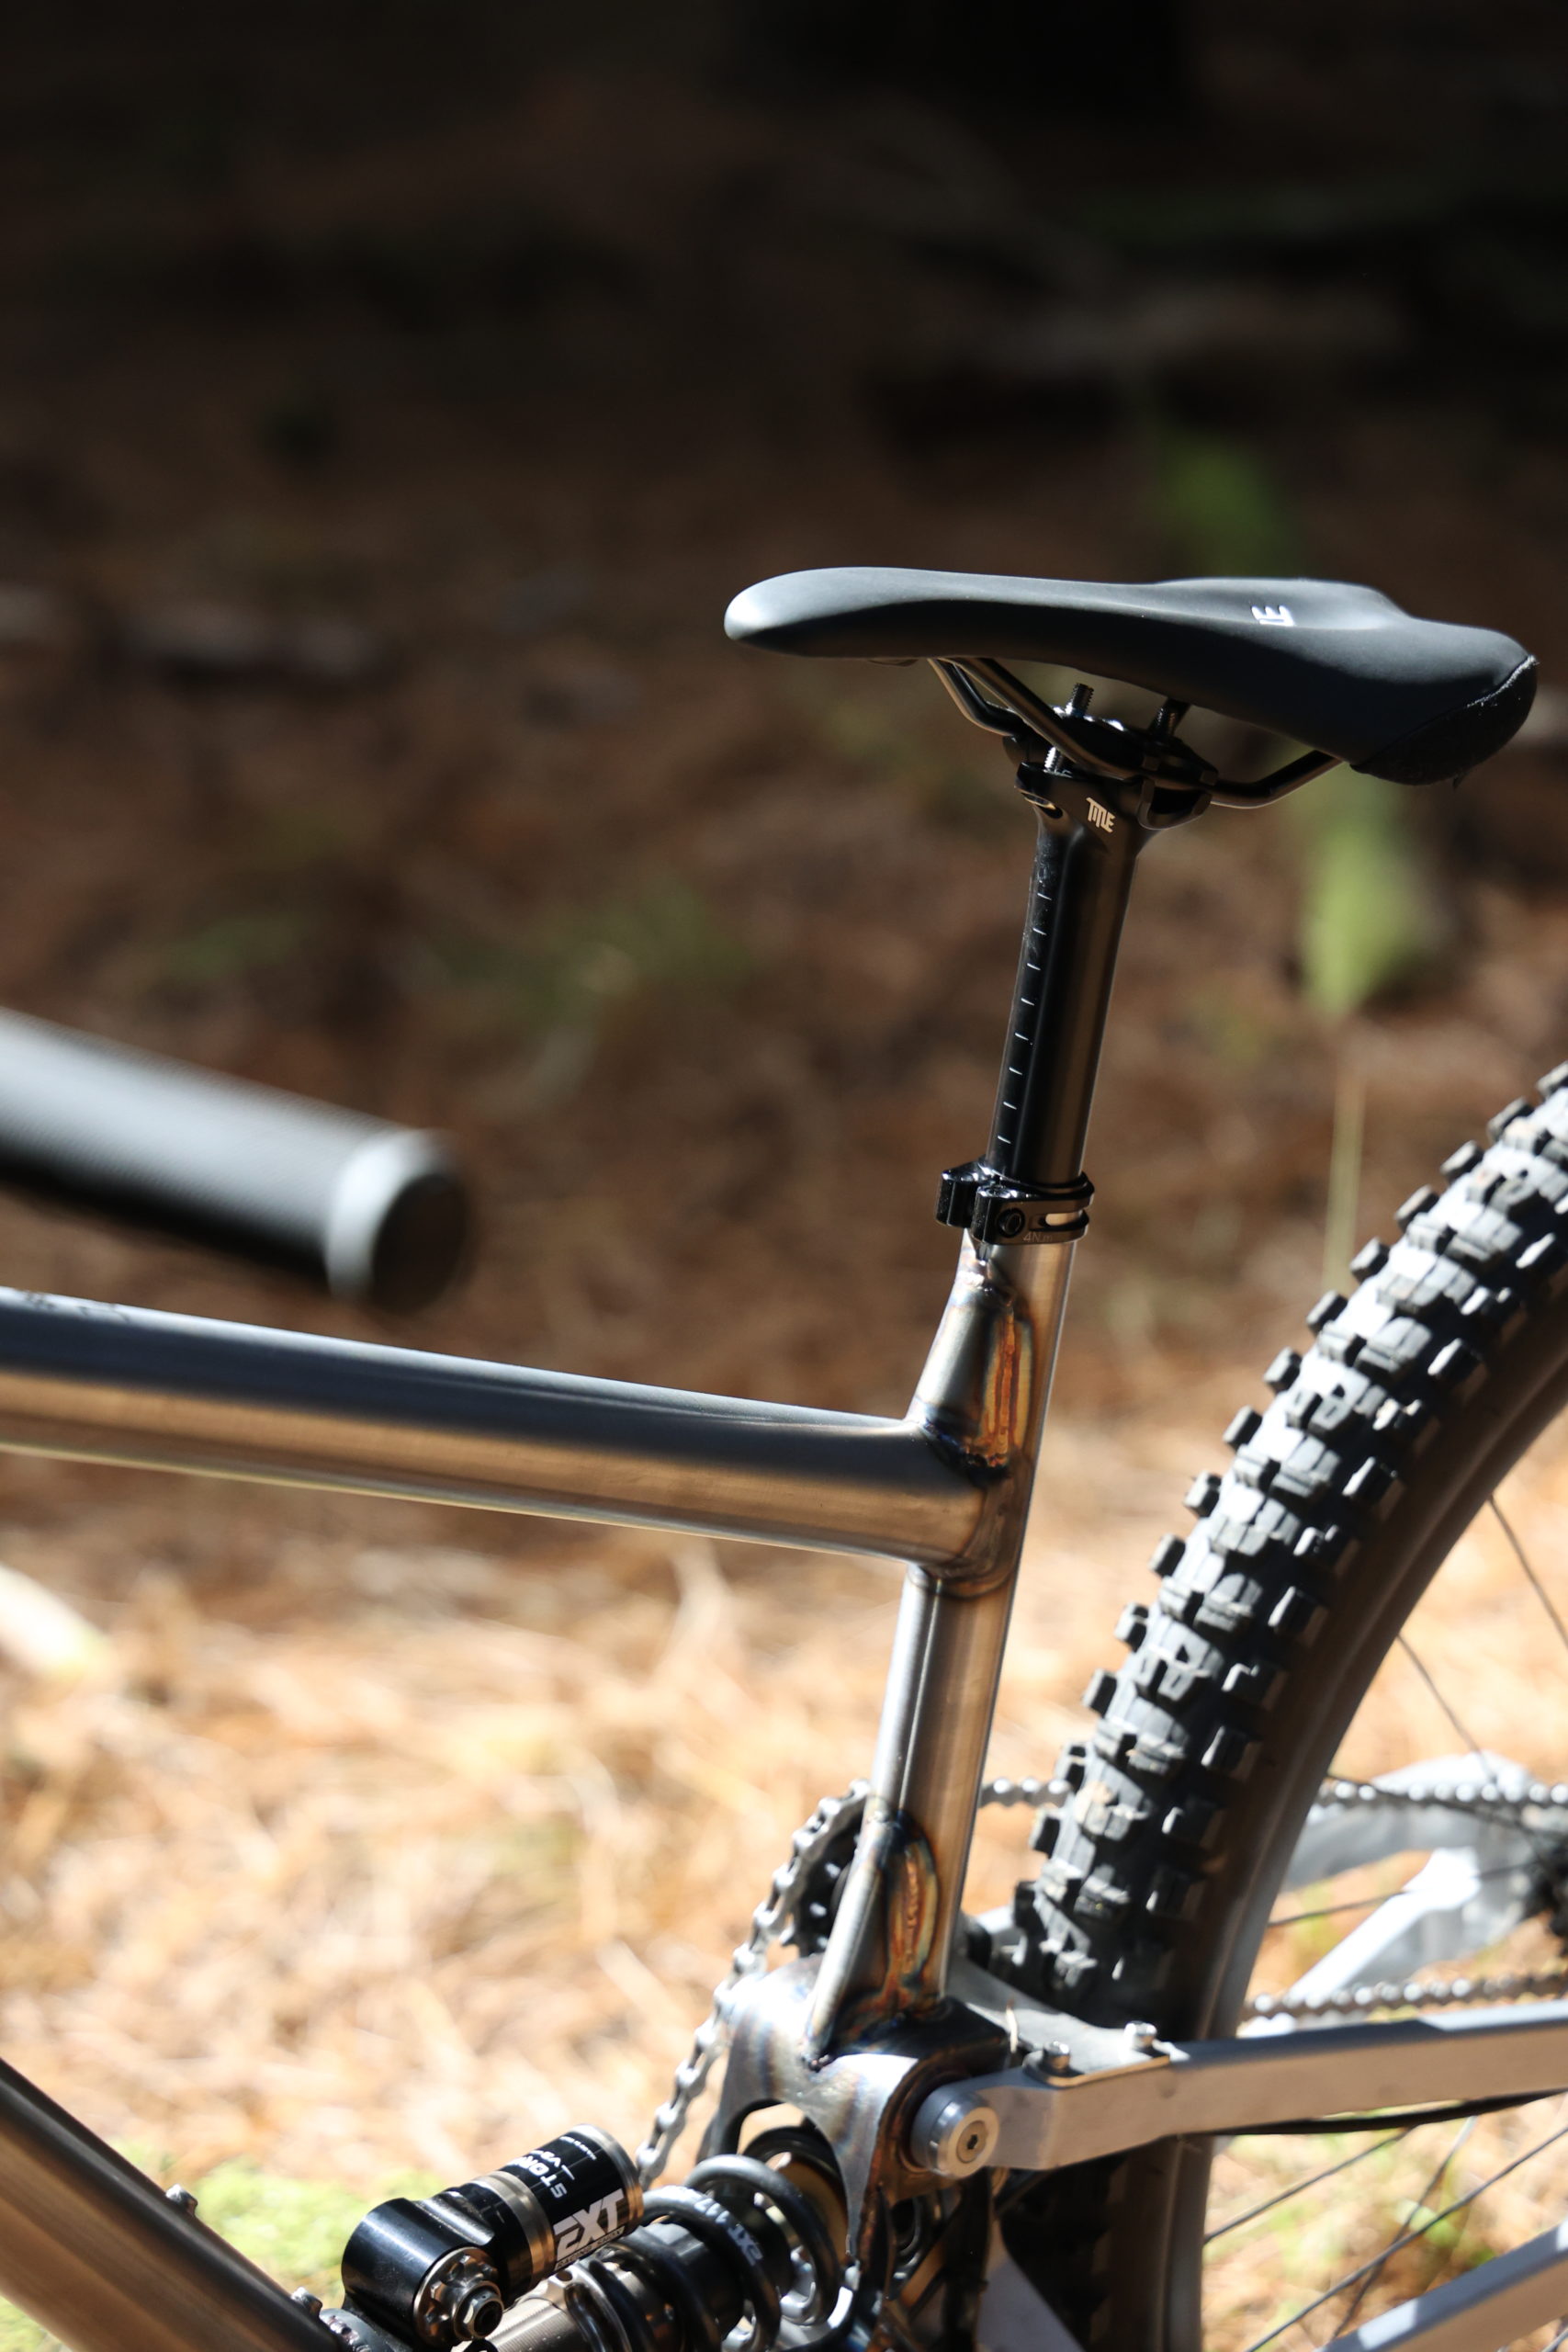
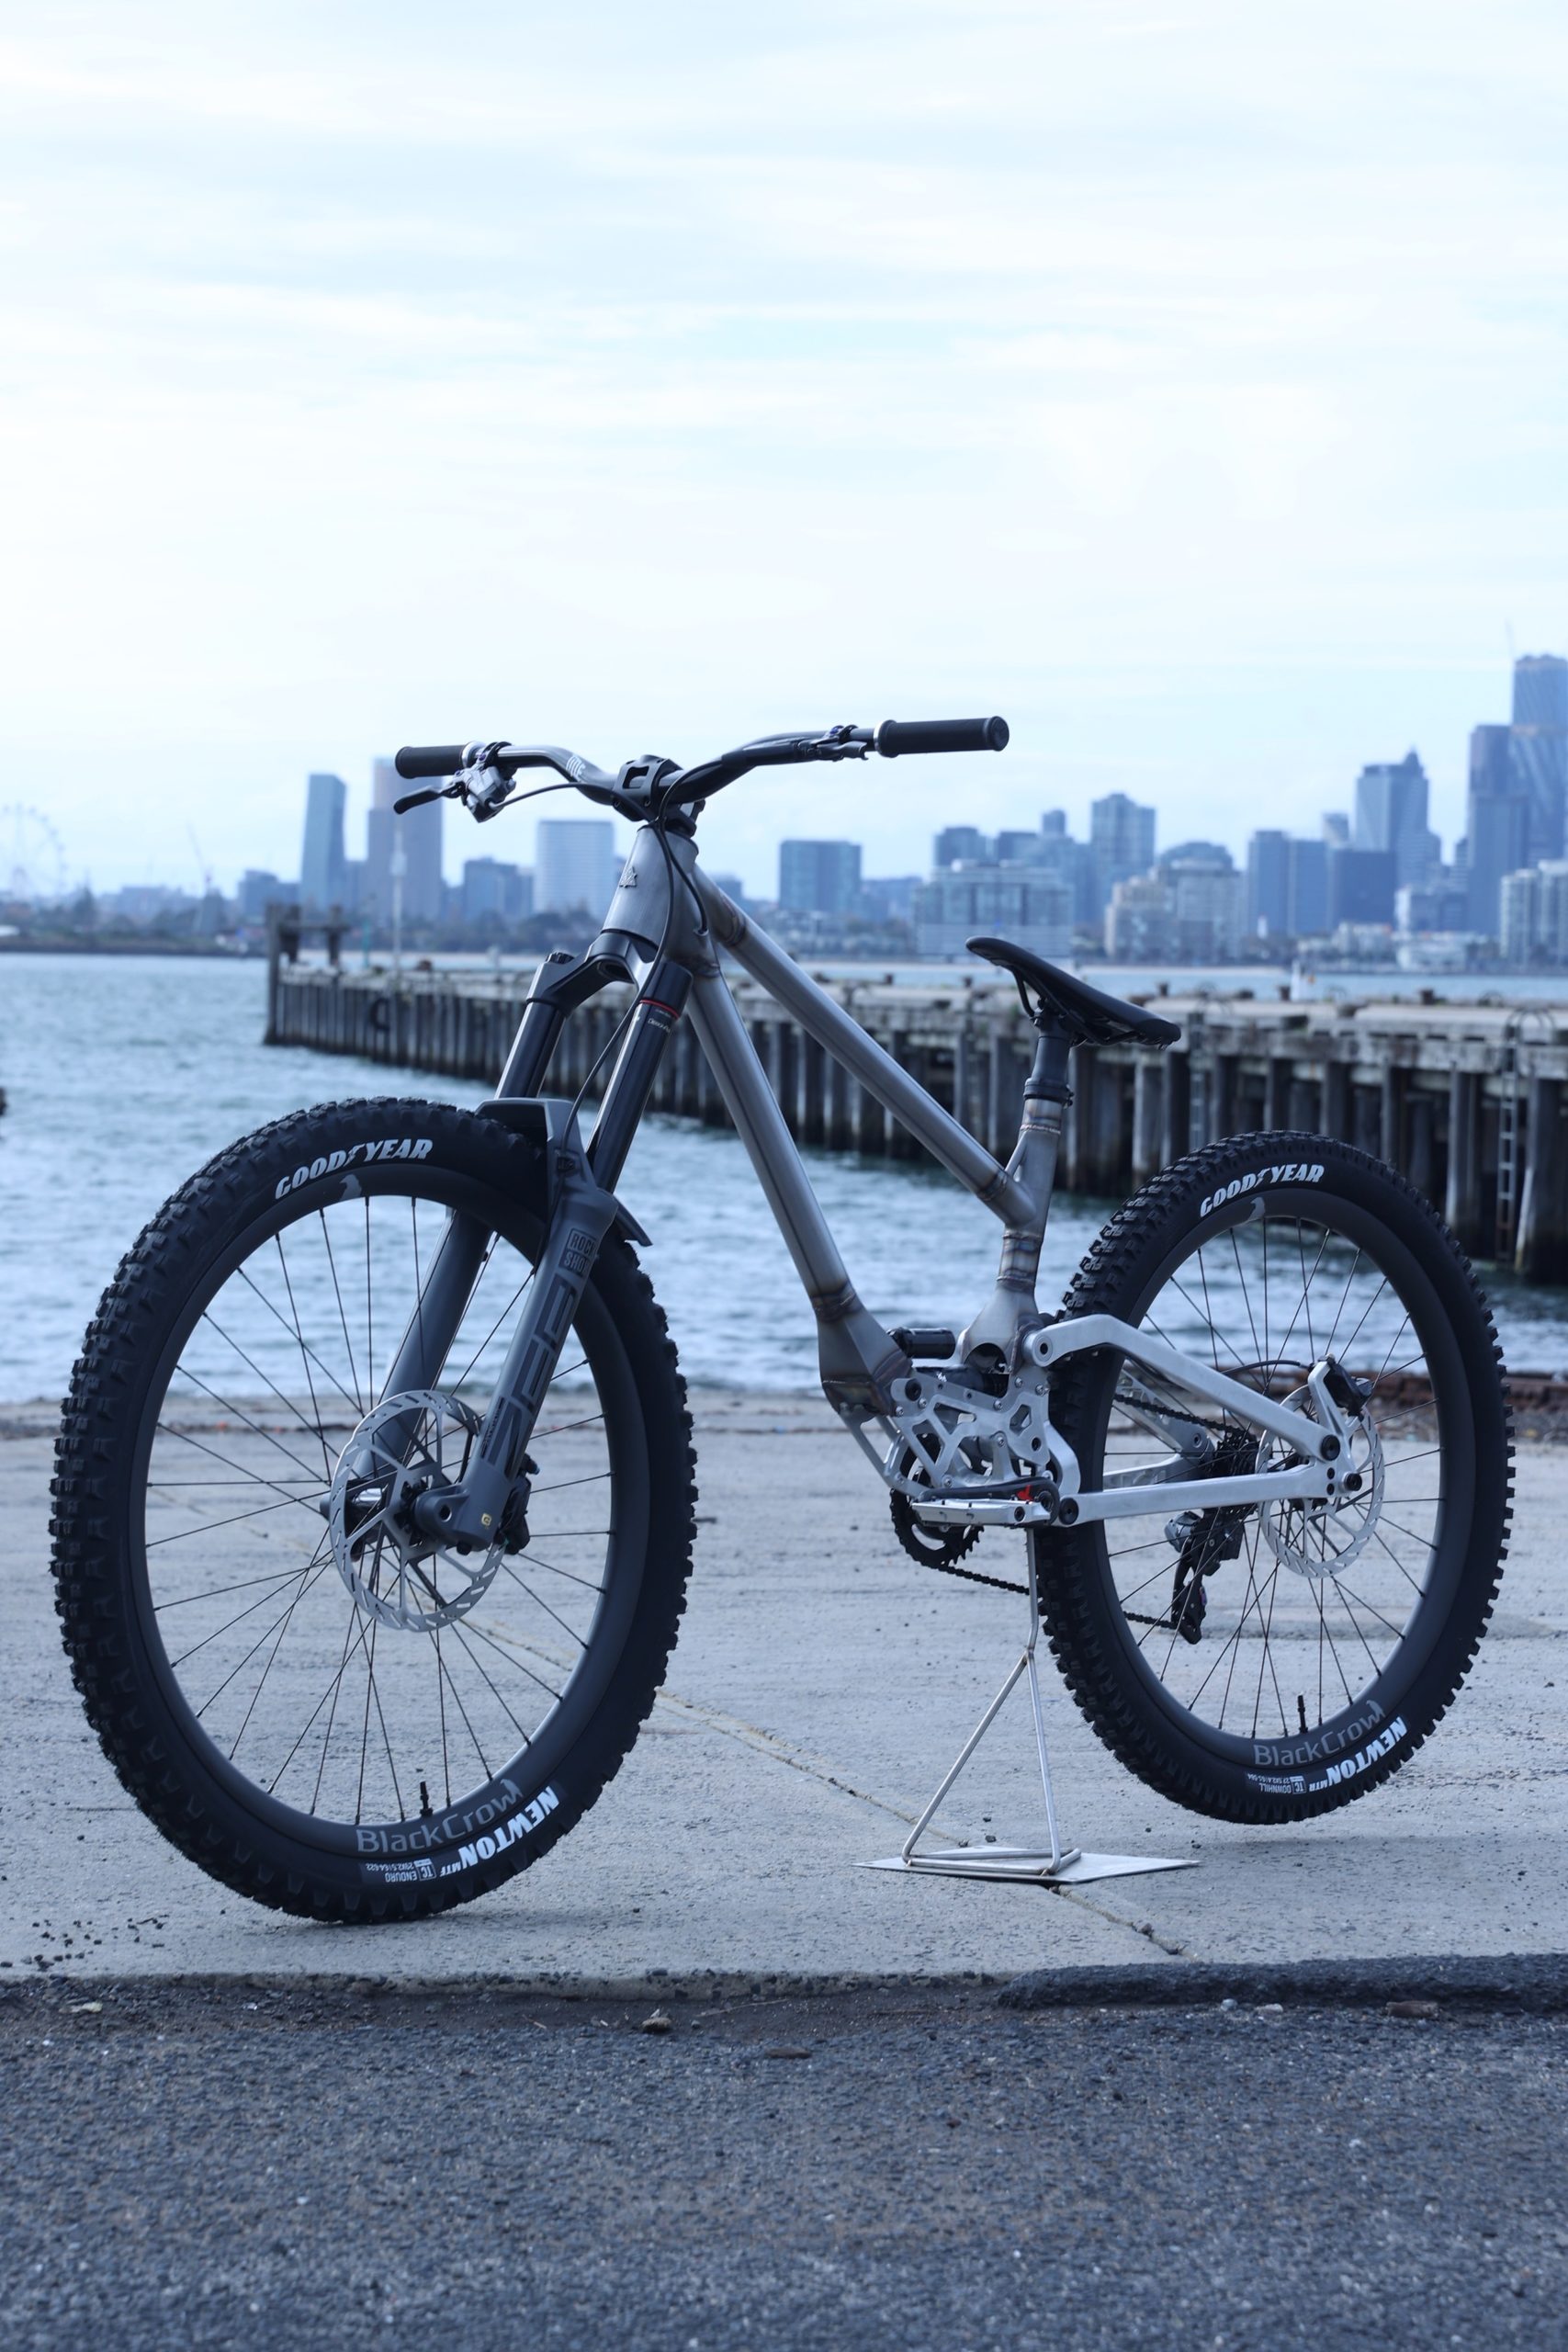
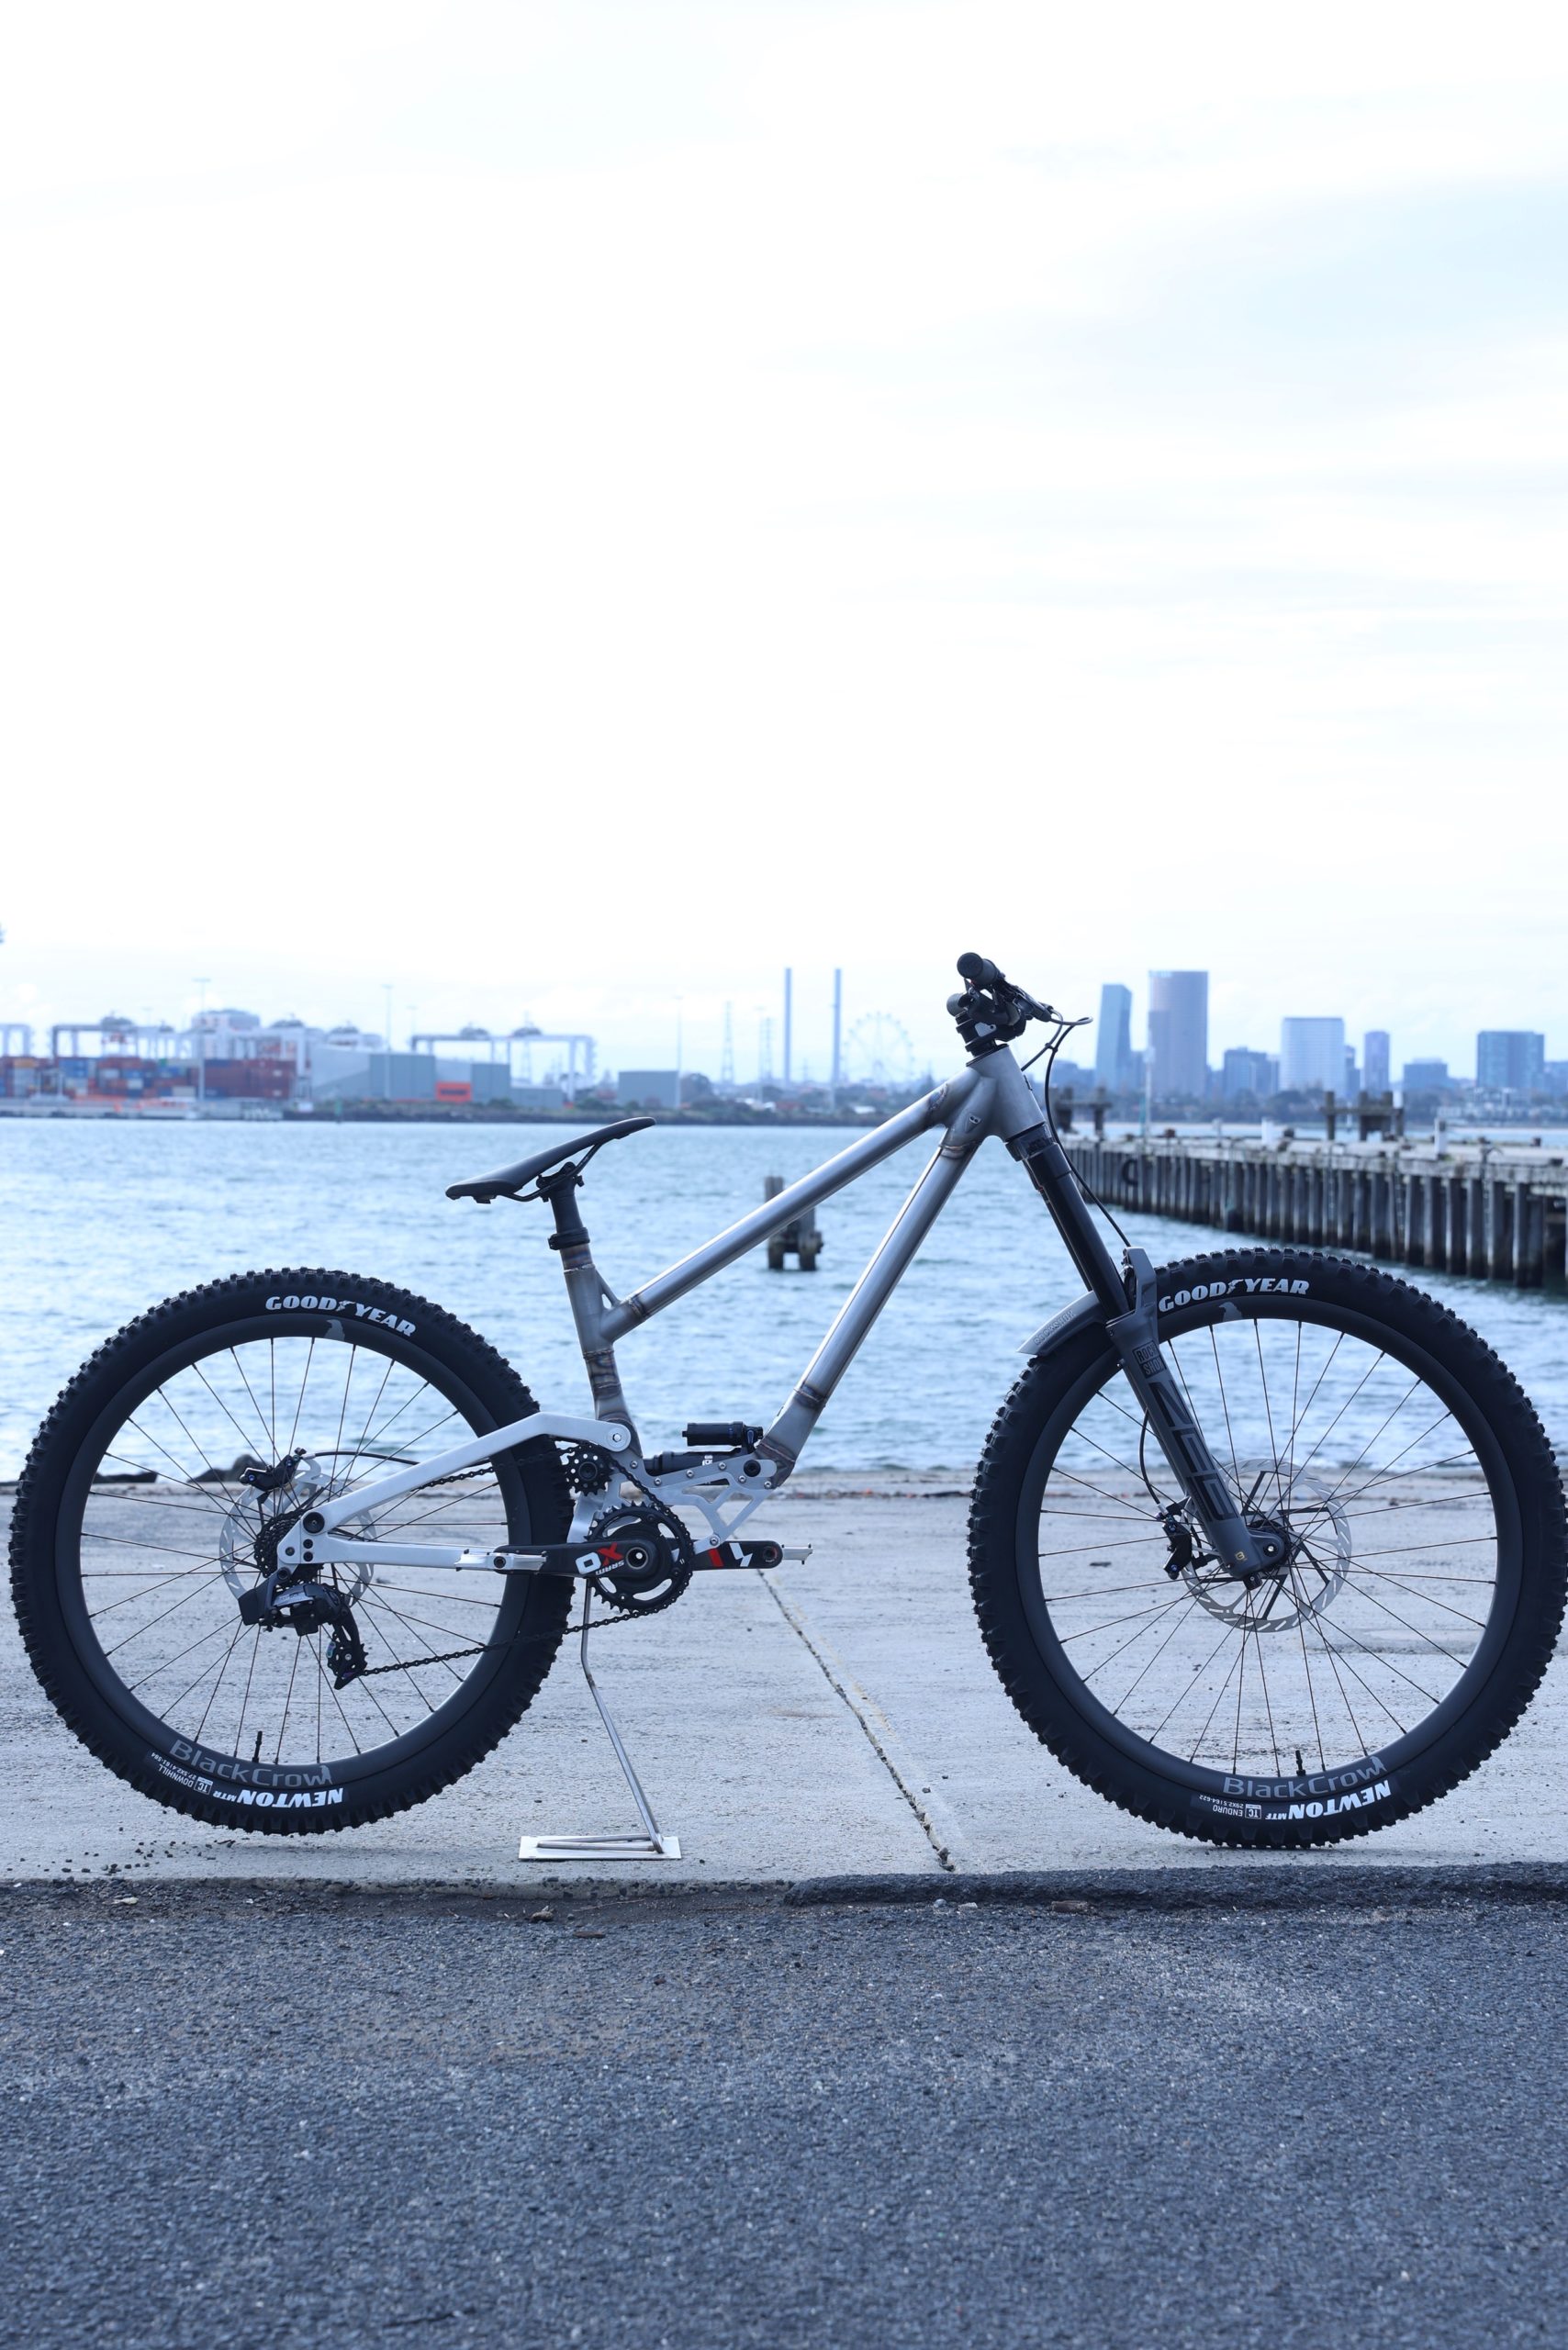
Version 2 features many changes, the versatility of the bike is extended with its bolt on bottom bracket side plates that are CNC machined out of 7075 Aluminium plate, these allow the fitment of a gearbox, normal bottom bracket or anything else we want to design in the future.
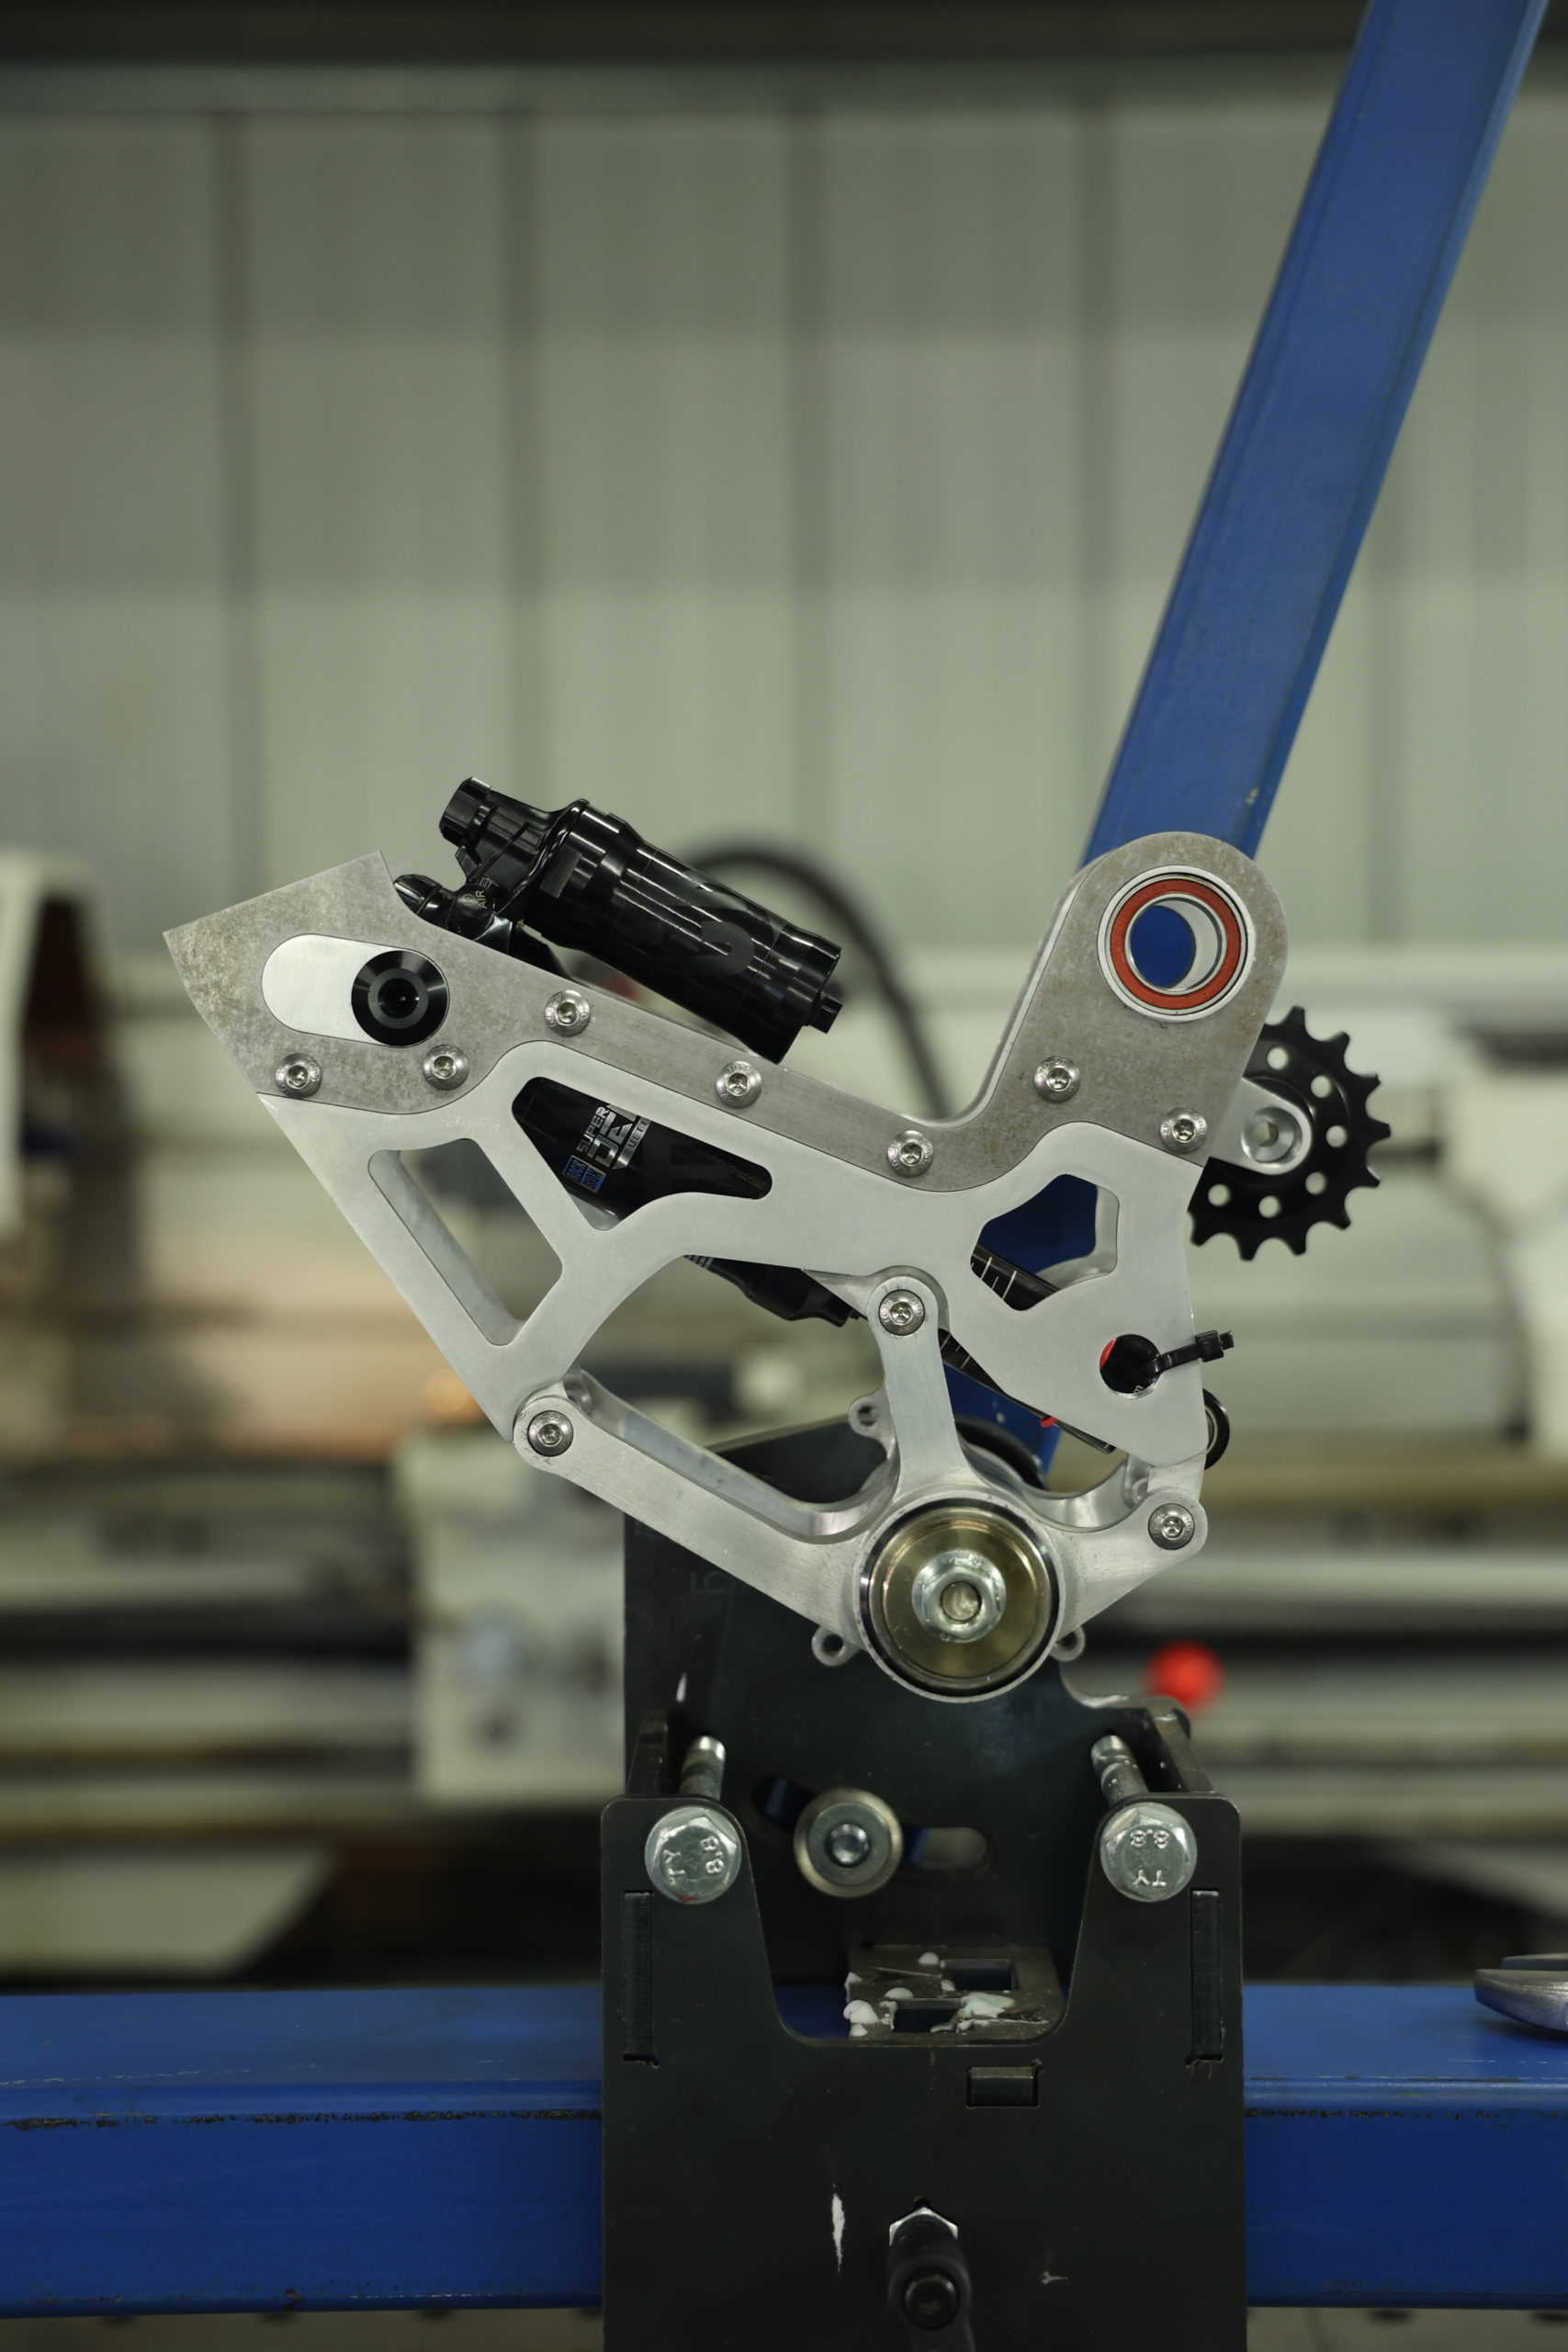
The shock mount also features versatility to allow the fitment of a 205mm or 225mm shock to gain 155mm up to 195mm of rear travel with the flip of the “chip” as its known.
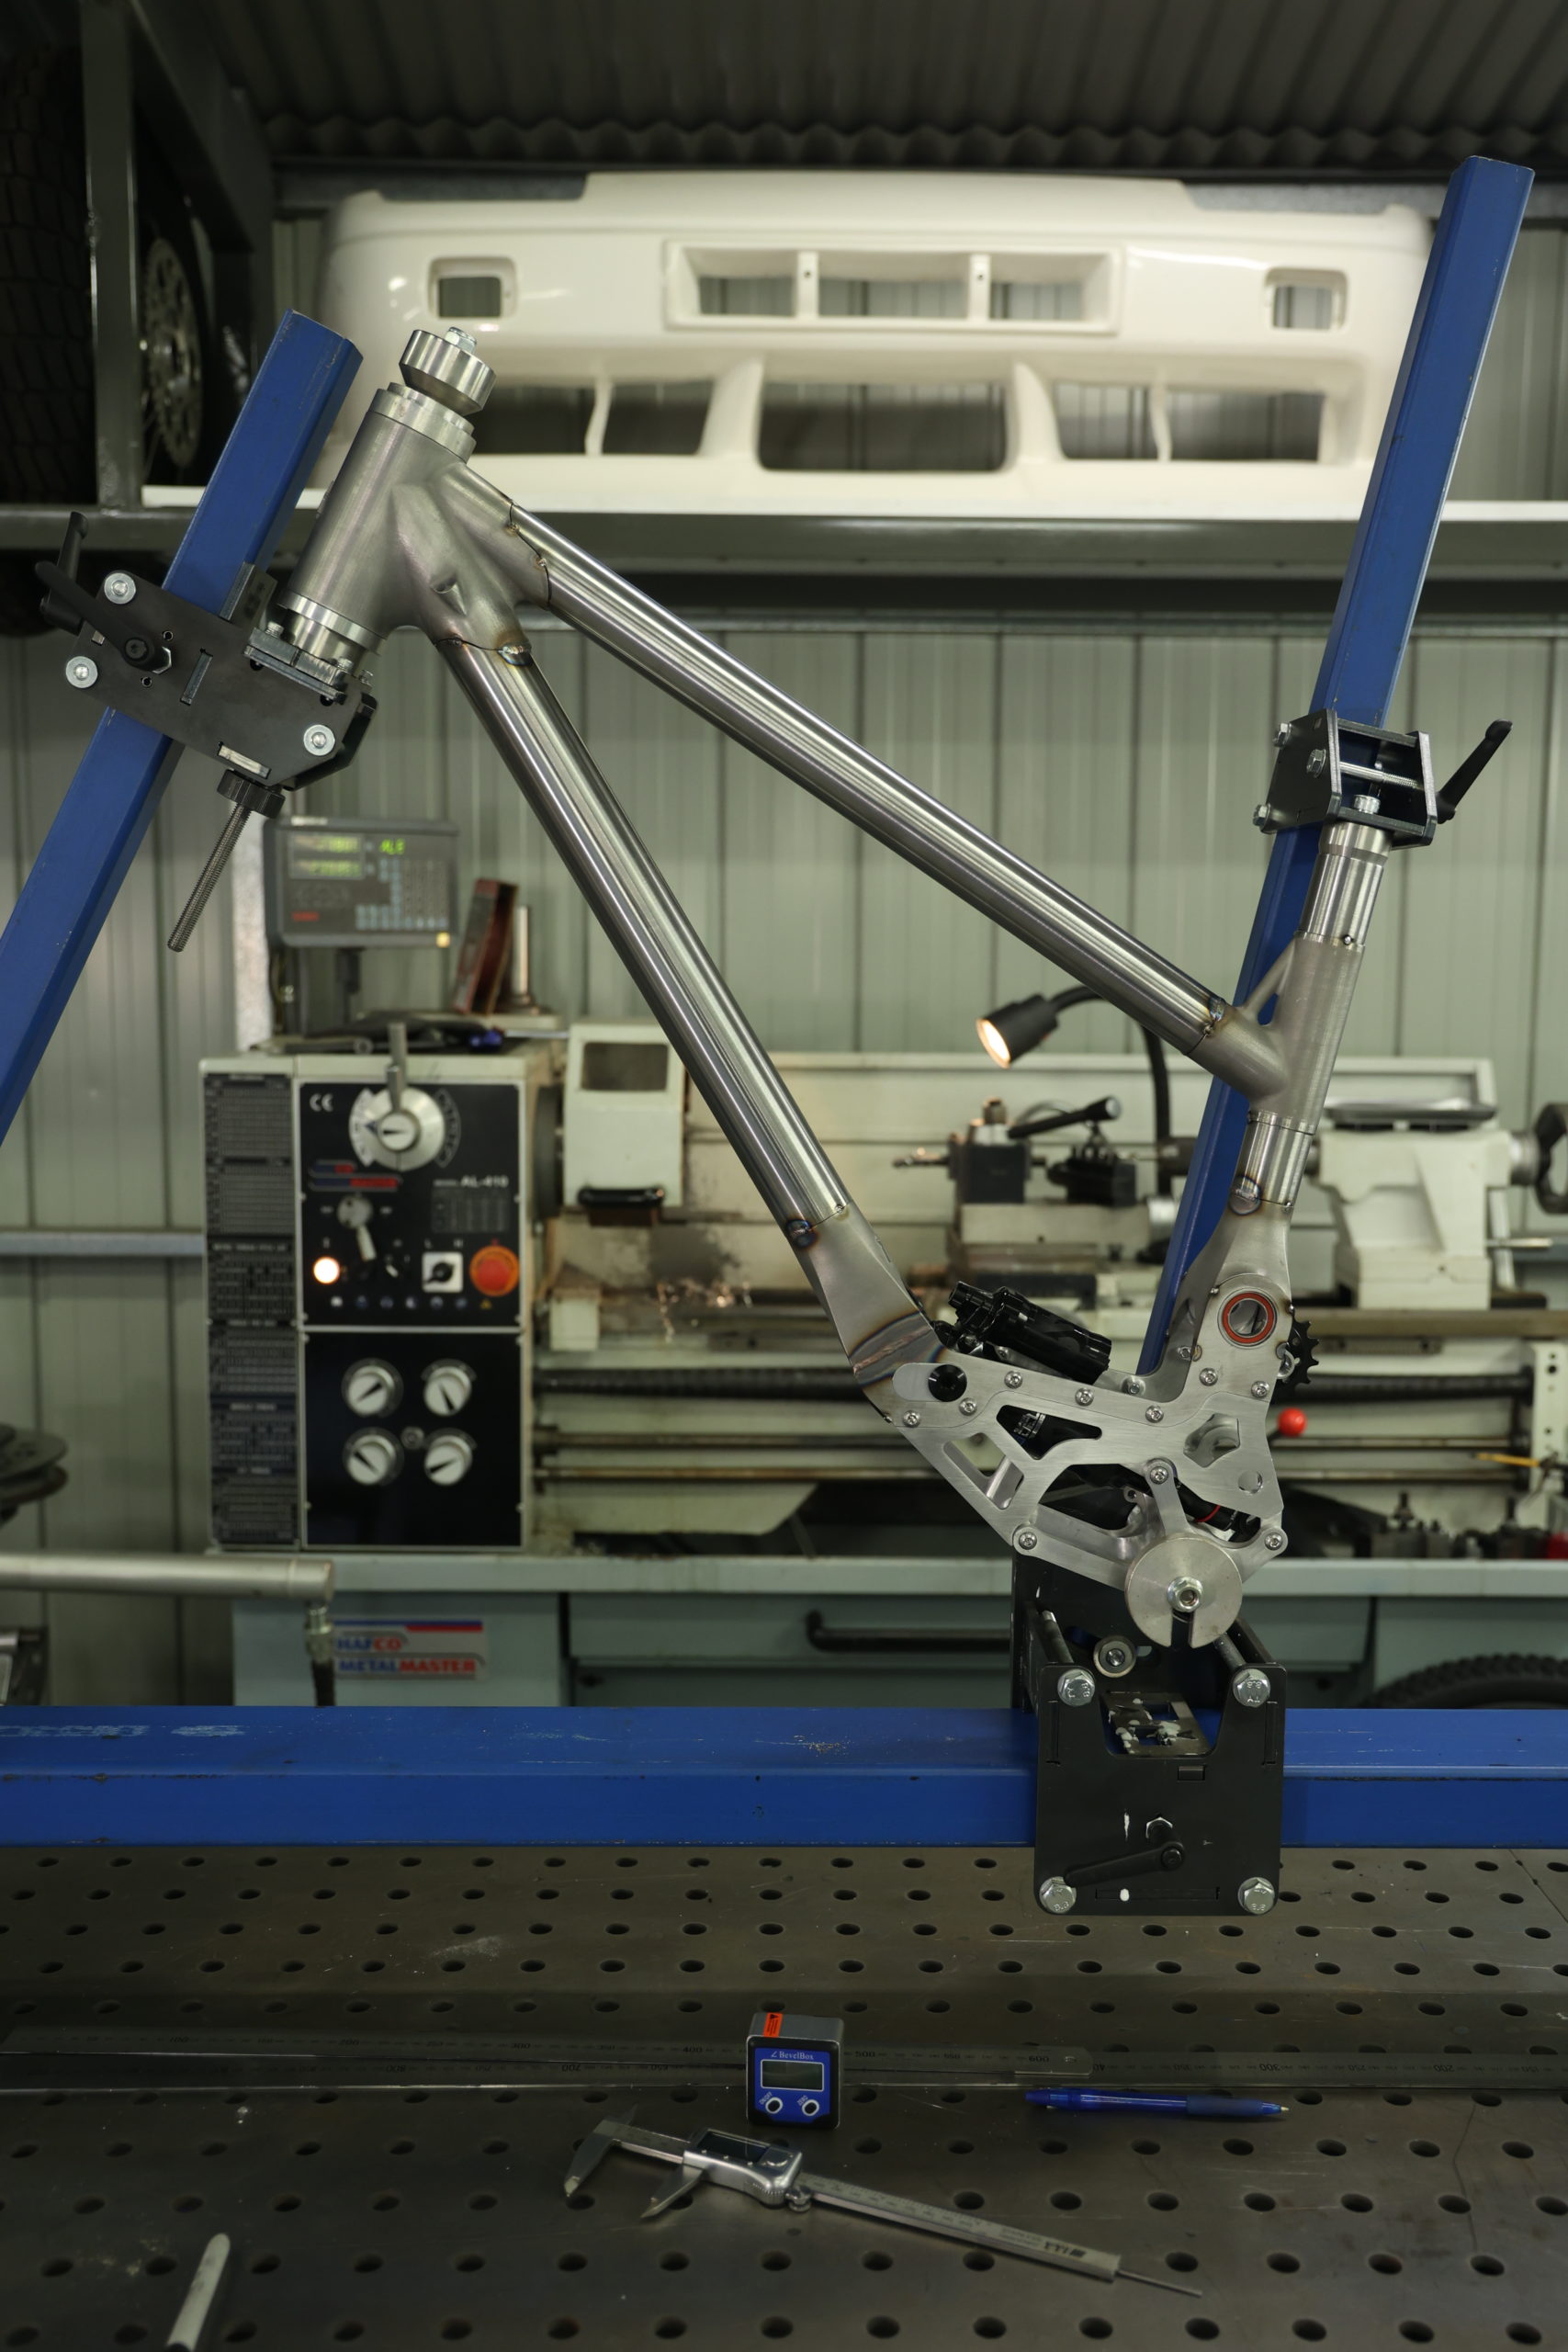
Surrounding this area is chromoly plate that merges this precision cut Aluminium into the mainframe that uses chromoly tube in 1.5 and 1.75 inch .049″ wall thickness.
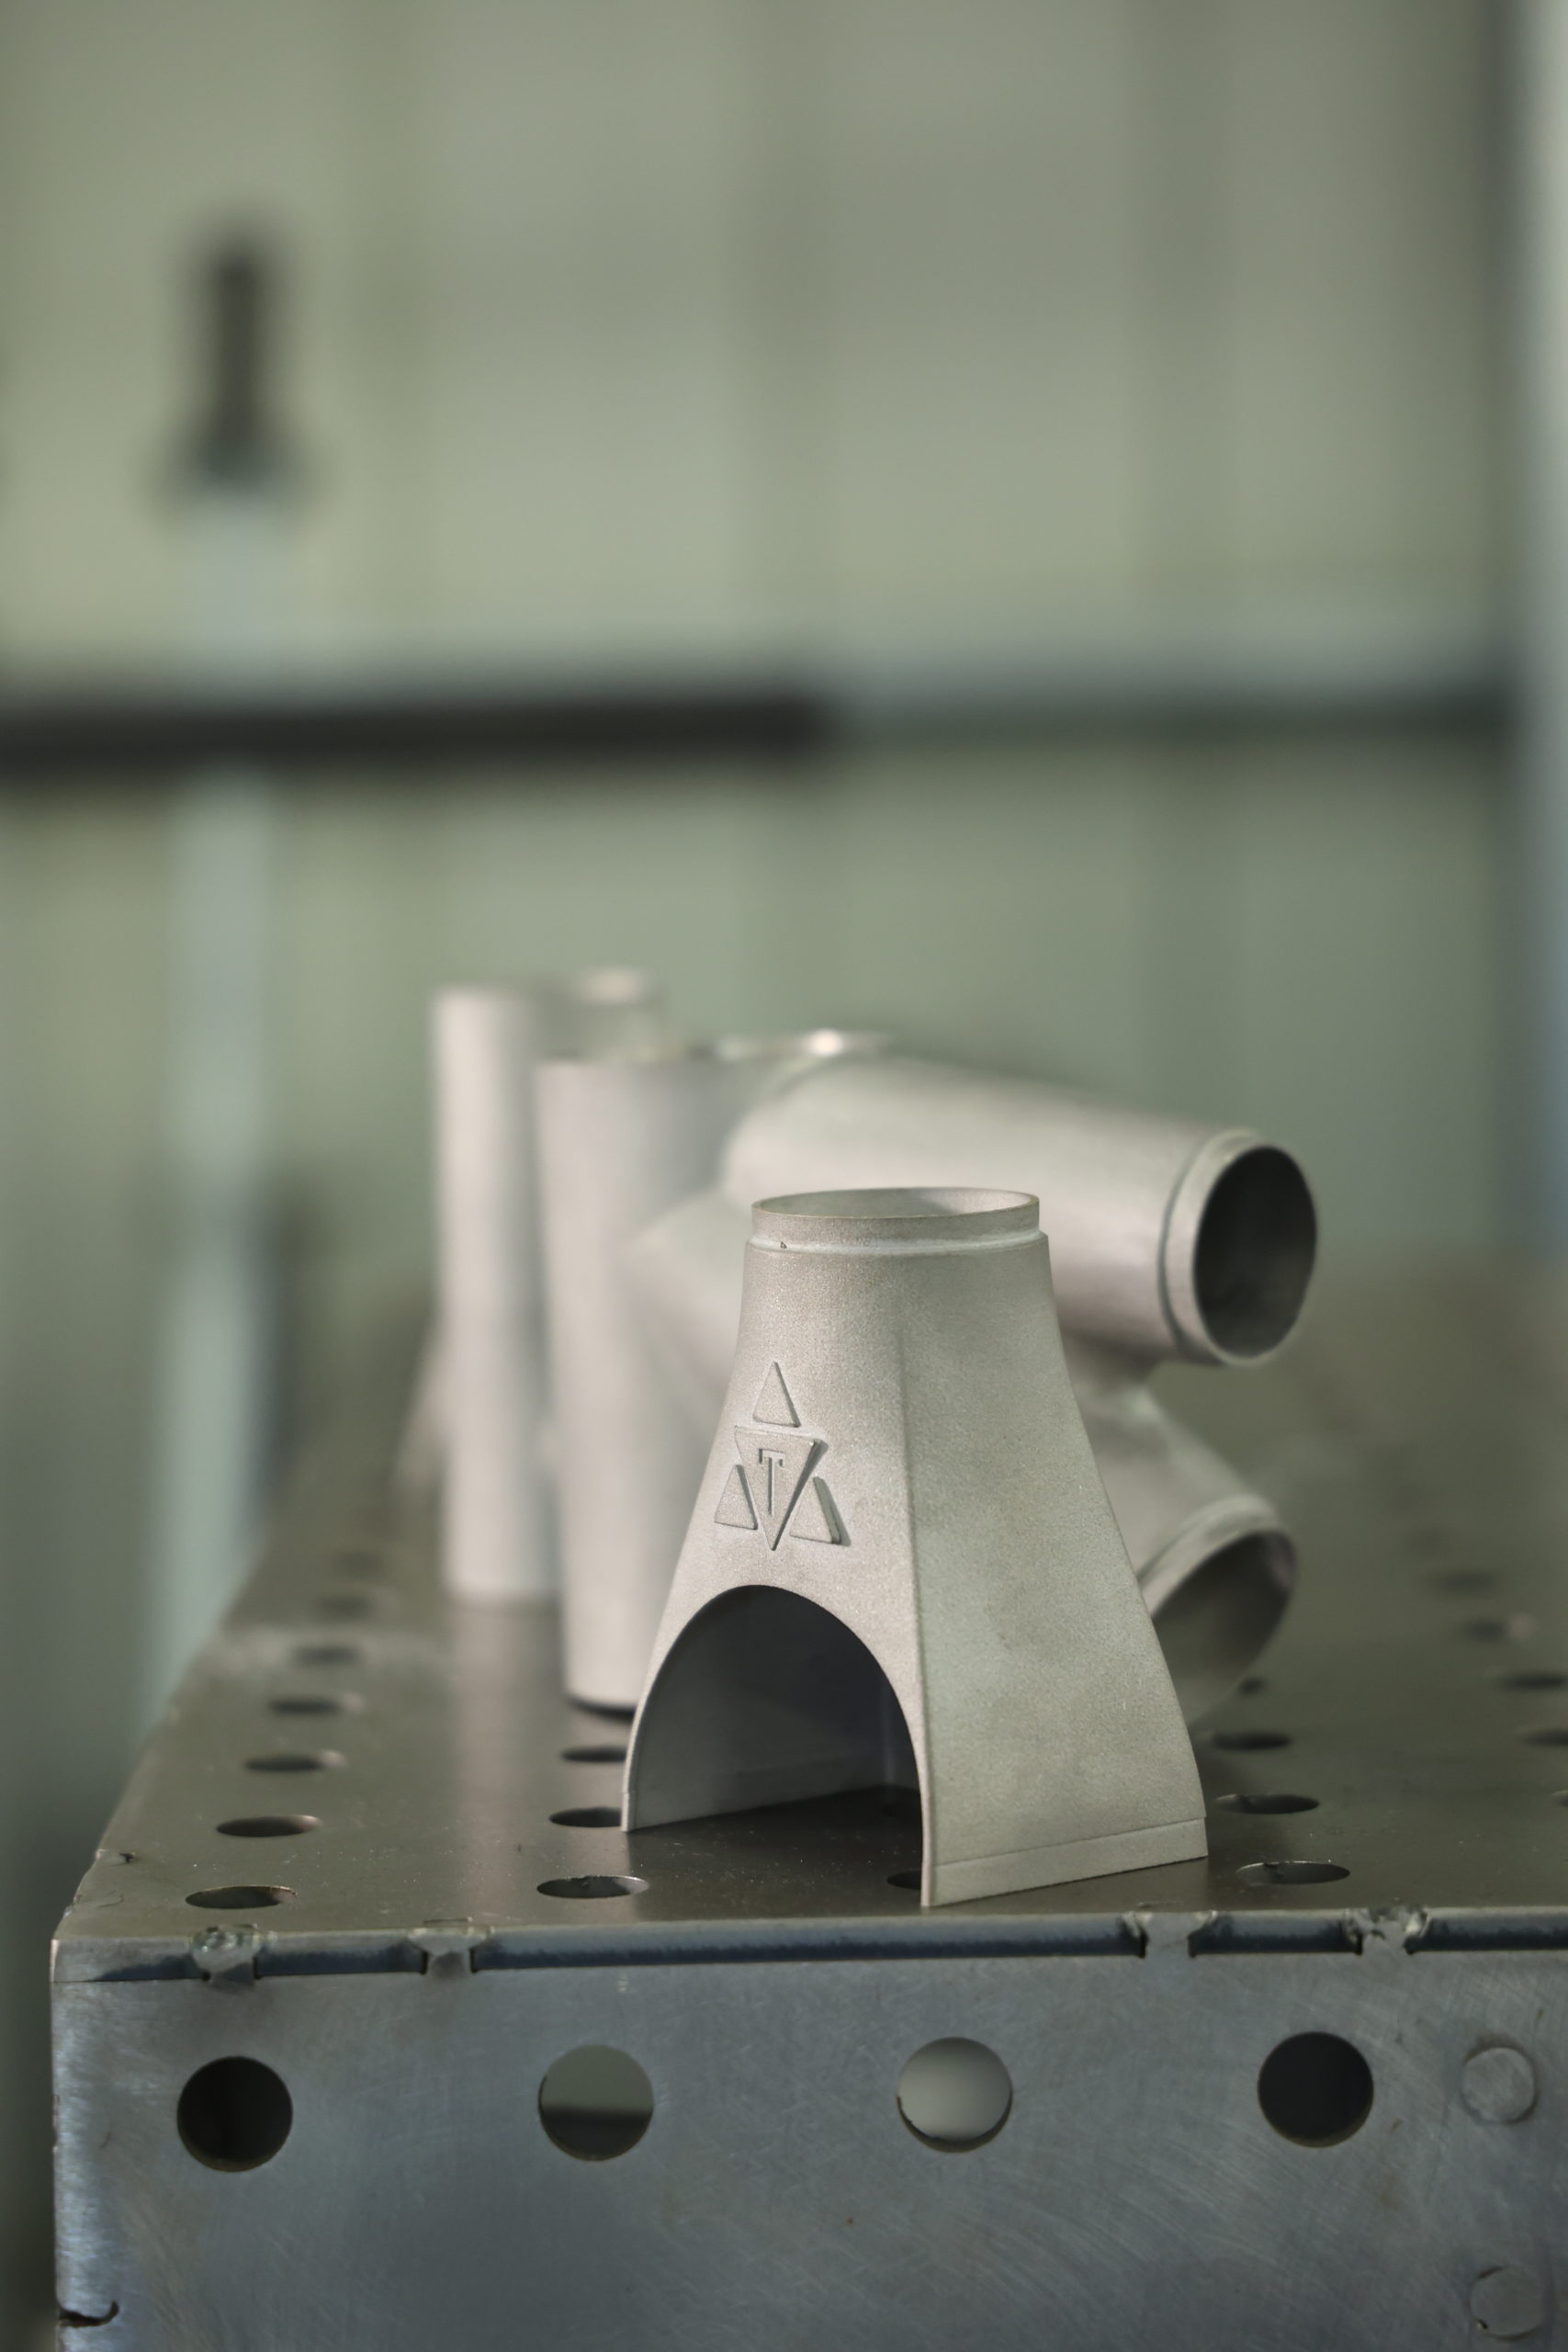


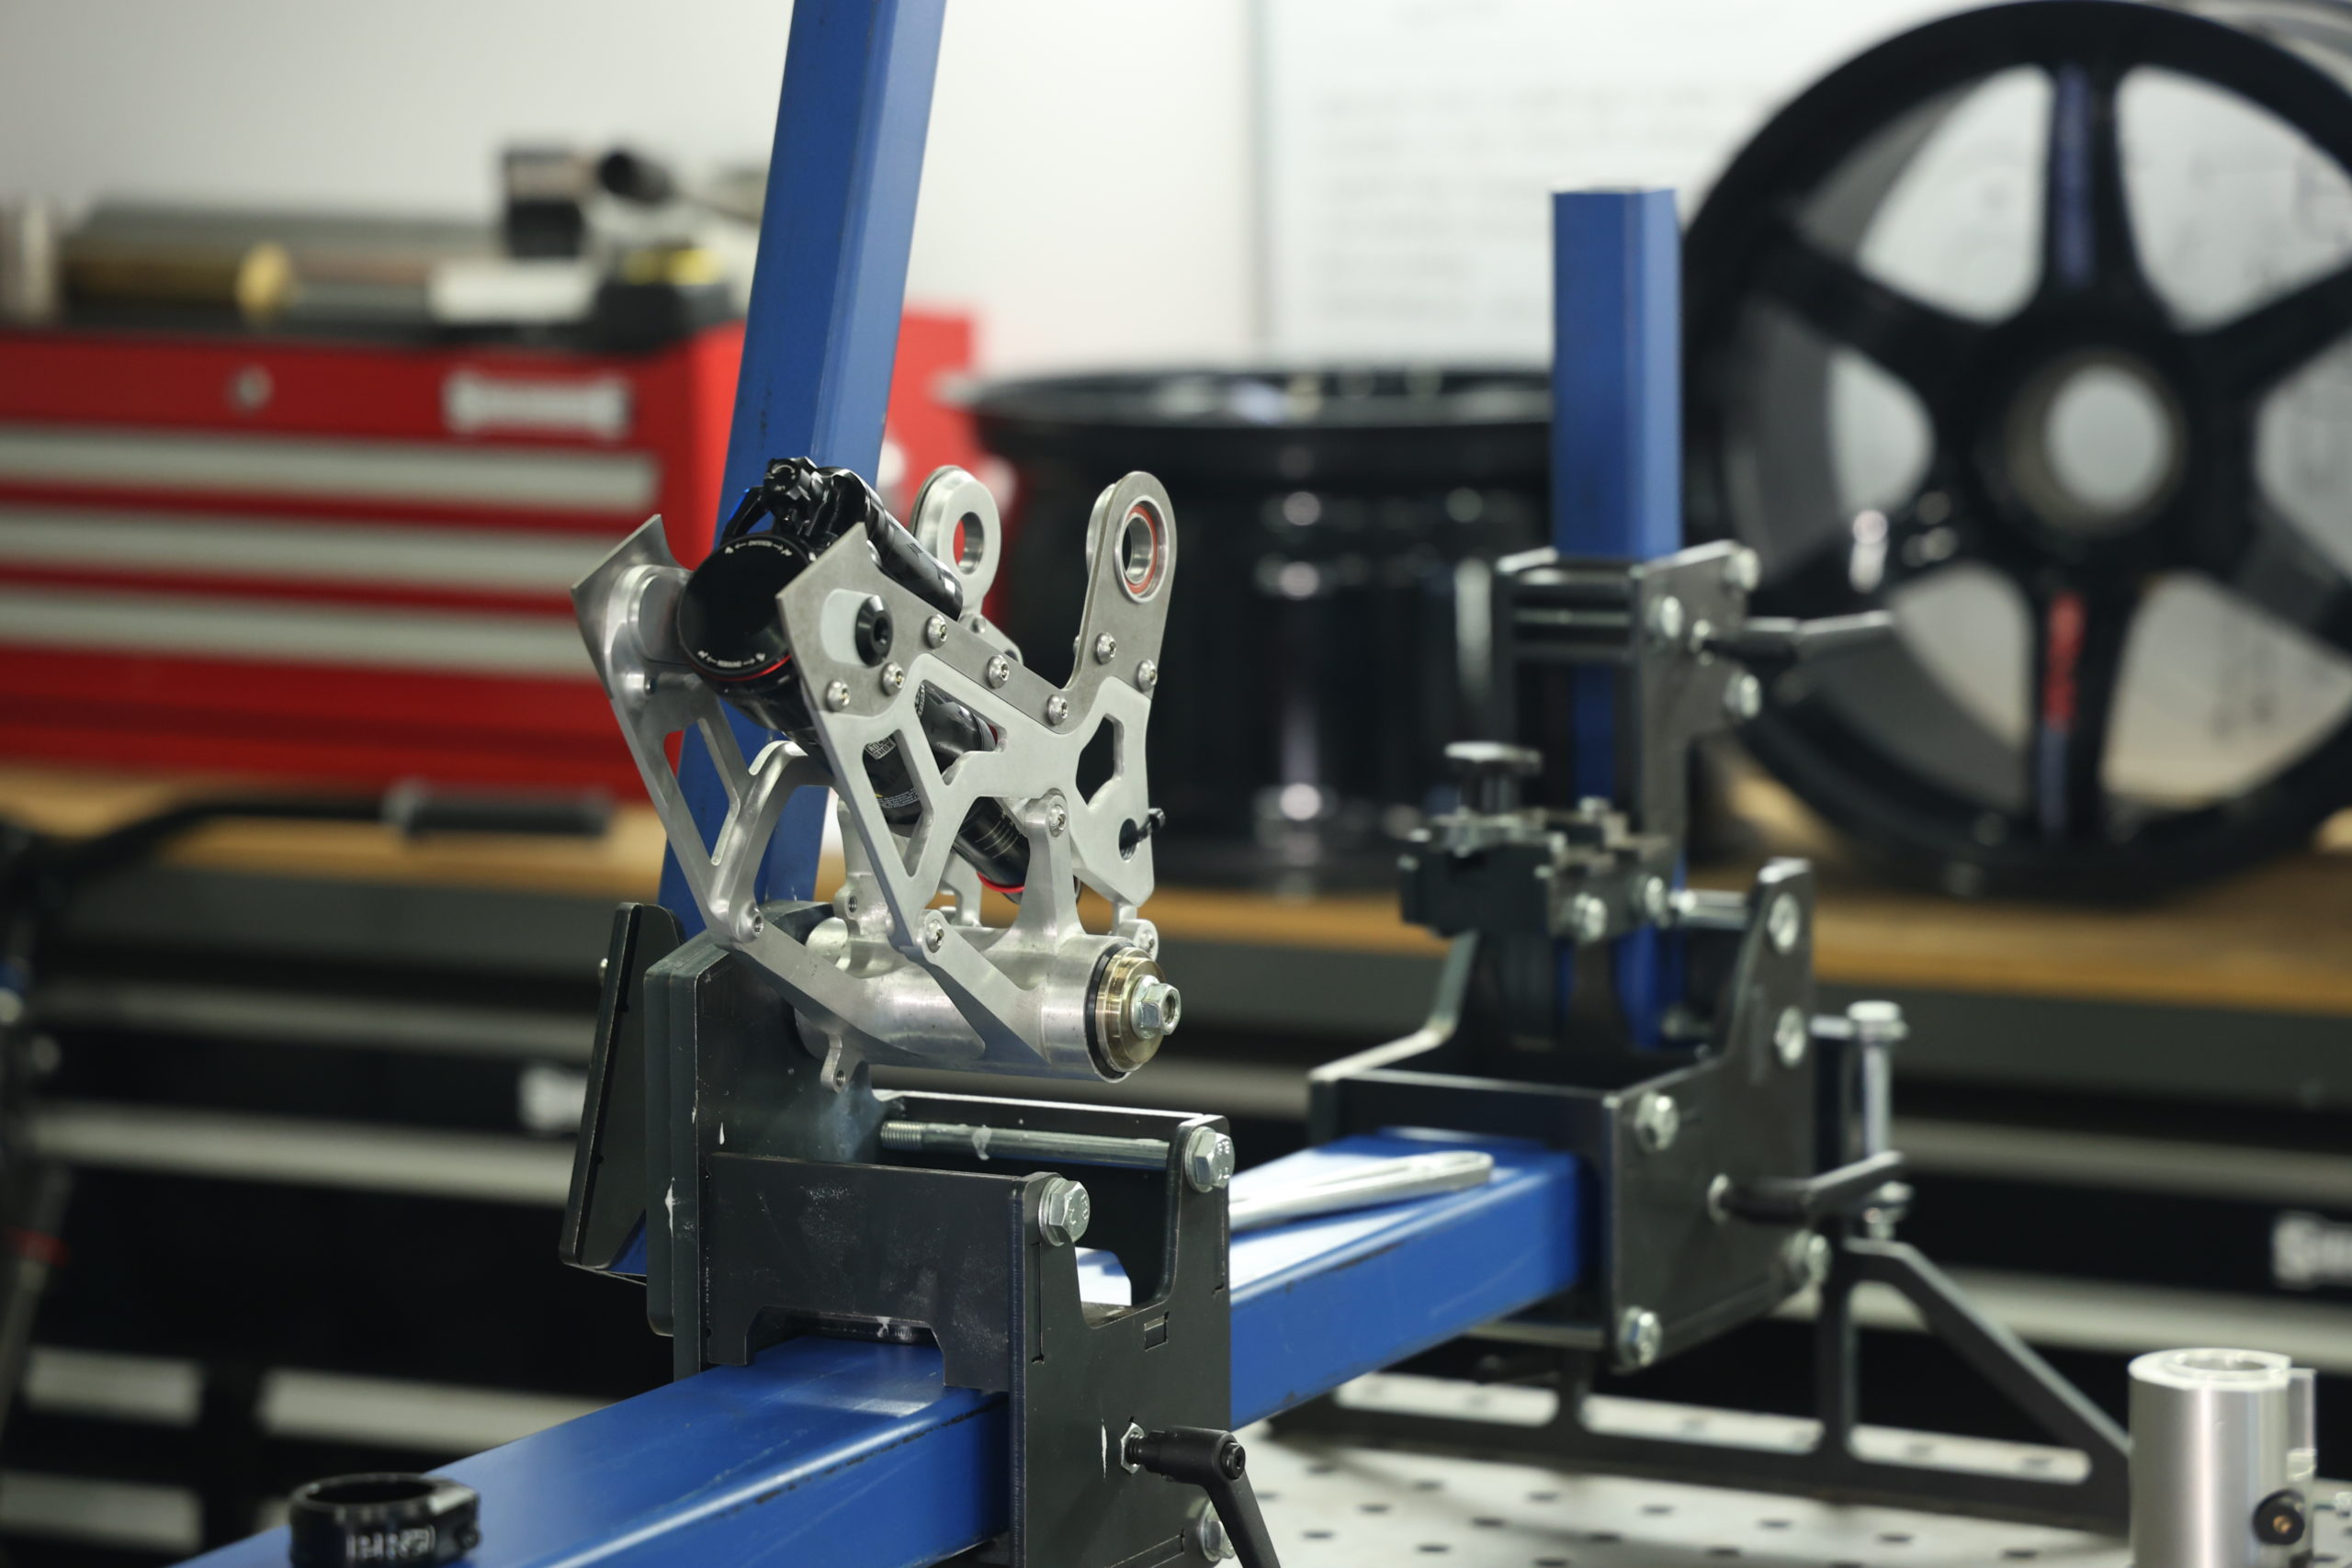
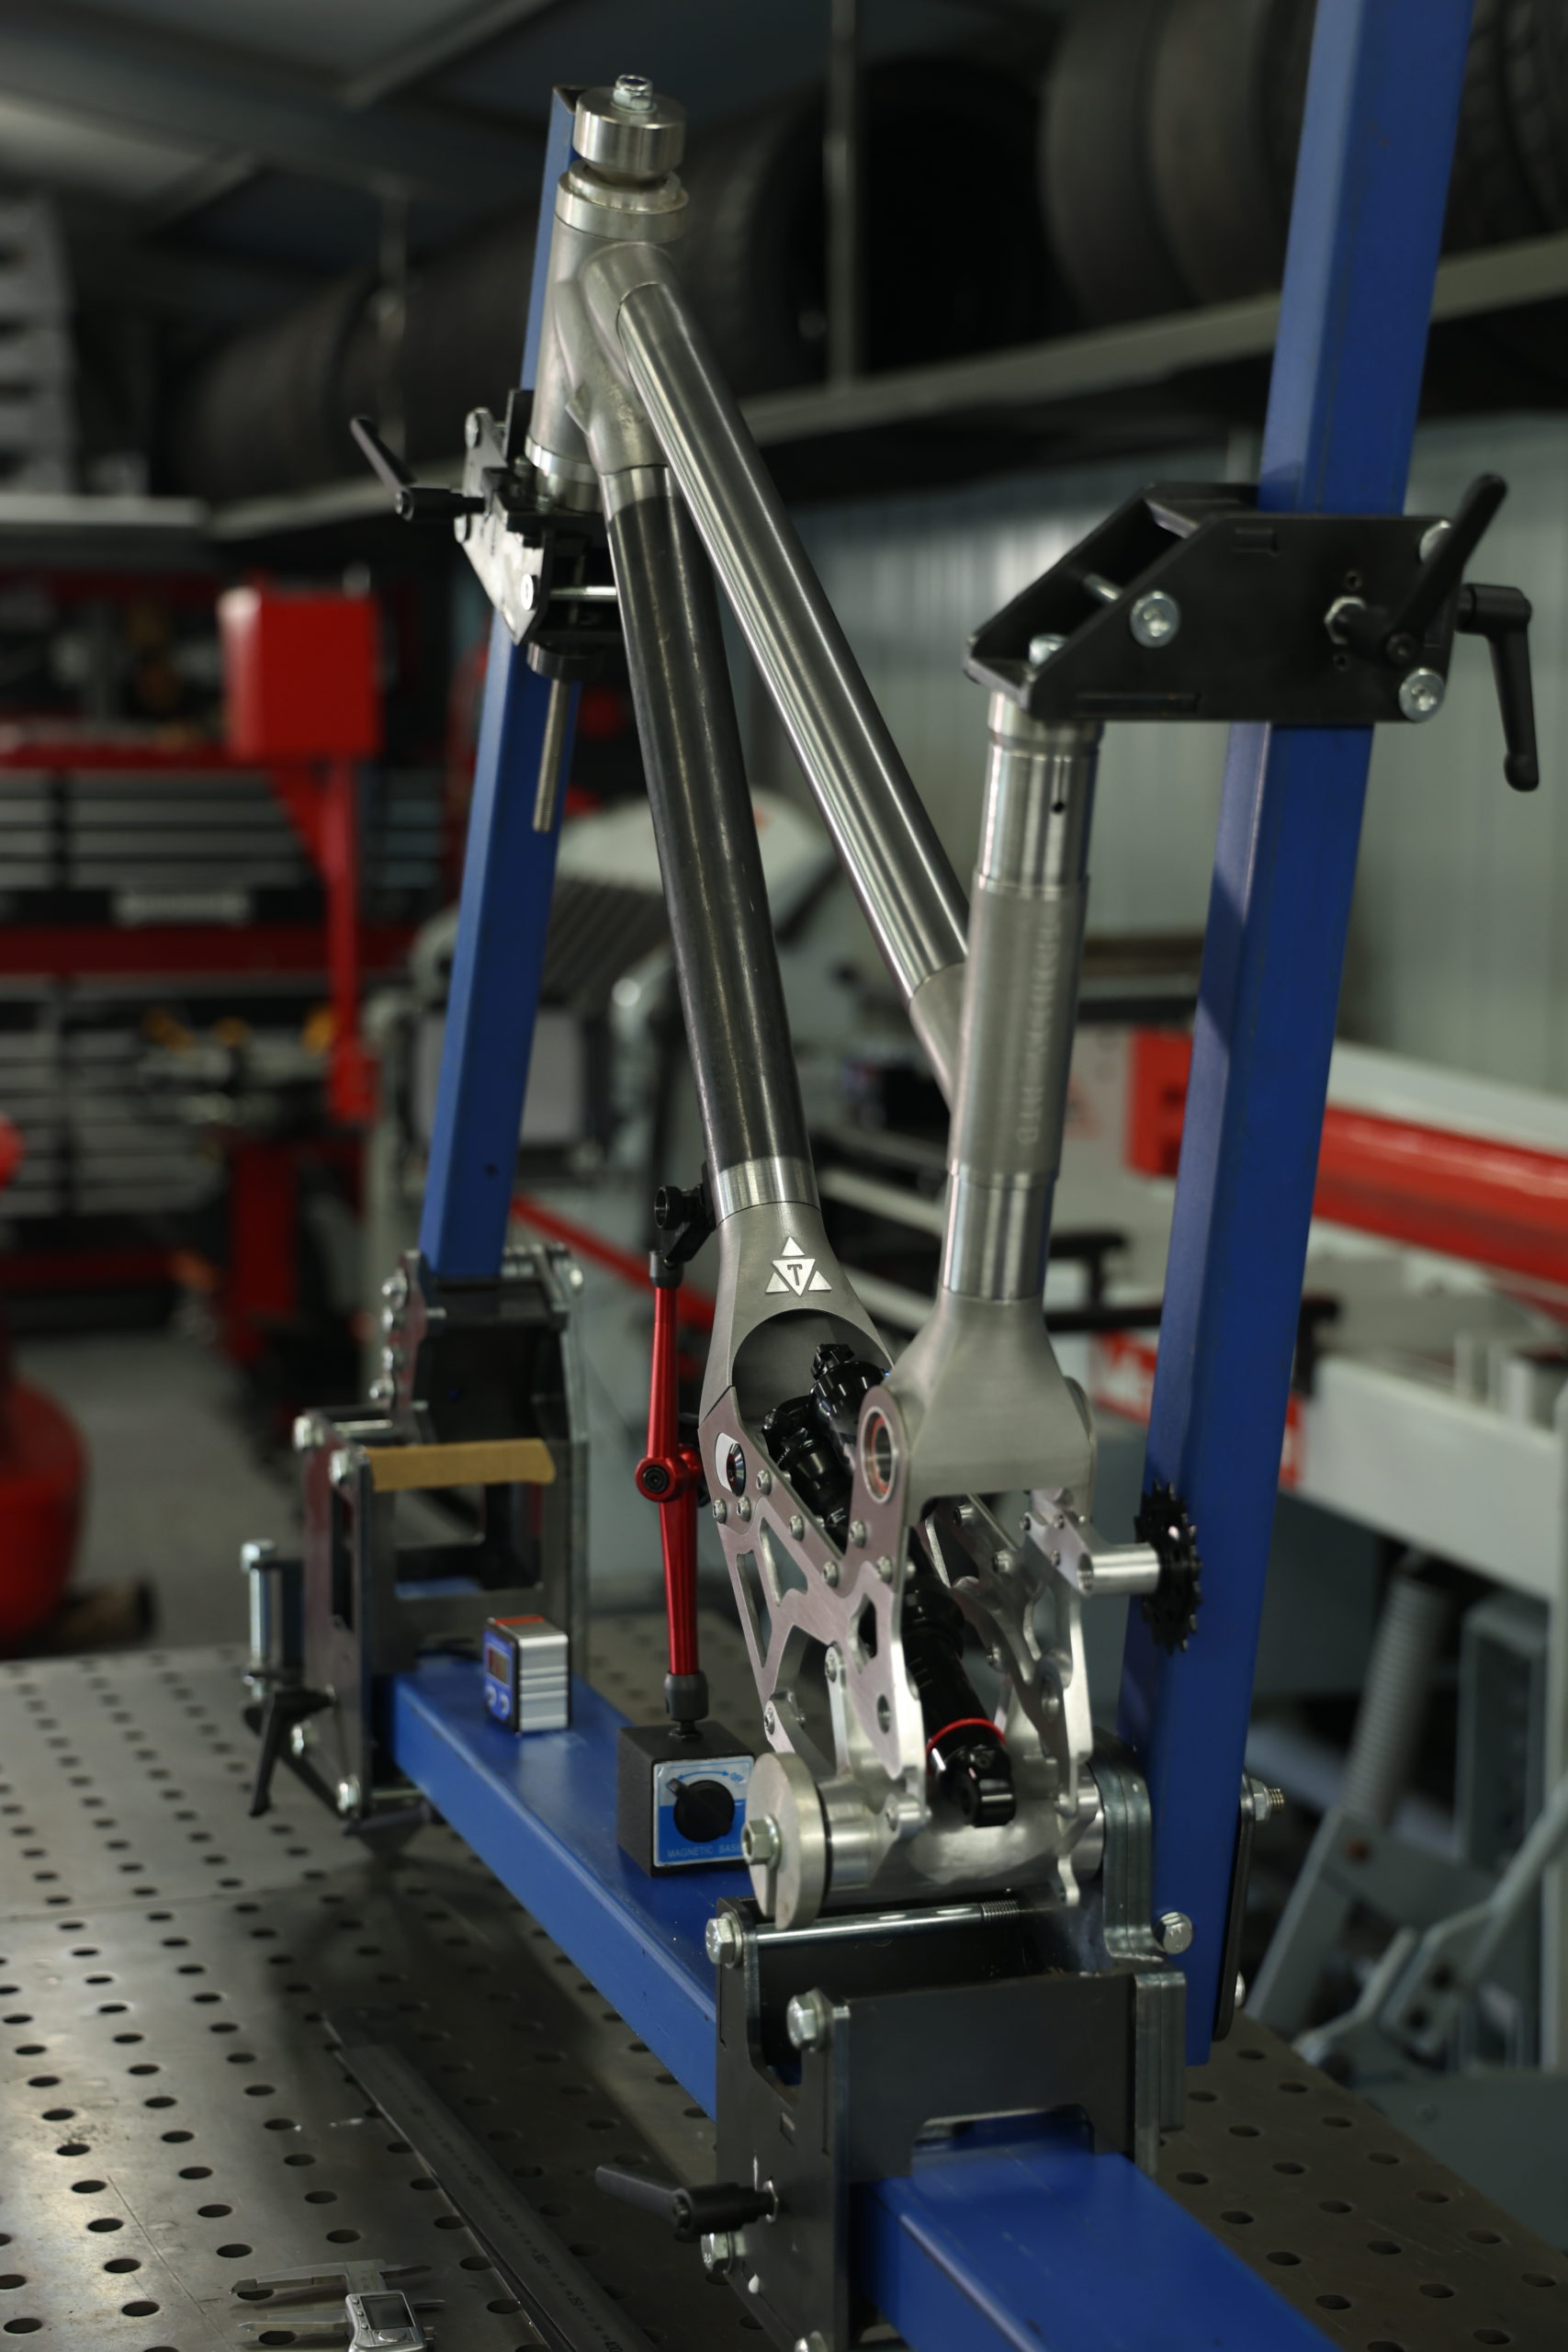
Merging this tube into others is now taken care of by 3D printed steel parts, yep thats right……. 3D printed steel!
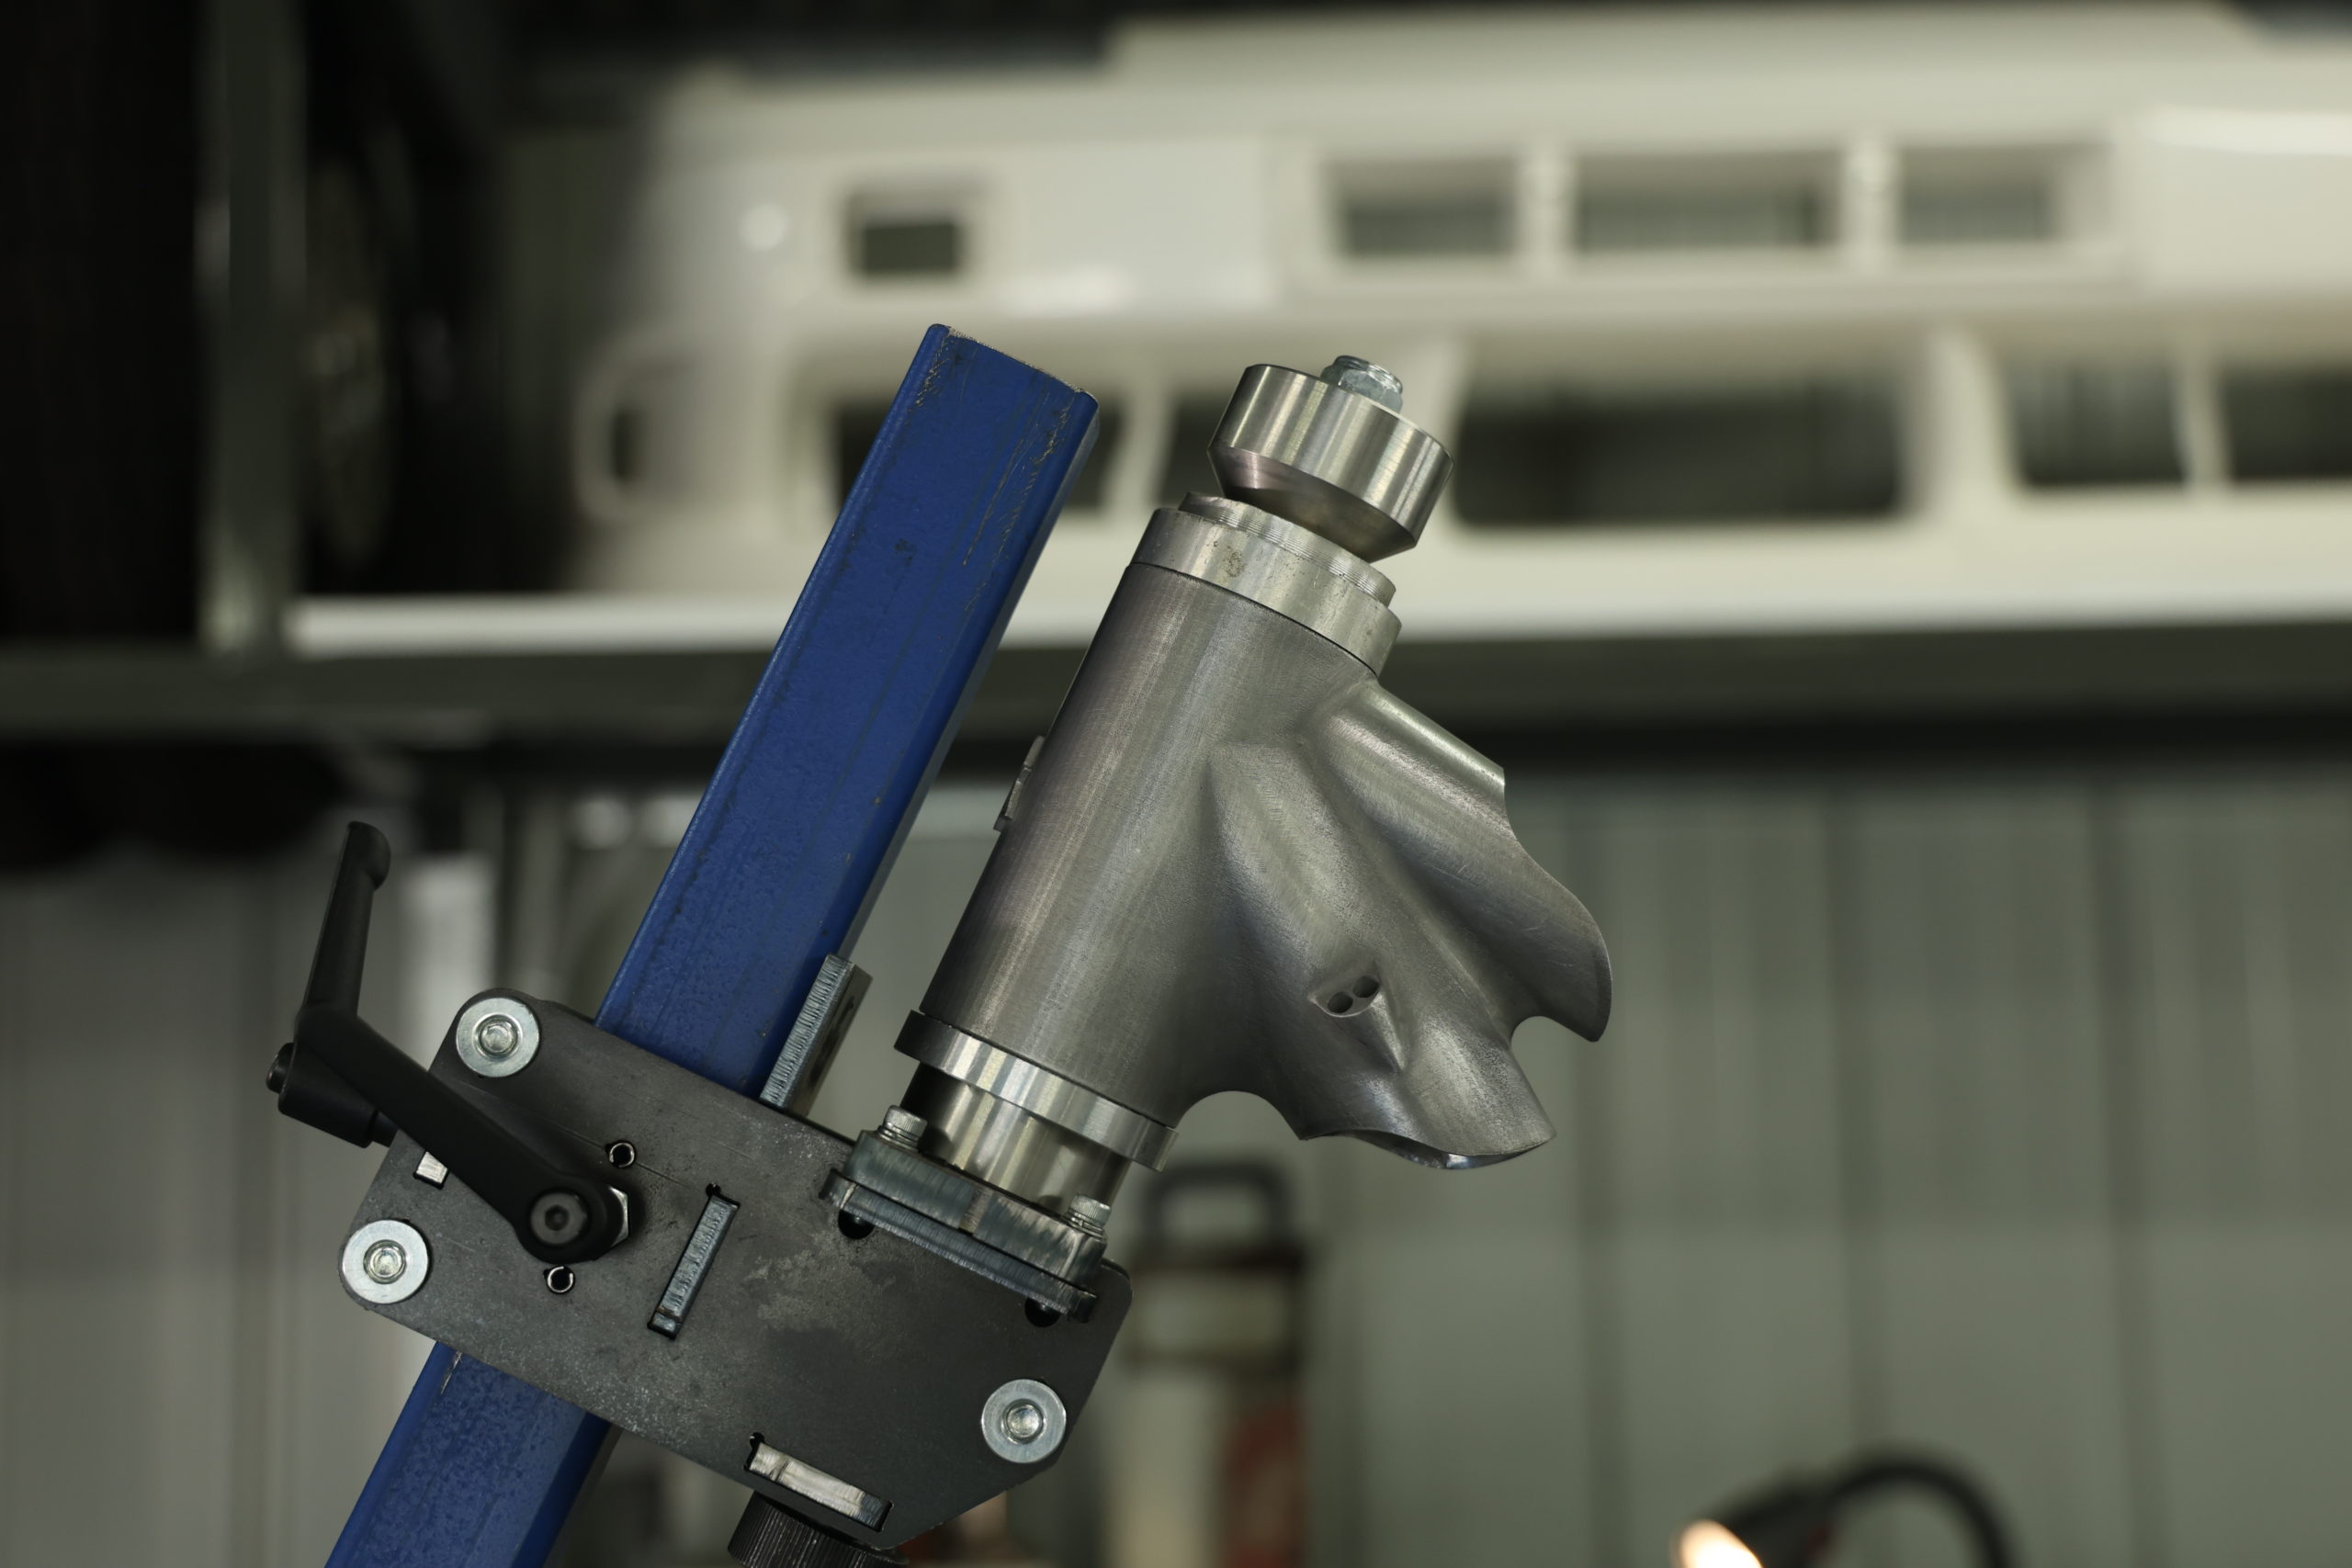
This is known as MS1 and it has some very favourable properties that lend itself to this application, I wont go too far into this here because I want to wait and show you what we have planned for Prototype #3 but tuning the stiffness of the bike is infinitely possible with this technique along with a lot of time and energy saved in the notching and welding process.
Check out this video that shows the process of preparing the chromoly tubes and aligning the bike ready for welding.
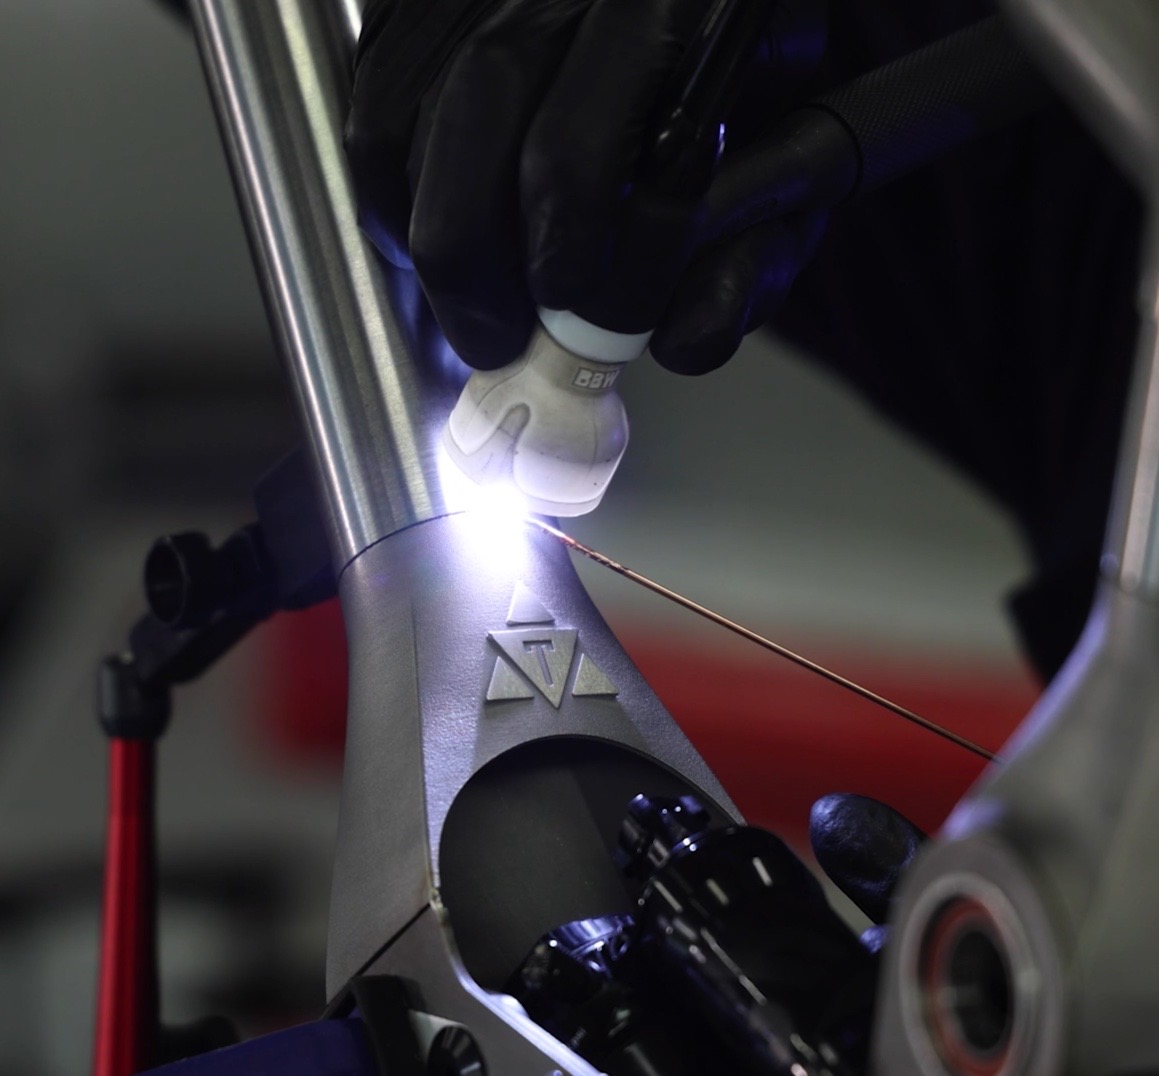
Speaking of welding I have used the TIG welding method to construct the bike, chromoly needs careful inclusion of heat and we only want just enough to produce a full penetrating weld. If you want to learn to TIG weld then you need to check out our TIG welding course where we detail the use of Chromoly.
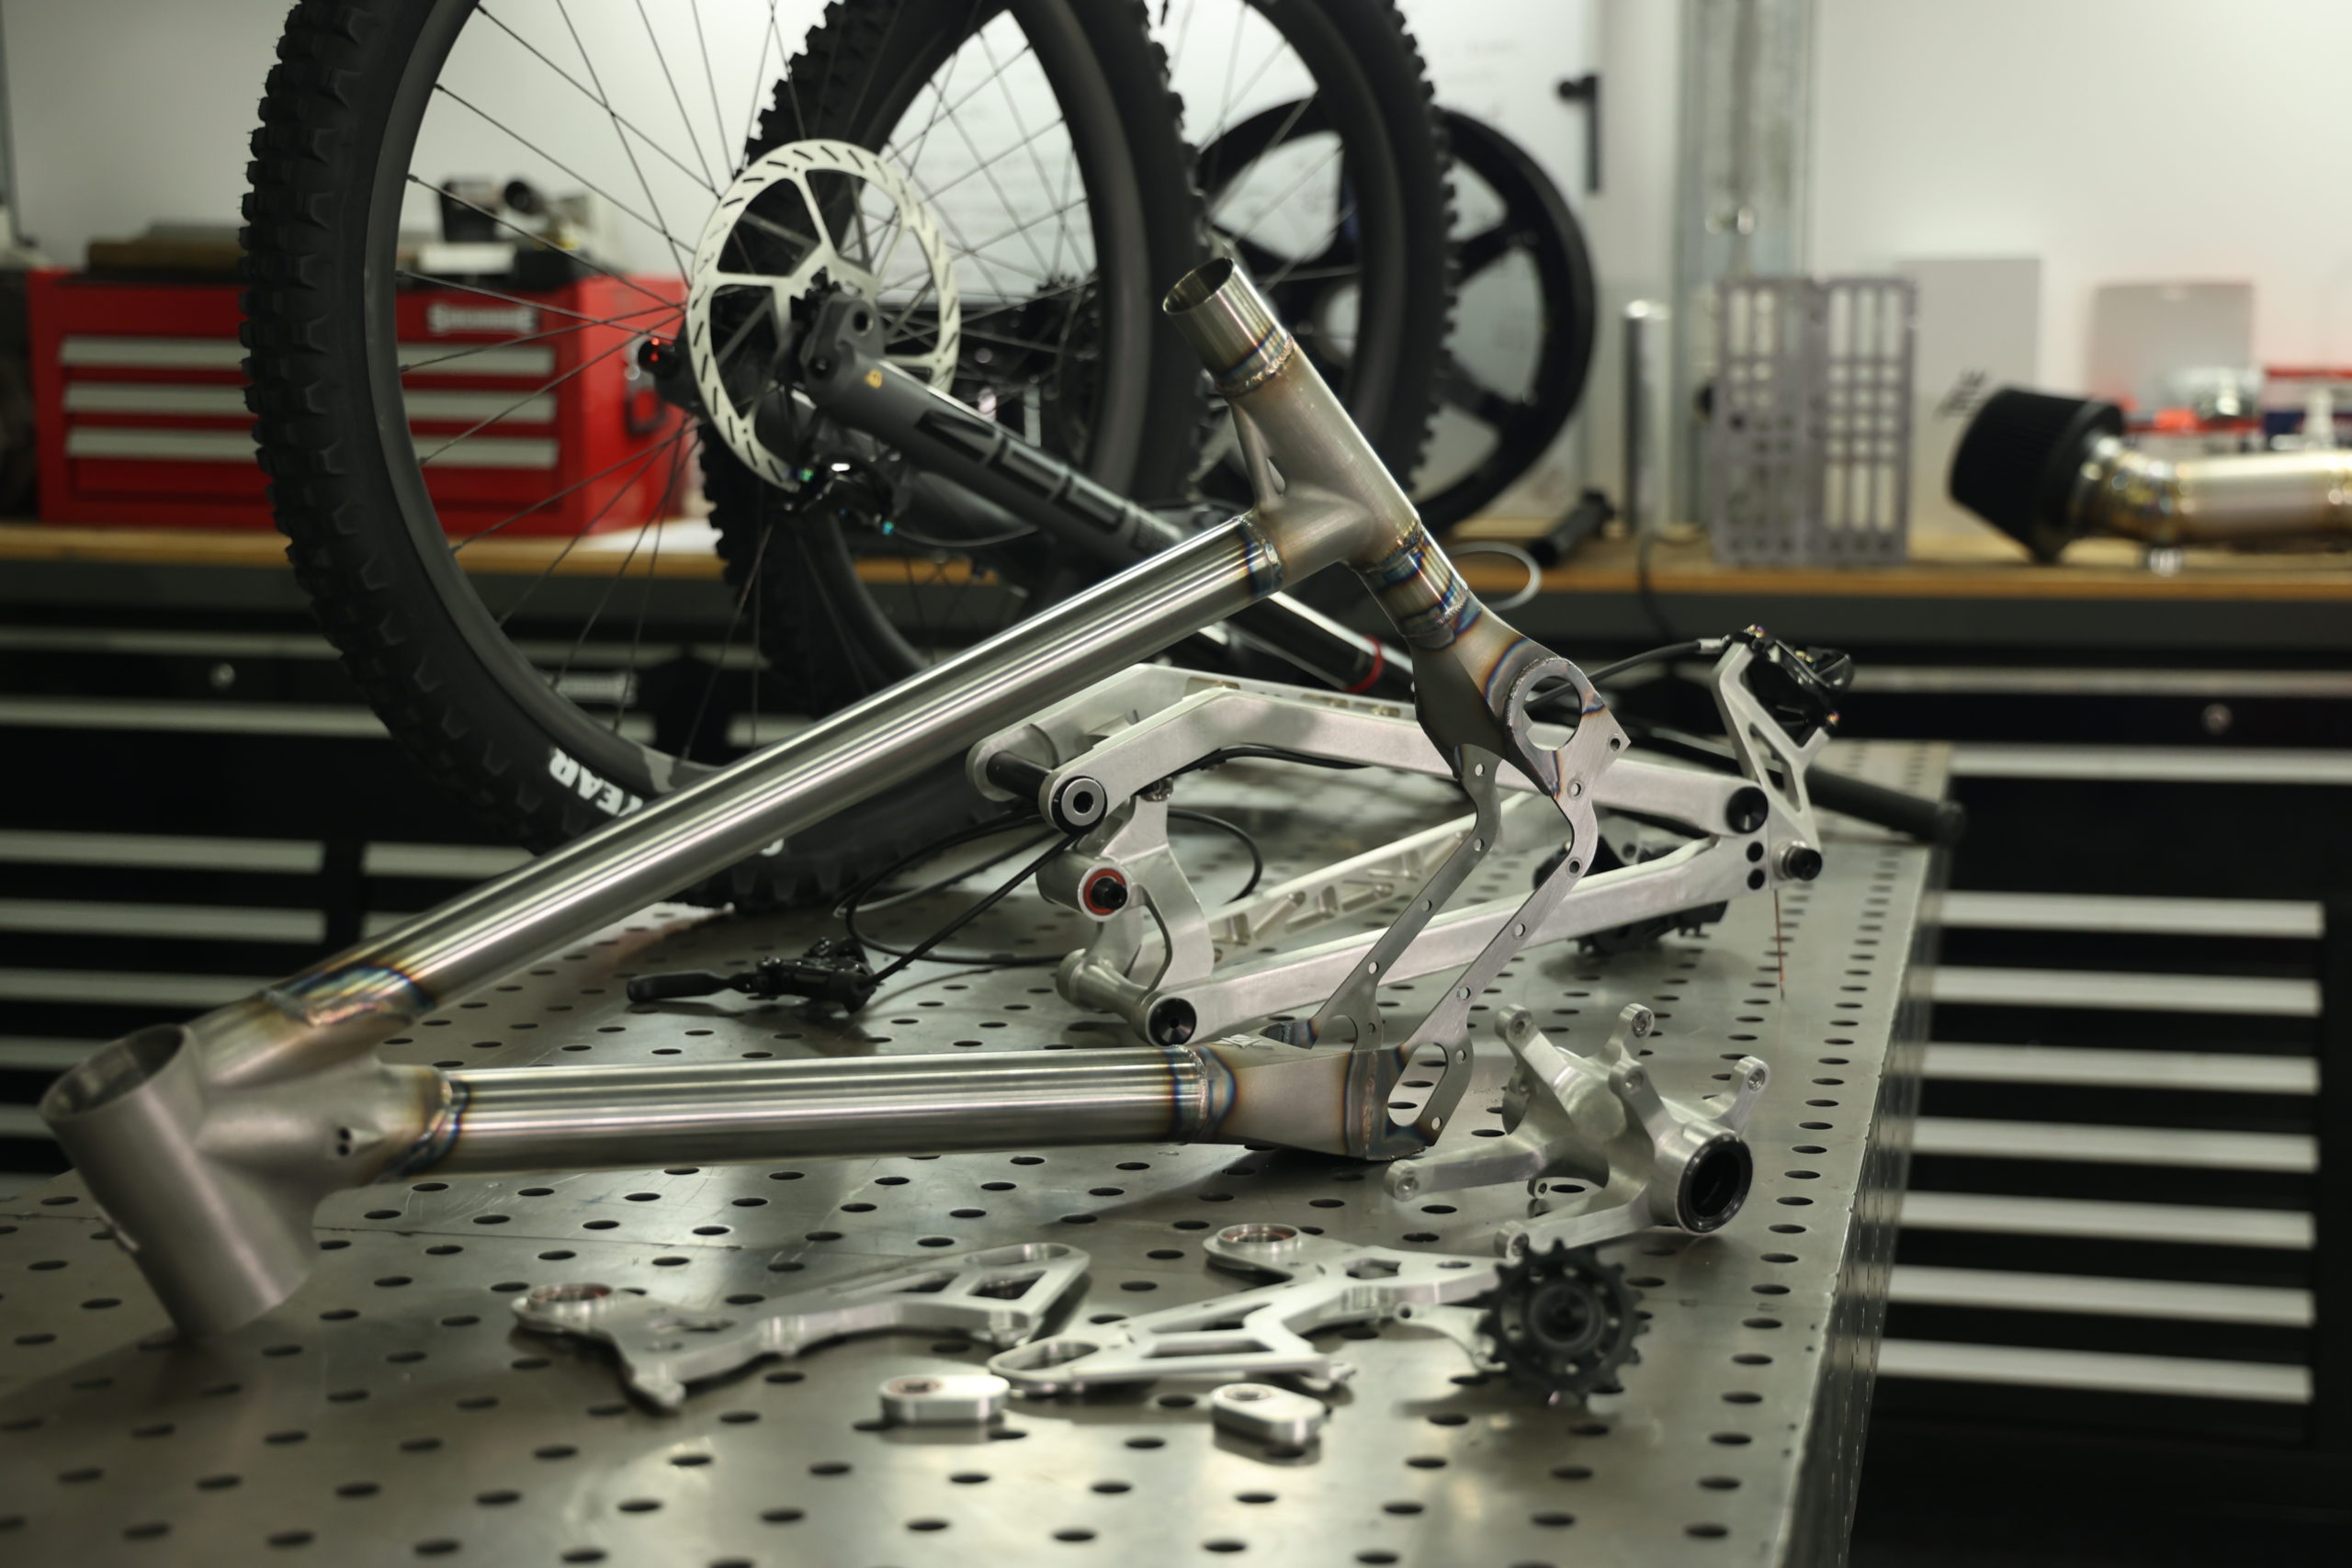
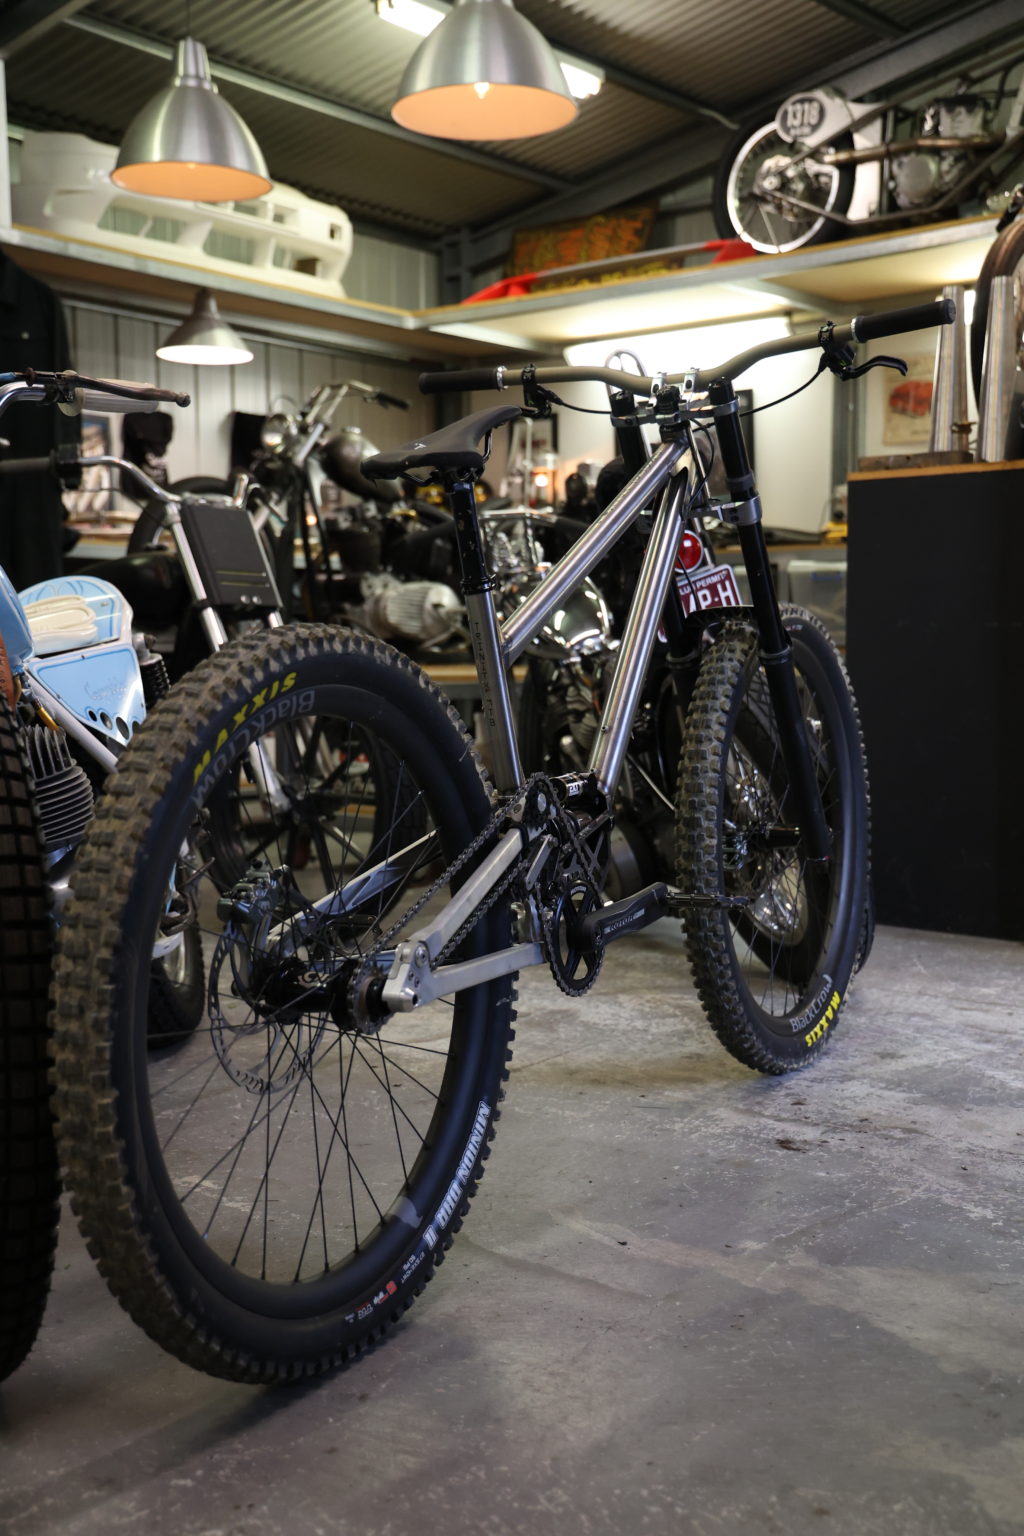
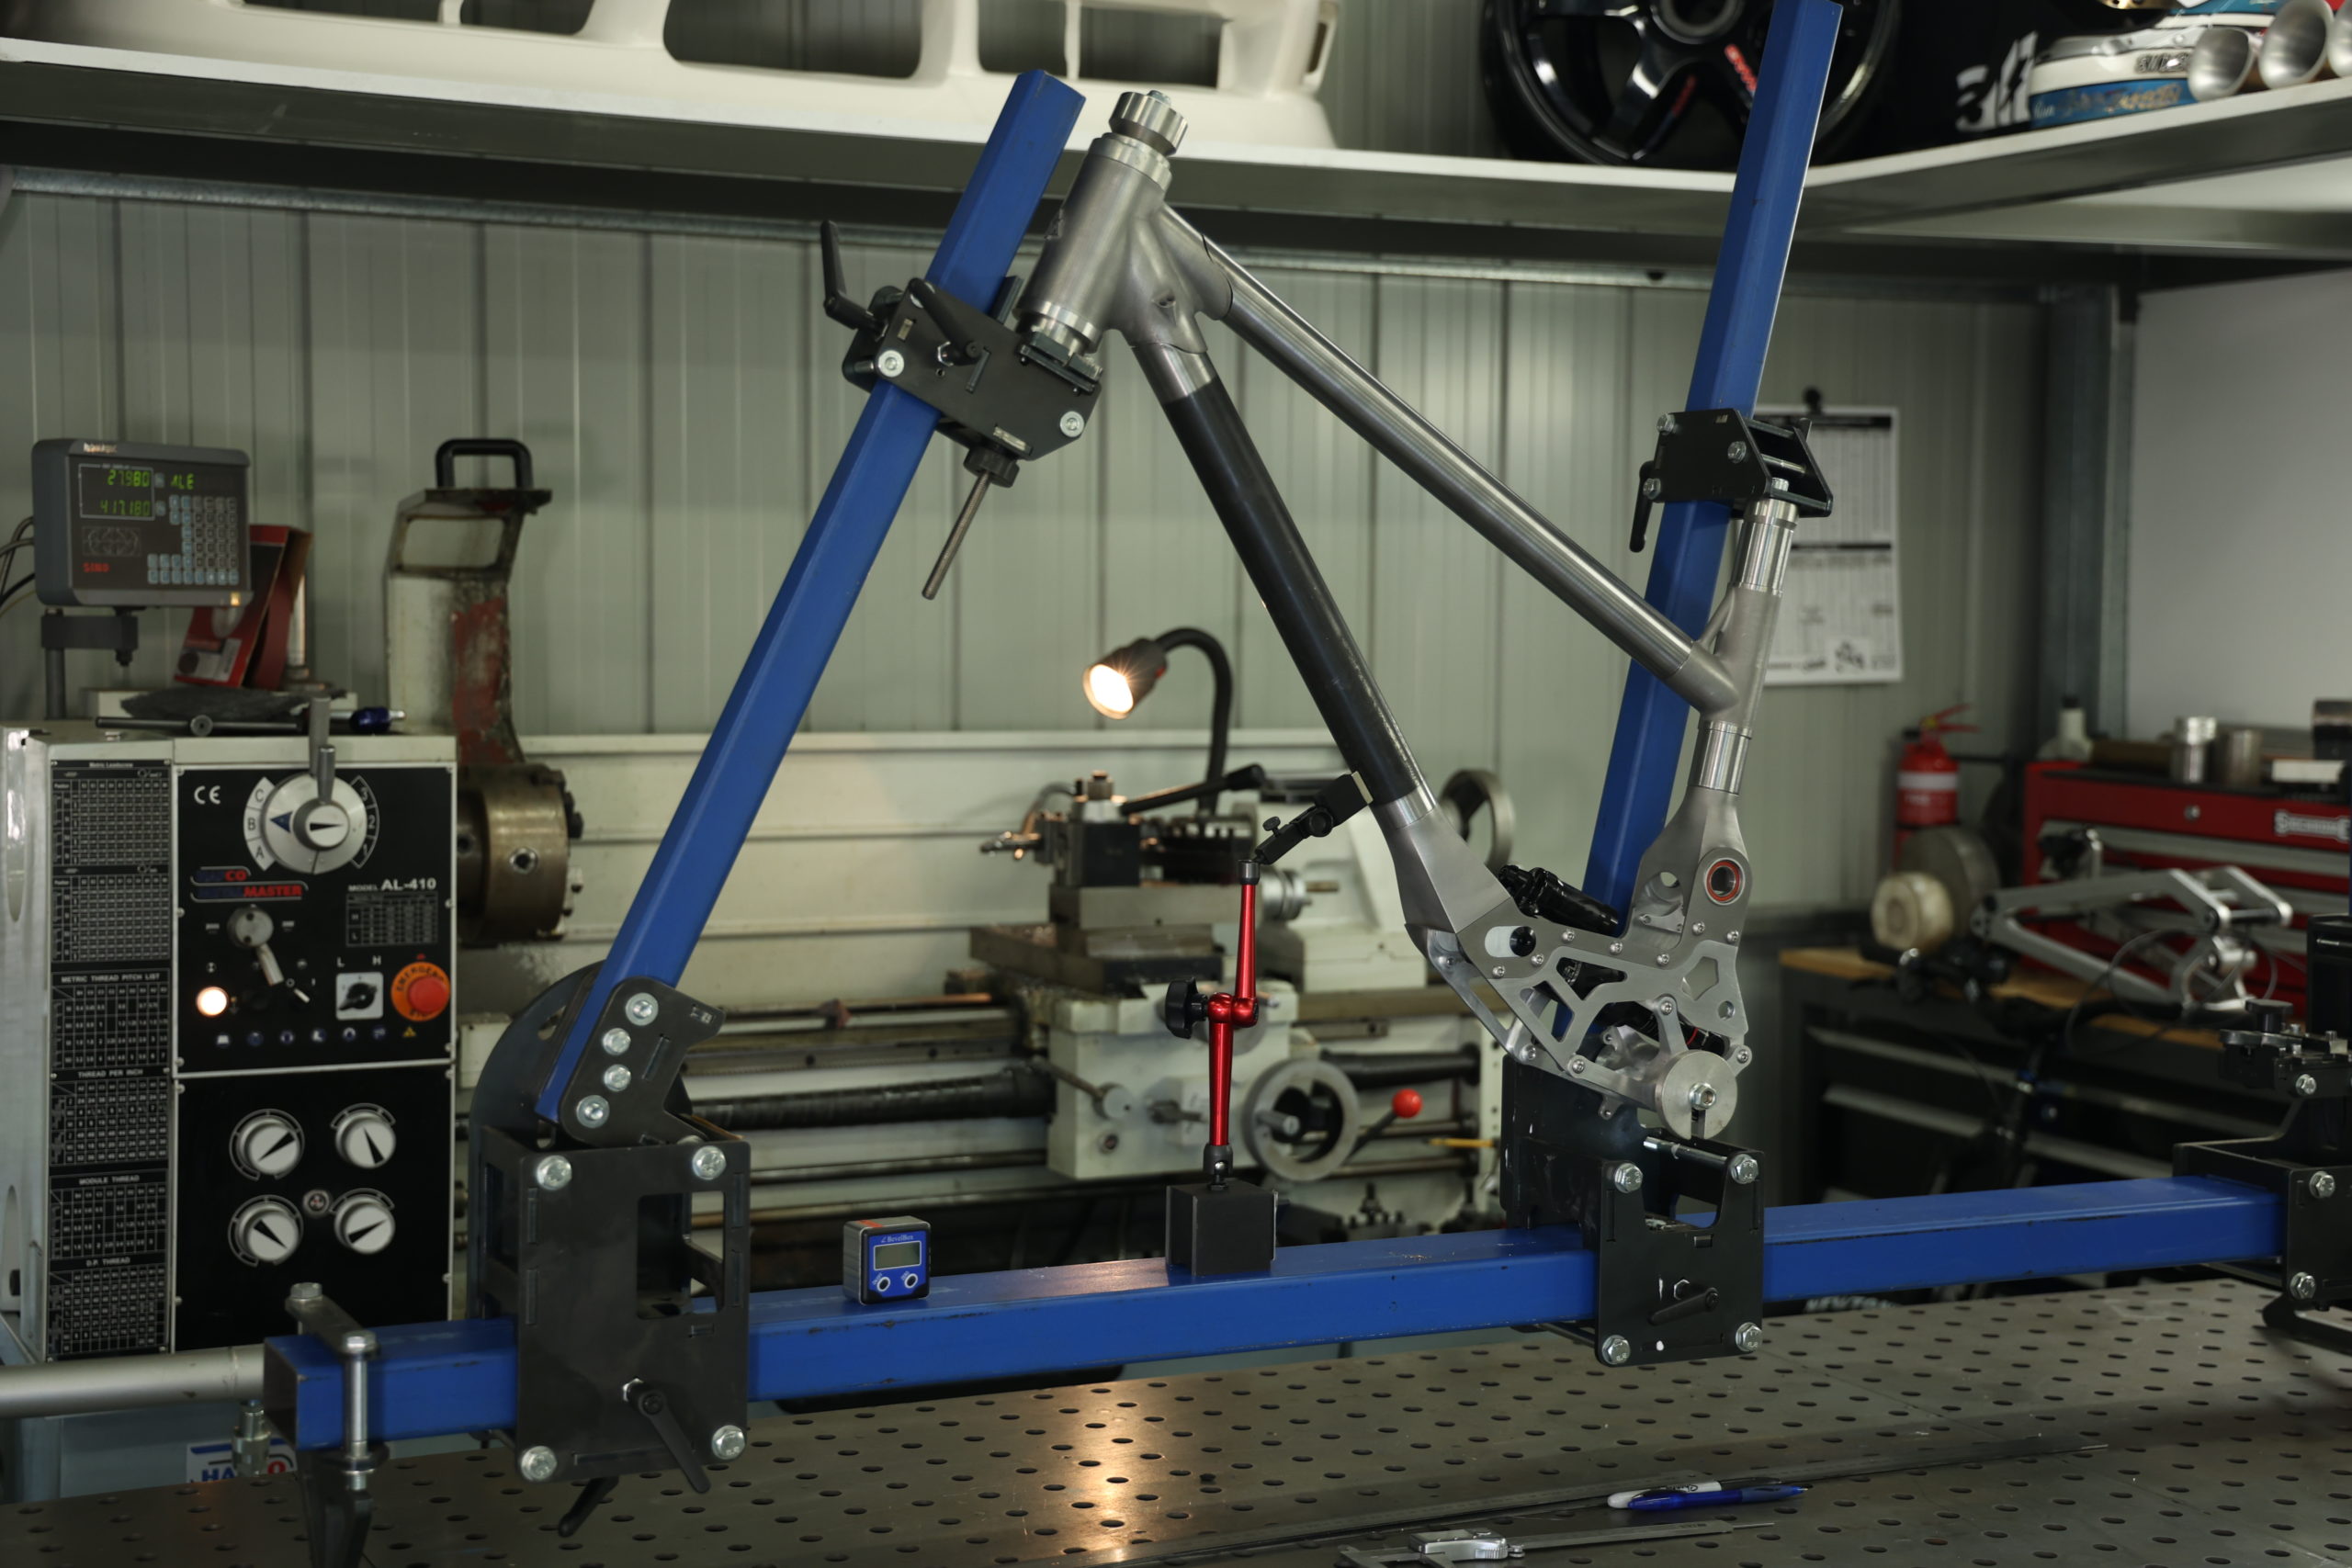
Once the bike is welded I took it out of the JIG and started preparing it for the parts to be assembled. The 7075 aluminium side plates are returned back onto the mainframe and the 7075 billet aluminium rear end reattached.

All of this happened in just one day and the day after we left to debut the bike at the HandMade Bike Show in Melbourne where it was greeted with a lot of support.
I absolutely love the creation process of things like this, seeing this bike come to life has taught me so much about material strengths and advanced manufacturing techniques. Over three years of development has gone into this bike and I cant imagine where it will be in the next three years.
Thanks for reading… Nigel