What is it that you want in life? If its a garage full of your dream cars then you and I have something in common.
I have worked out that money want buy my dream car, if it did then I wouldn’t appreciate it anyway, for me its what I build that I love, I don’t think ill ever be able to sell the RPS13, the Hilux or the Econoline, theres just too much of me invested in them.
Taking that journey through the highs and lows makes the finished product all that more exciting.
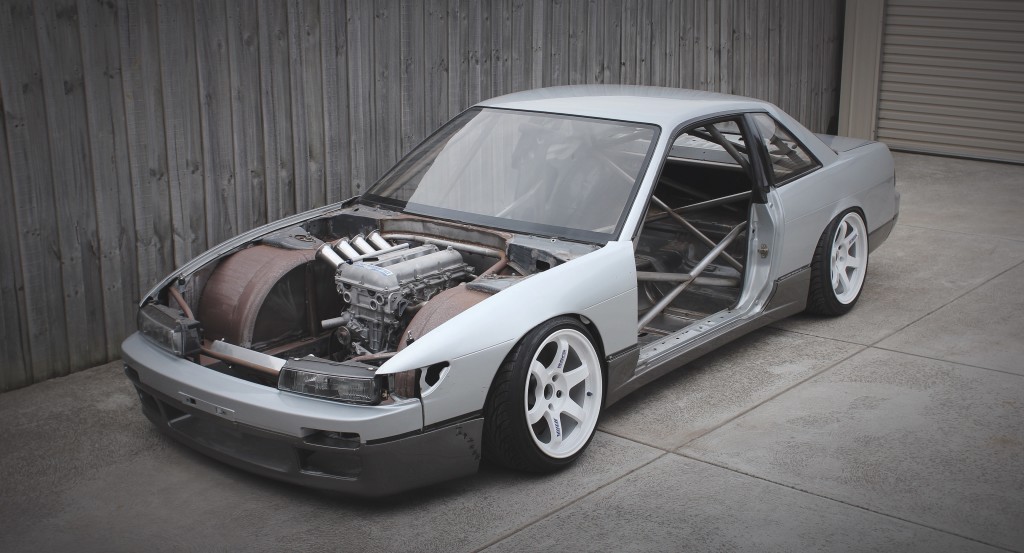
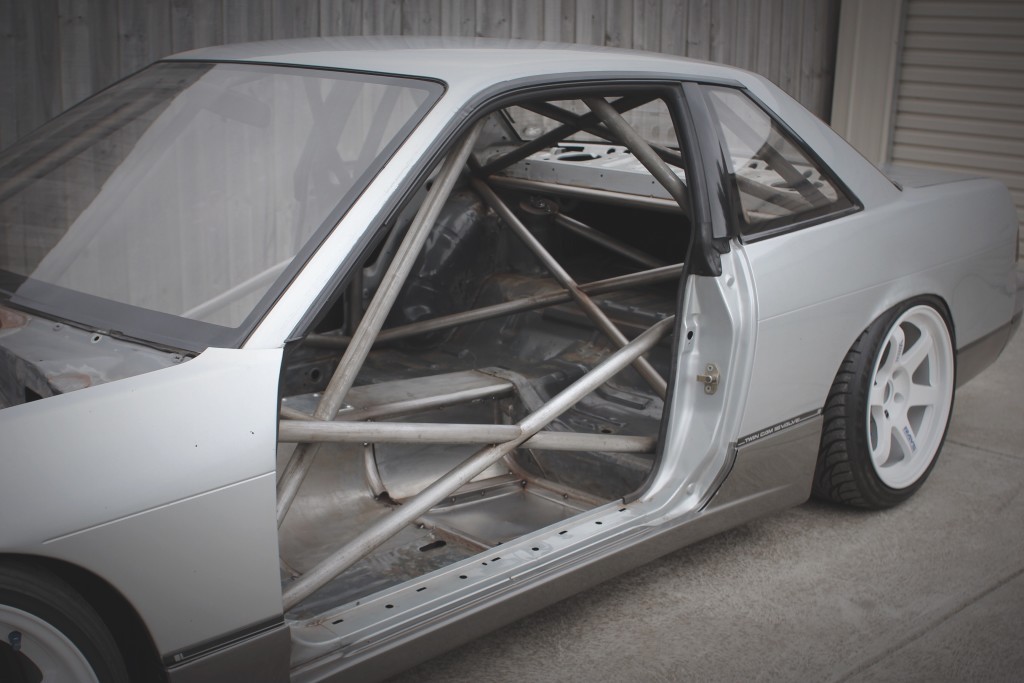
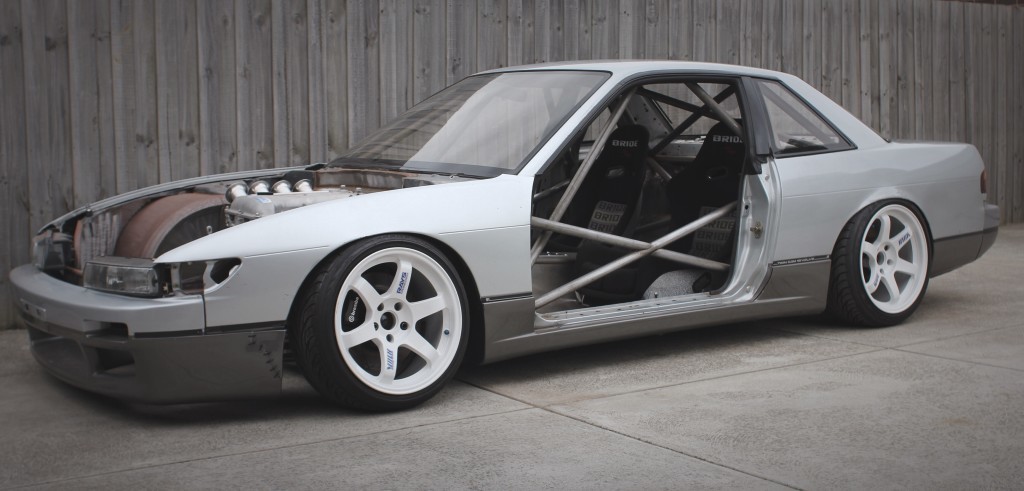
I have almost had this car for ten years now, it’s seen 4 different engine configurations, countless hours worth of chassis and suspension modifications and whole heap of other “good ideas” that with time and knowledge turned out to be not so good.
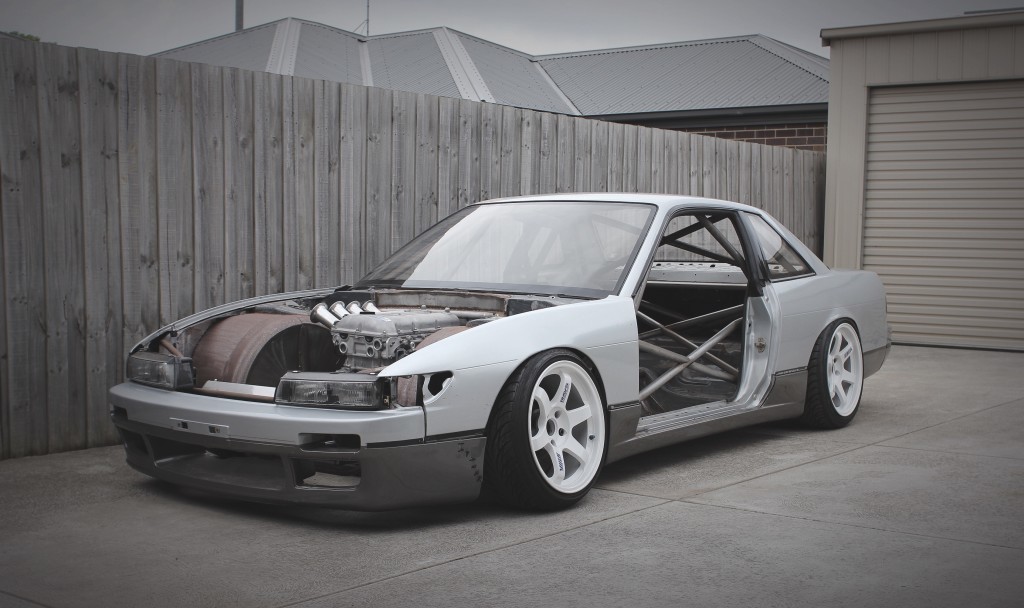
So a little while ago I started from scratch, I cut everything out I had ever done and started from scratch, the last edition of the ten year journey.
You wouldn’t believe how close I came to cutting the body shell off the floor and building a full tube chassis, it troubled me that the identity of the car would be lost, it would just become another Hilux build, it would however be easier to do this but I persisted.
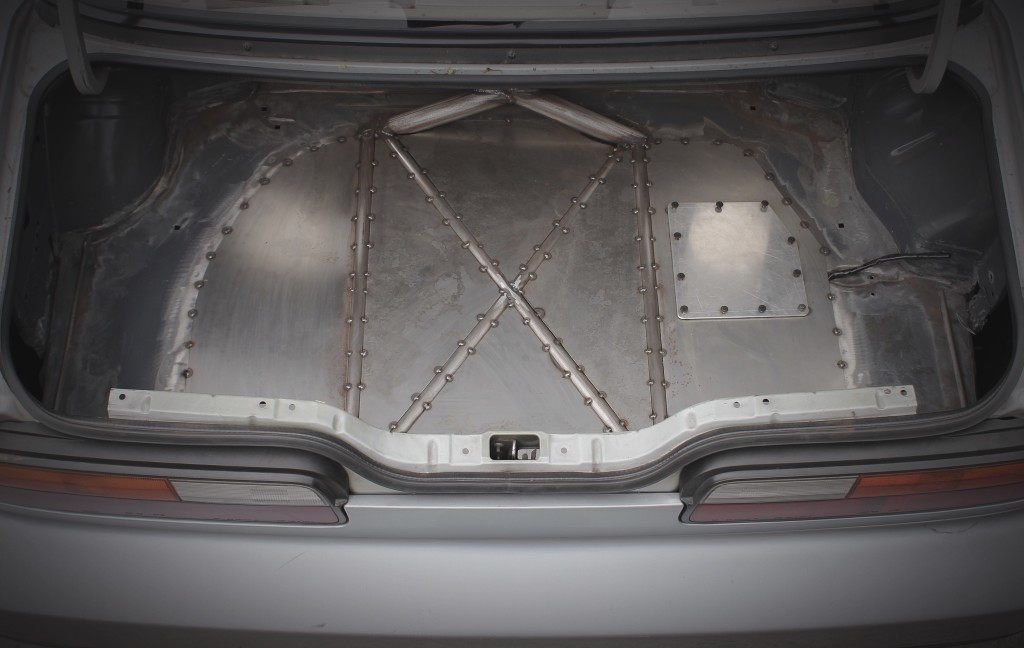
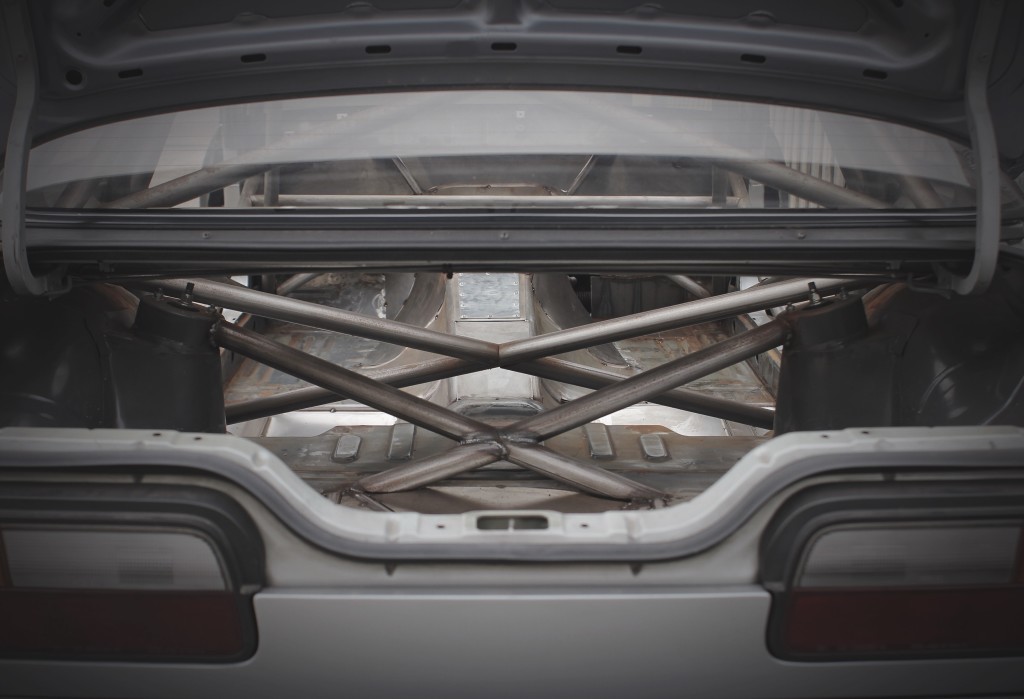
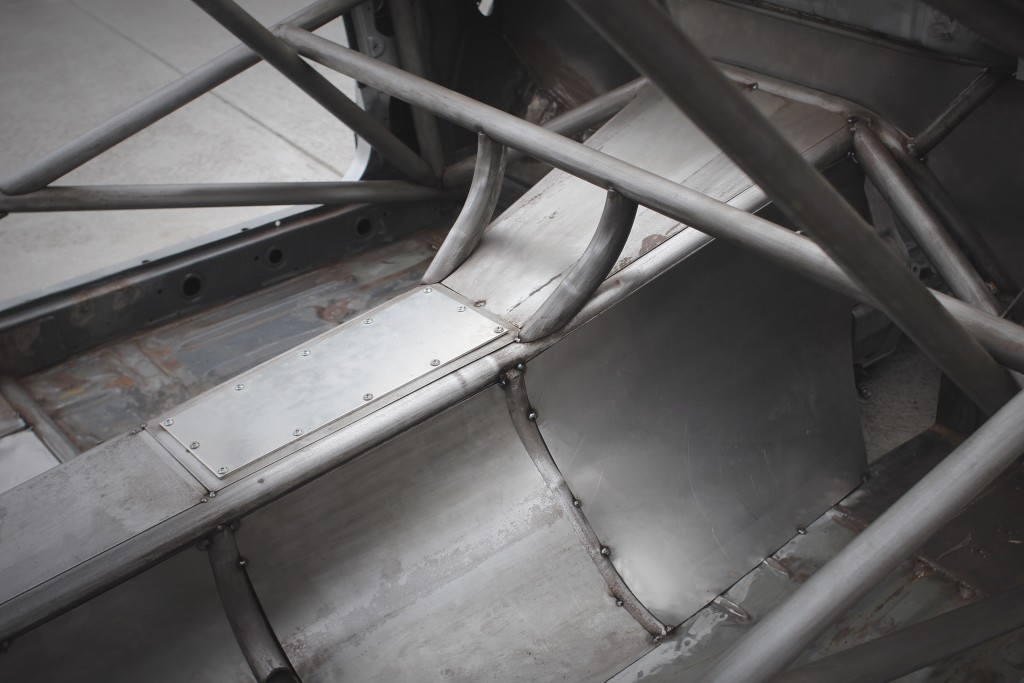
It started with the boot floor, in my last post I showed you the smaller fuel tank I fabricated, my aim was to have it all external, that meant I didnt have to partion off the boot from the cabin, this meant the fuel filler remained in its factory location and I just had to fabricate a removable lid for access to the fuel pump, the 0.8mm sheetmetal sits within the tube structure.
If you own an S13 then you will understand the pain of getting a jack under the stock fuel tank, with the tank halved I have all the factory fitted benefits and with a low center of gravity and now enough room under the car to work on it. I was considering air jacks but they wont be needed as tyres should last a lot longer on this than the Hilux.

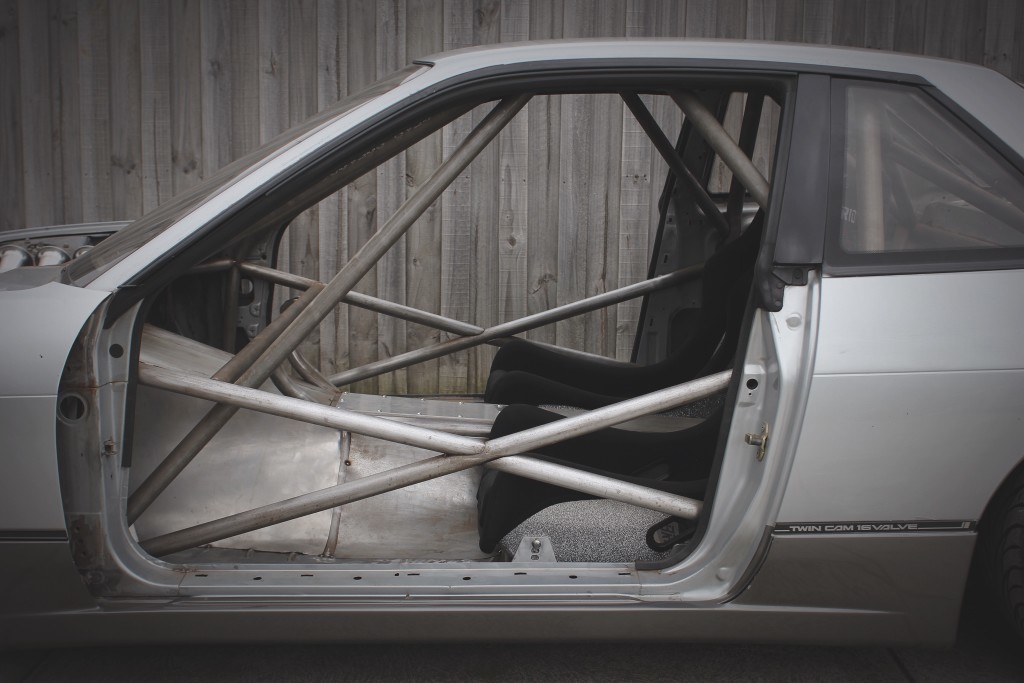
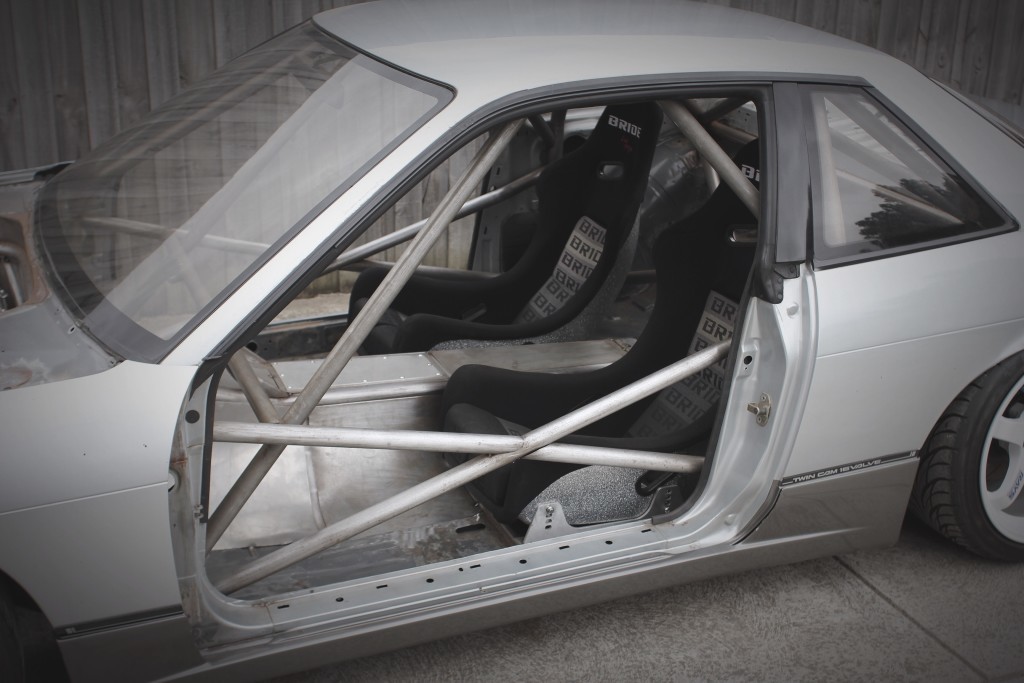
With the boot floor done it was time to move inside, it’s a big job templating everything onto 1mm polycarbonate, transfering that onto steel, cutting the sheetmetal and then making it fit but its worth it.
The seat mounts, tunnel sides, floor panels were now all in and tacked.

These shapes were easily bent on an old nitrogen gas bottle I had lying around, really any large diameter rolling surface will work.
The firewall is just one panel of being finished aswell.
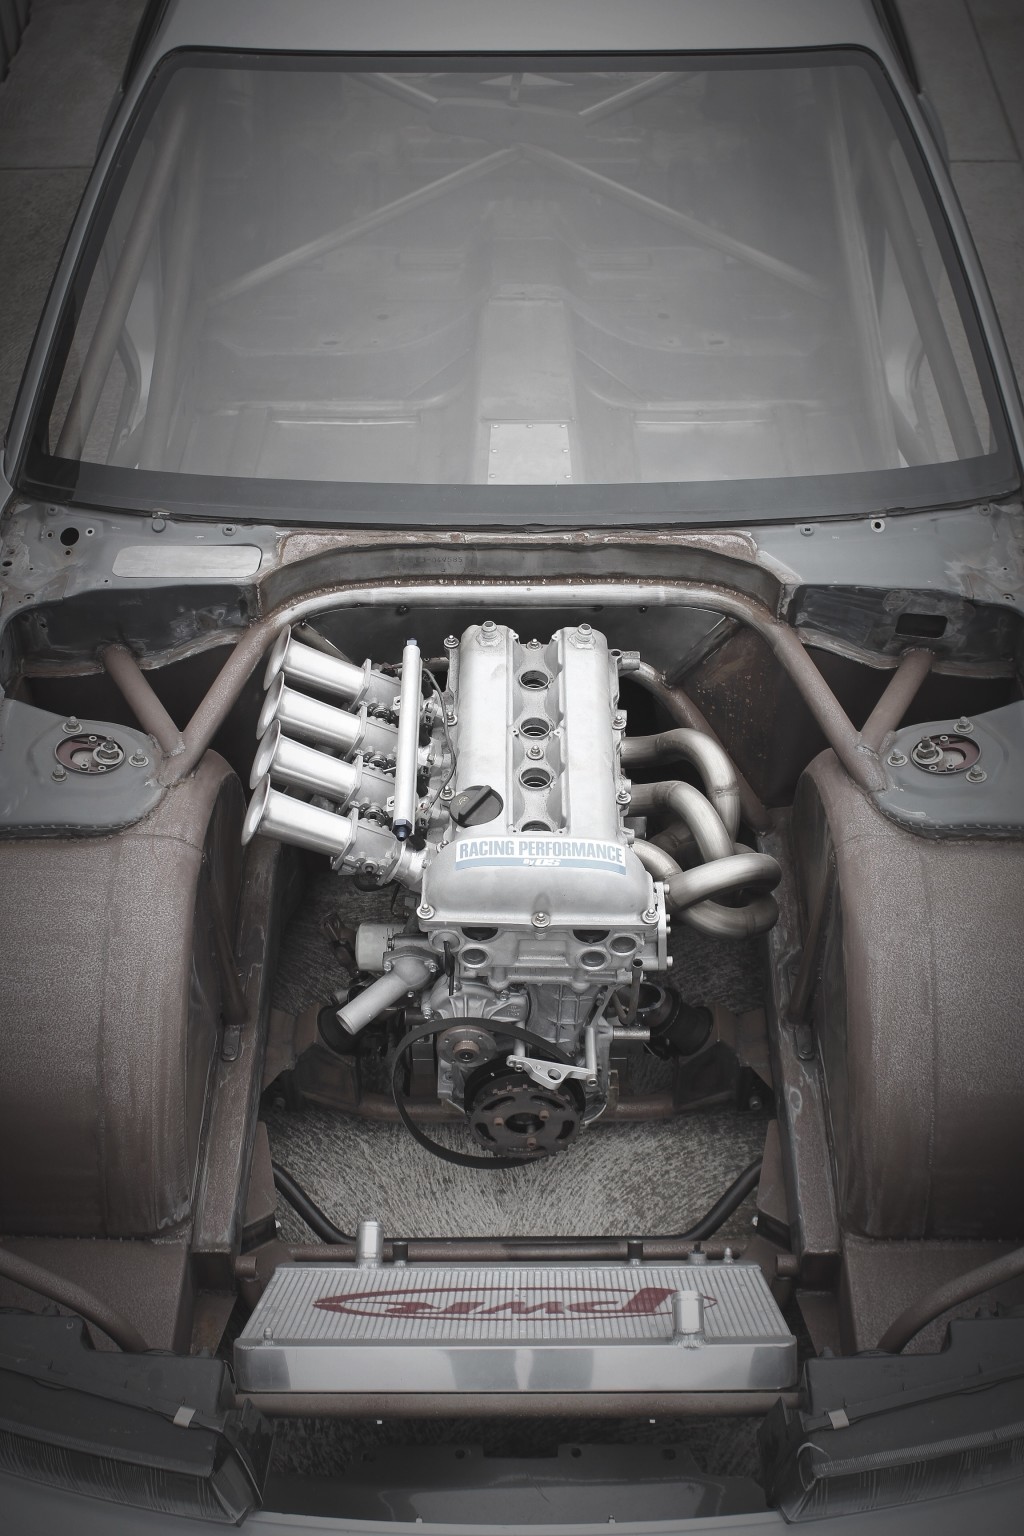
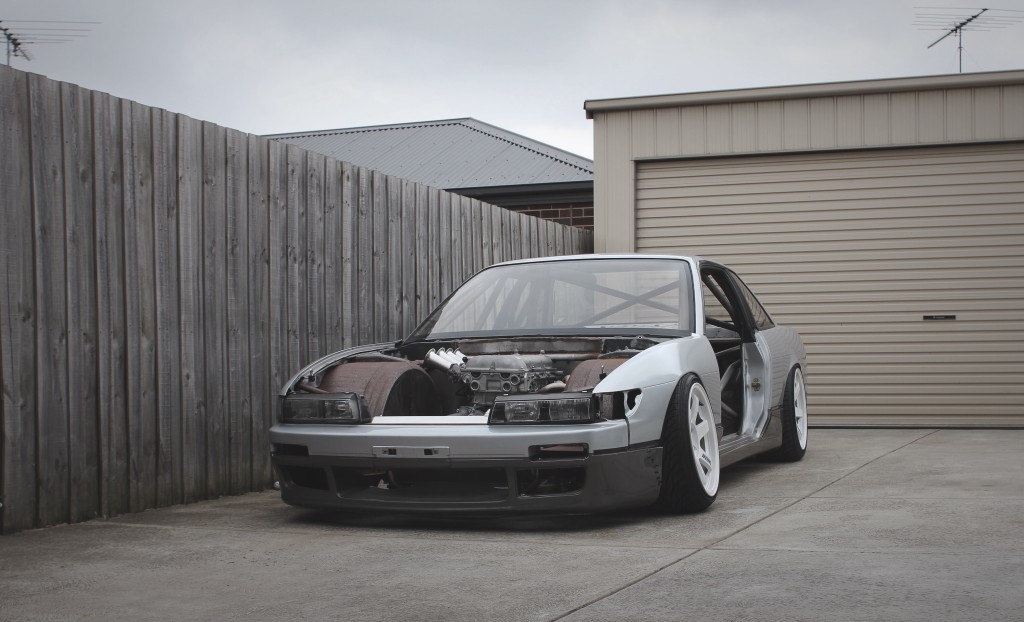
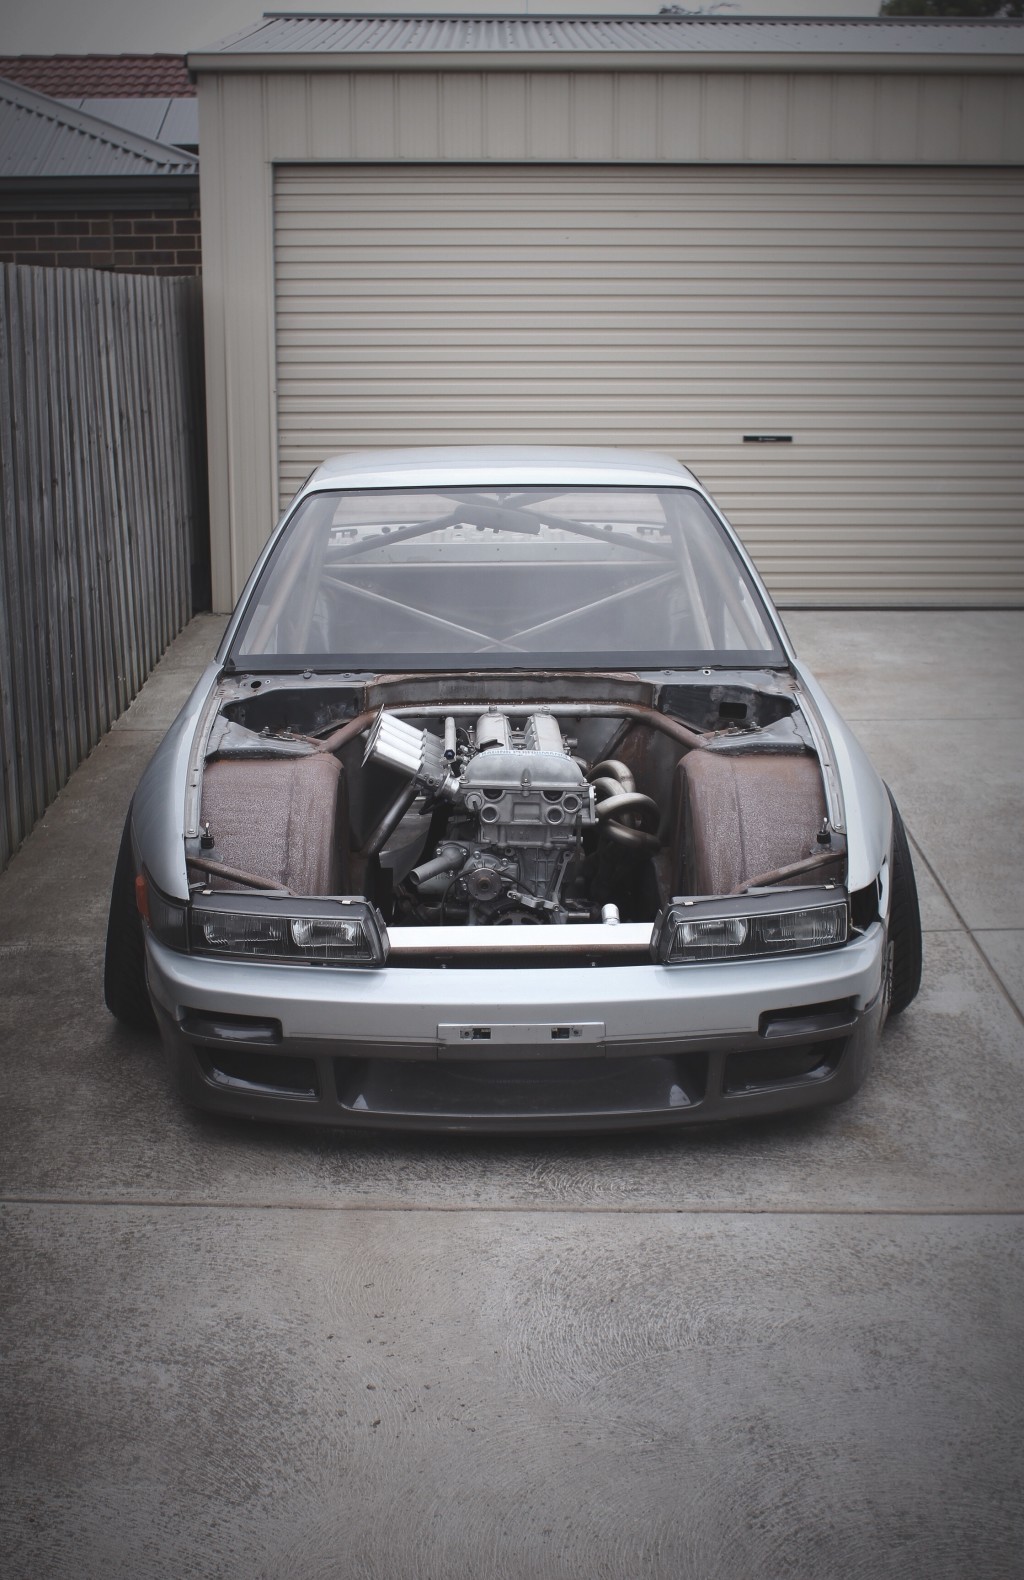
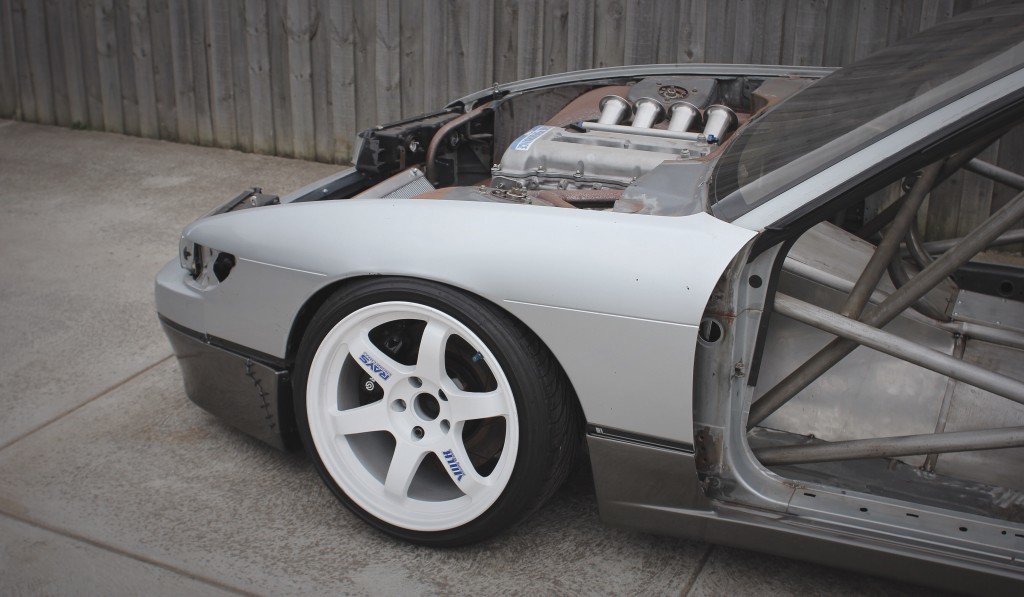
The engine bay is finished, this weekend I just need to strip off the rust and give it a primer.
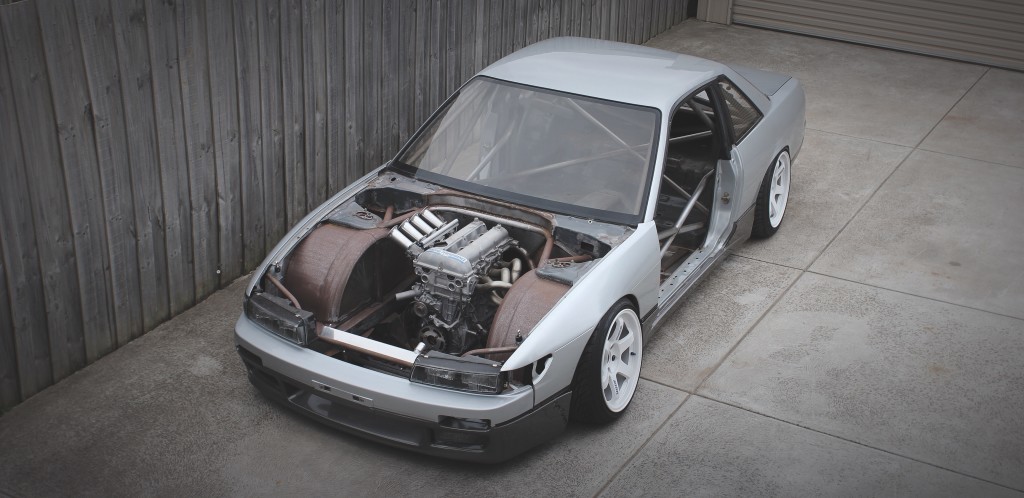
I made some new engine mounts to suit the new engine location, the rear sump really helps here.
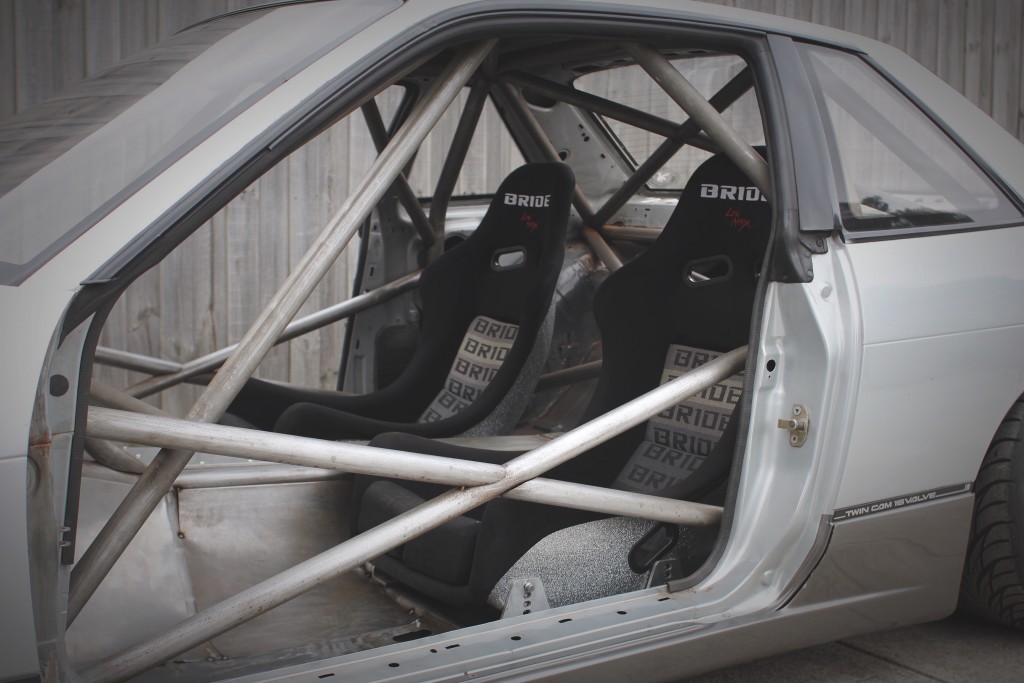
With the Bride Zieg III seats sitting in their position you start to understand how dramatic but refined its look will be (Im going to swap the Bride seat cusions for the dark grey Gradation cushions)
The motors about 200mm further back, its low and hugged by the new firewall, I think I have found a nice mix of new and old lines, once its painted it will all look seemless.
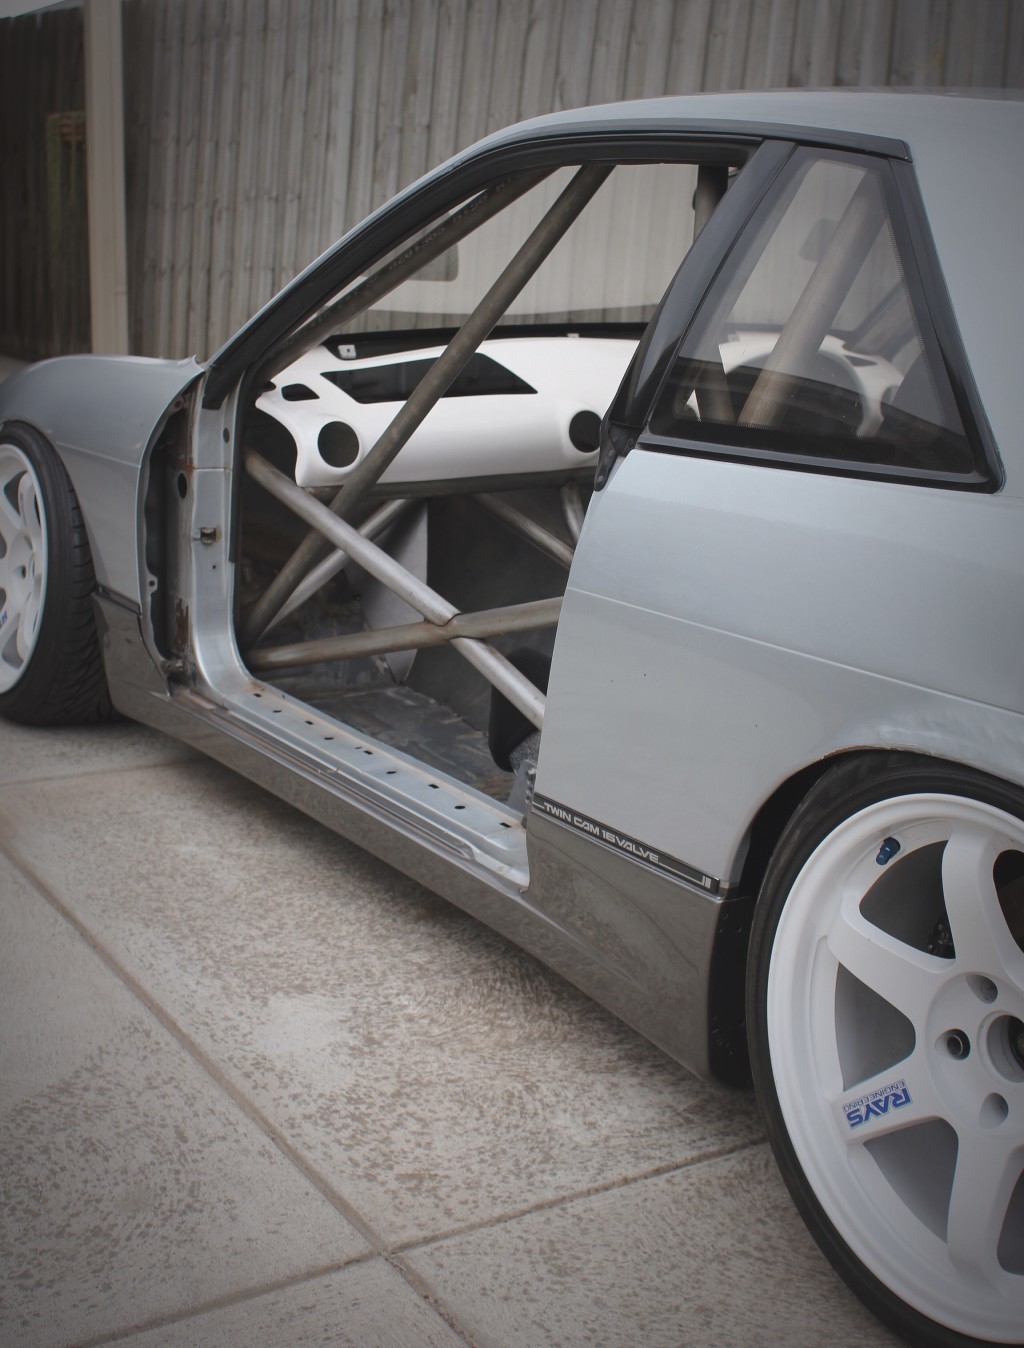
With the S15 FRP dash skin sitting in its place theres not a whole lot more that will go in here, I am unsure about what dash to use, I have a heap of the white faced Defi guages that I might refit back into the facia, it would be a heap neater to have a digital dash but I think the gauges always suited this car so they will stay.
This weekend I will remove the engine and gearbox and start to finish a bit of the running gear.
Speaking of running gear, I spoke with the guys at Quaife and since fitiing their QBE69G gearbox into my Hilux they have developed a straight fit QBE69G gearbox for the SR20, after drawing the bell housing and giving them the dimensions of the adapter-plate that I made they agreed on a future discount.
After spending so much time making all the tools, learning about these gearboxs its going to be hard not to fit one in the PS13NA, I even made the tunnel suit the gearbox.
Pingback: Social Media Round-up v8 | Build Threads