This may seem like its taken an incredibly long time to complete but theres a lot going on behind the scenes, let me fill you in.
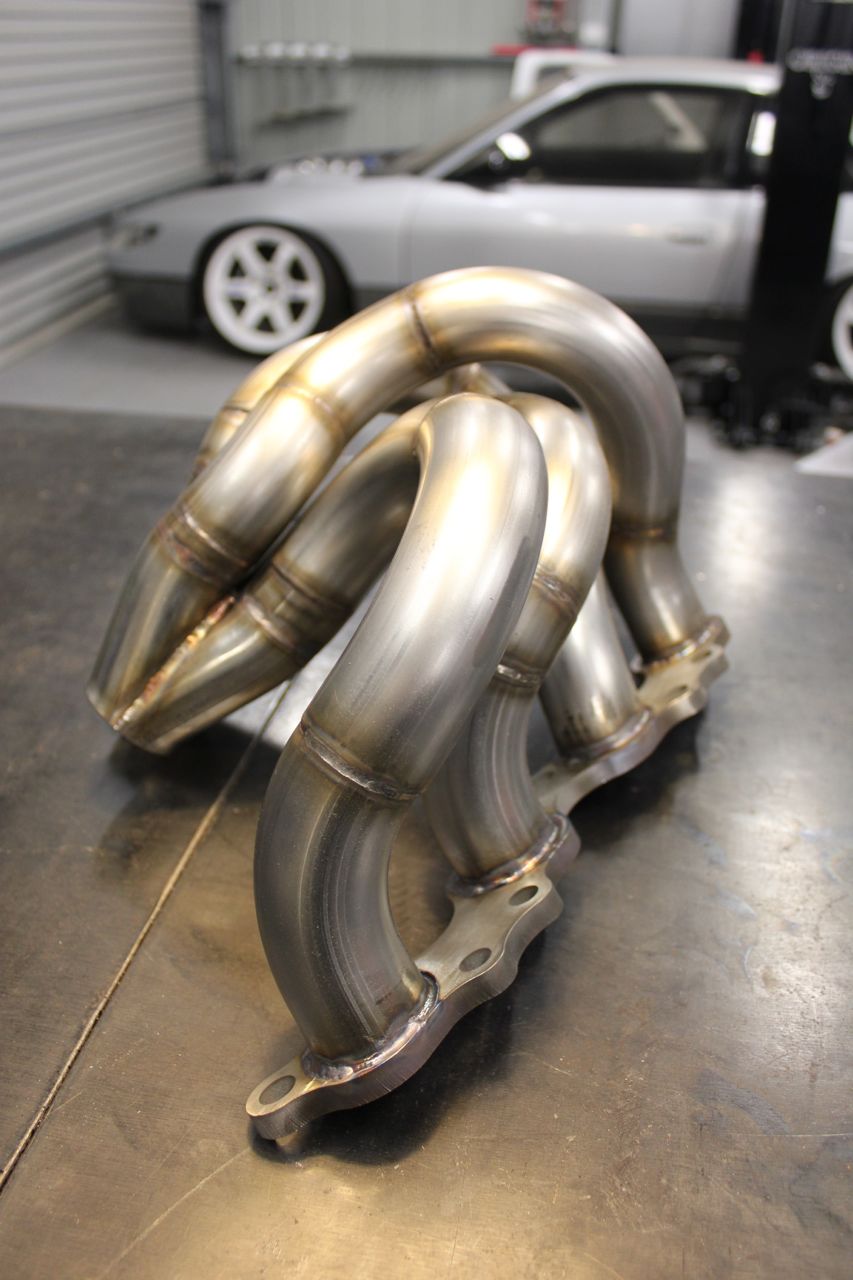
It all started with a dream, a few weeks after i had this dream i was in Japan at Tomei HQ and i happened to ask the right people the right questions and that dream got a little more exciting. You see i love to not stuff around, and making a header suit an engine is a huge stuffing round process, to get info out of the people who have done this is sometimes like trying to get blood out of a stone, but the guys from Tomei were incredibly helpfull and gave me enough info to go ahead and design a pretty decent header to suit a modified SR20DE.
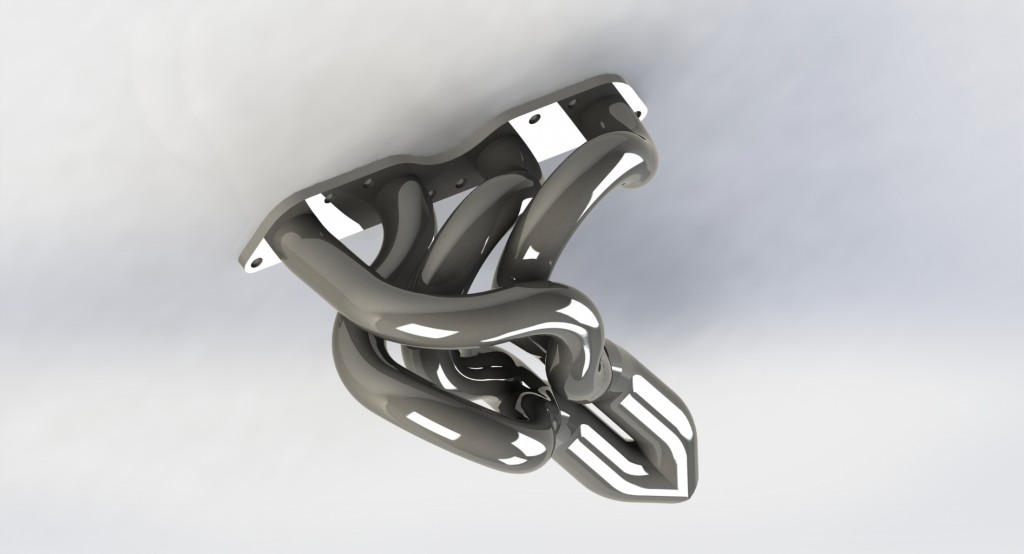
So i had the dimensions, i had the 304 stainless tube but i was lost, that was until i met a very smart man called Martyn, Martyn took my dimensions, my tube sizes and developed a header layout in Solidworks.
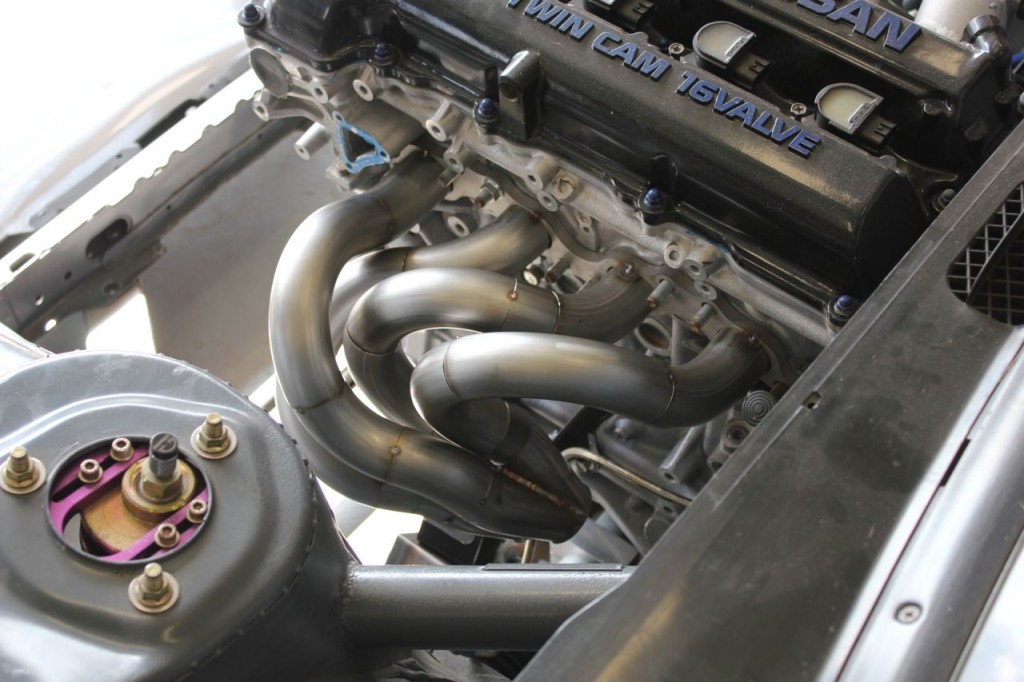
From there we built a jig for each runner and then made the exhaust, it went together so easily and that made all that work worth it, of course none of that would have been worth it if i only wanted to do a one off.
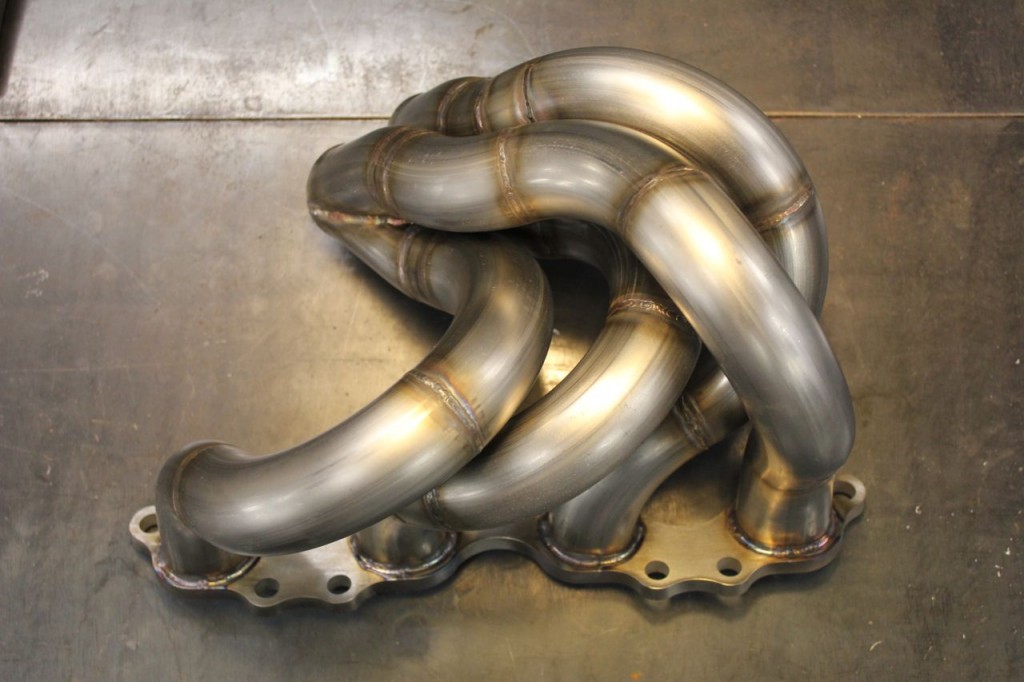
So now whats happening? Well we obtained a factory header to make a jig so that our header can then connect up to original flange, off that jig we measured and drew the pipe that will create the 2 into 1, that pipe will be CNC bent and cut to size so that no time consuming cuts will be needed.
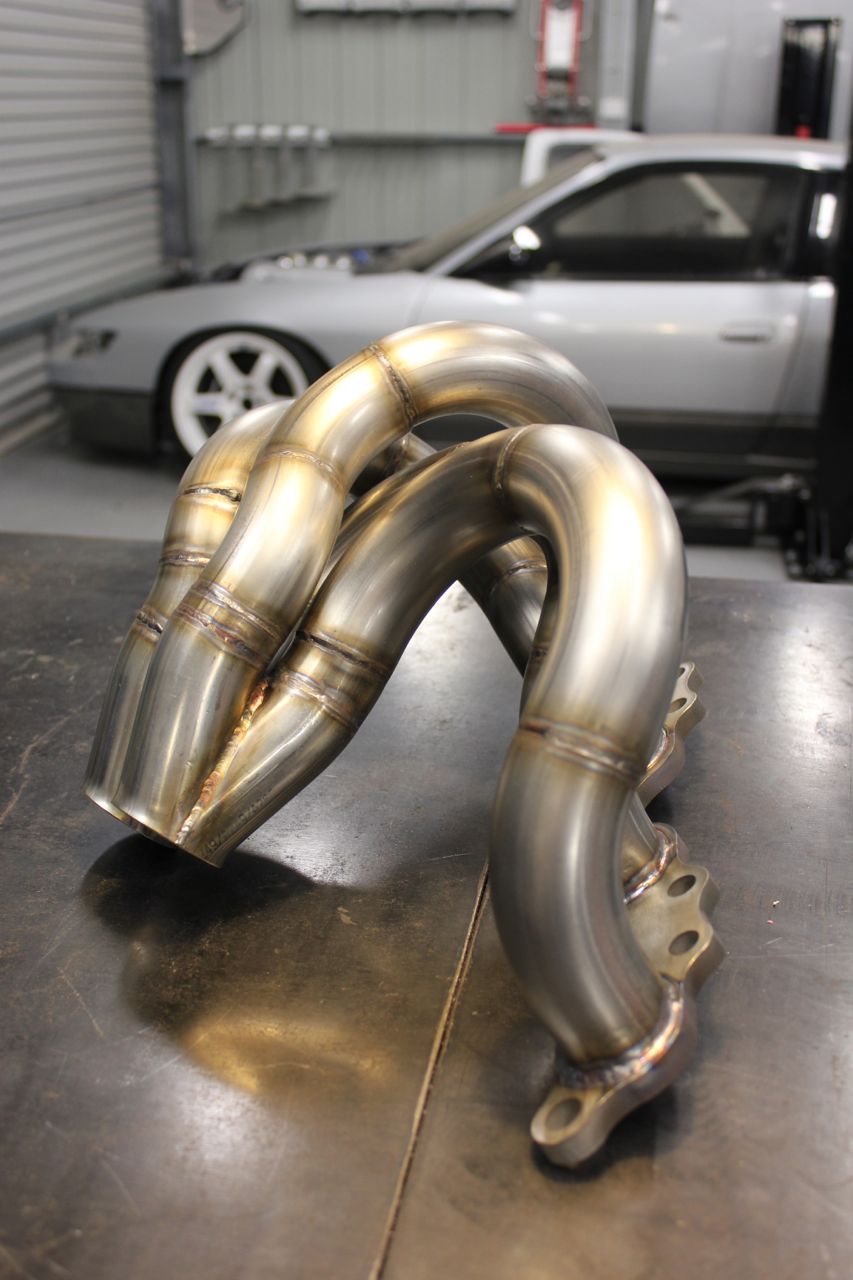
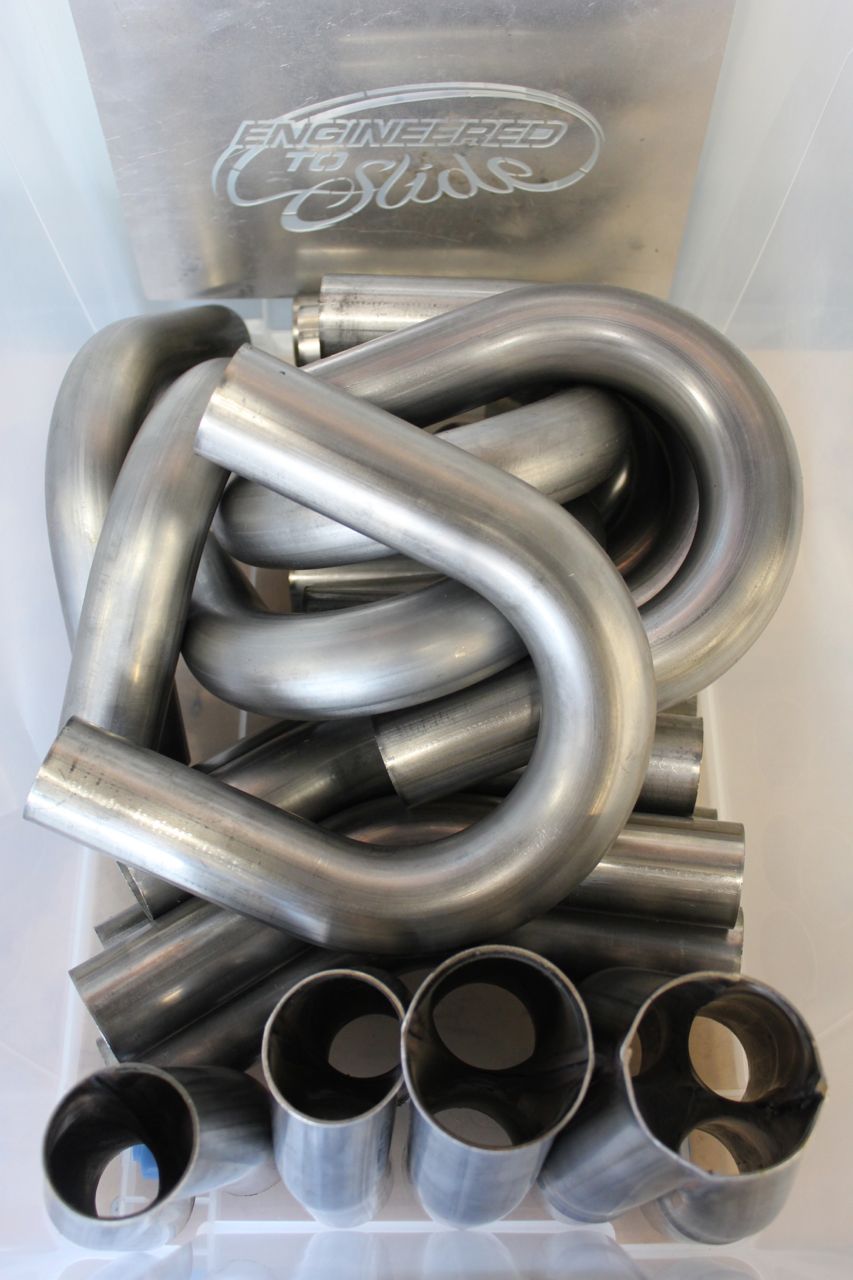
I also had a hard time sourcing the tube for the header in Australia, in the end i bit the bullet and gave the go ahead to a bending company to build a die especially to produce these bends, this makes a massive difference in the long run as i can source the tube locally.
So all in all its been a long process but hopefully a rewarding one, its not easy setting something up like this to be repeatable but i have learnt a lot from the experience, i hope to have a few happening in the very near future so keep an eye out!
Dan Simoes
have you considered making turbo manifolds?
Lachlan Maslen
Why did you decide to go with a 4:1 design rather than a 4:2:1 design?
Richard Massey
It is a 4:2:1 if you look closely. He just hasn’t done the 2:1 portion yet. That is what he is waiting on the CNC part for from what I read. I just hope he has a plan for access to be able to weld it.