A couple of months ago I spent some time up in QLD and met up with Max from Akin Moto, he threw me the keys to his Triumph Scrambler, equipped me with a new Akin jacket, some gloves, a helmet and we hit the road to meet up with some of his friends.
After a feed at Iron and Resin Garage we all fueled up and headed south west through the rolling mountain roads and into NSW.
It’s incredibly lush in Northern NSW, as the road winds its way up the mountain range I take my eye of the apexs every now and then to take in the surrounding scenery, the flicker of the afternoon light through the surrounding trees offers views of Mt Warning.
The Triumph I borrowed from Max eats up the mountain and before I know it we are dropping down onto the plains and cane fields near Murwillumbah.
I can tell this area is extremely well known to these fellas, we turn into a private property and the asphalt stretches as far as I can see. I quickly loose sight of everyone as I must have missed the green flag that signaled some kind of drag race. Anyway long story short the property is owned by Derek and he has built a house, workshop and racetrack on his very own land. The workshop houses many racebikes including a GP NSR500, a machine shop, dyno, lounge area overlooking the racetrack. Hundreds of trophys lined the shelves hinting to Derek and his sons racing success.
After a few laps we rode back over the mountain, stopped in at a brewery and reminisced on the ride, motorcycles and the QLD scene. Max hinted at a build that he was interested in doing and it wasn’t until I returned back to Victoria the next day with a thorough understanding of what he needs I continued the conversation and we both worked out a plan to make that bike that Max had in his mind a reality.
Max set a budget and I set about finding a donor bike to get to work on. I knew exactly what he wanted in a bike and I knew exactly how to make it work. After all its something that I have done over and over again, I am always striving to improve and I always find ways to make my ultimate bike just a little bit better than the last.
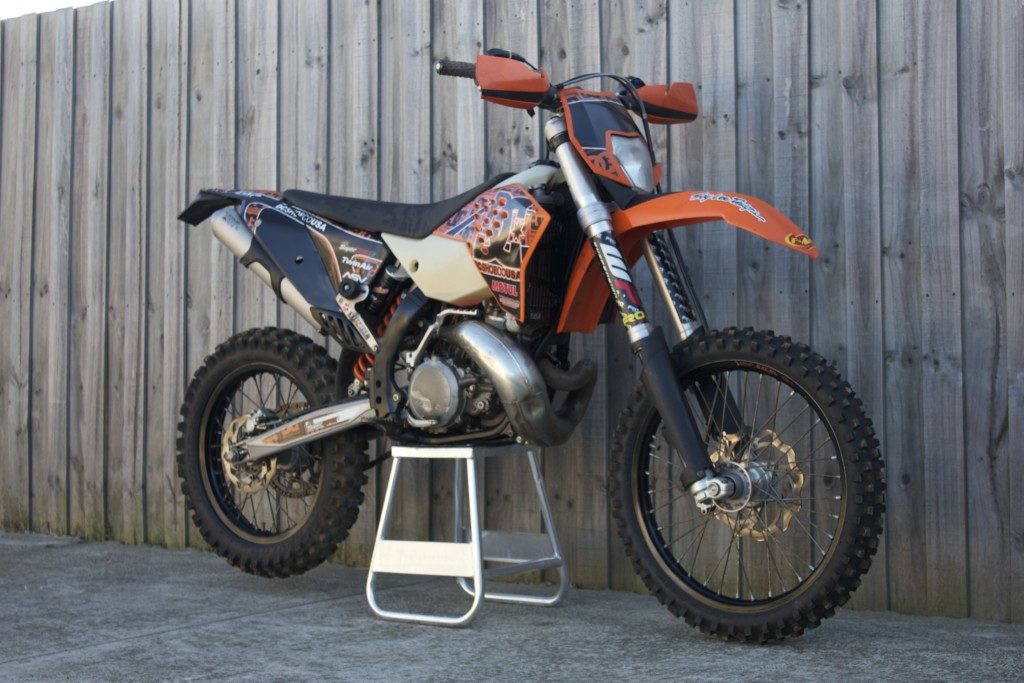
I spent 3 weeks searching for the perfect donor bike, I came across a few that would have spelt disaster if I didn’t know exactly what I was looking for. Just when I started to loose faith in dirt bike owners I found a relitively low hour 2011 KTM 300 EXC that would be the perfect candidate for this build. The 2011 had the 6 speed gearbox and host of other great upgrades that made it the one.
I got it home and immediately stripped it down to the bits I needed and gave it a good clean up. First things first was I needed to fit the wheels so I could get it up on the stand and begin work. The wheels in question were actually mine that I sold to a guy in QLD a few months earlier.
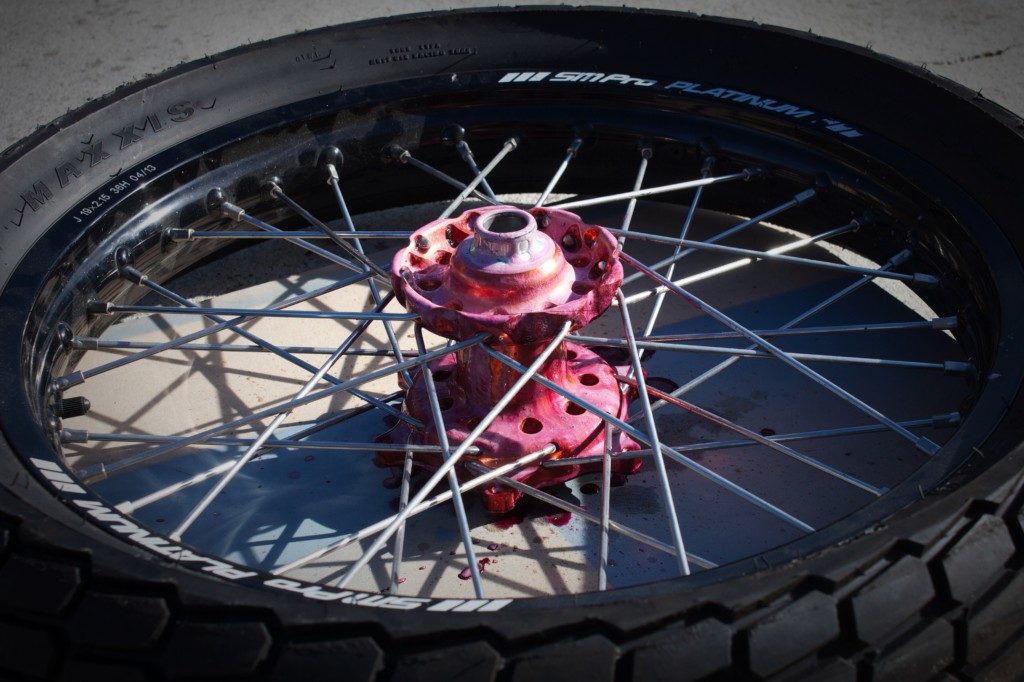
After a quick phone call Max was on his way round the corner to pick them up, my friend Dean was working up in Noosa and agreed to pick them up on the way home. A few days later I had the wheels but the orange anodizing wasn’t part of the brief, so a little time with the caustic soda and a tooth brush I got them back to raw alloy.
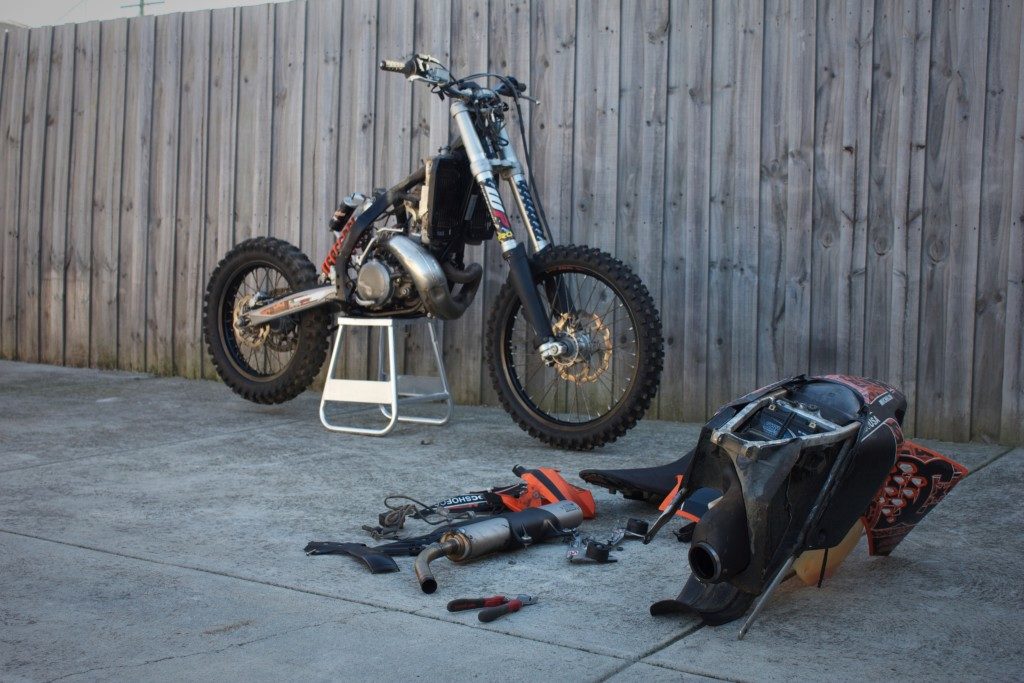
Now the bike was cleaned up, all the plastics, subframe, wheels and other accessories I didn’t need were boxed up in the “stock components” box and kept for Max should he ever want to reverse the process (I dont cut a single thing on these bikes)
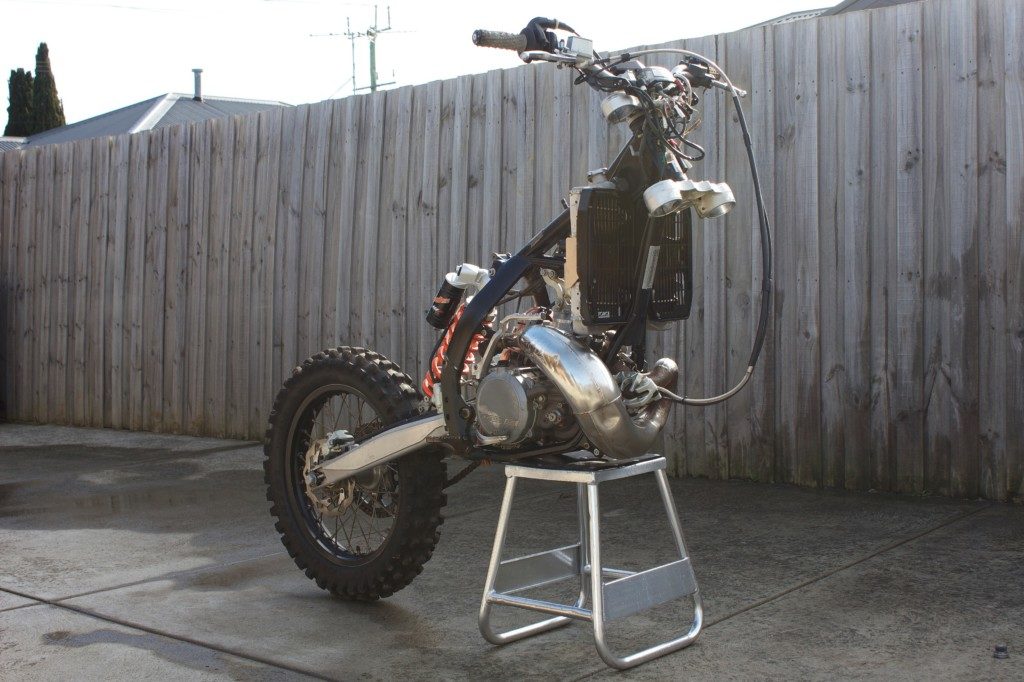
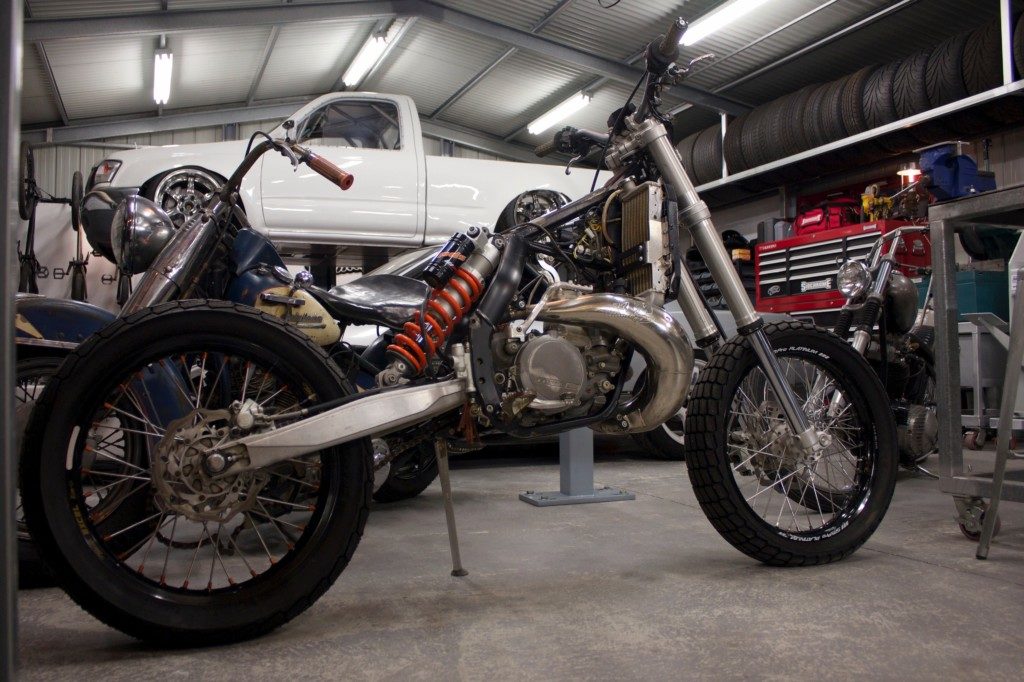
Now I could get to work on the fun part…… First step is to set the height and get the dimensions right. Knowing that Max wanted a gear ratio of 14-40 and this being a 6 speed 300 2 stroke I wanted to make it planted and stable at high speed, light bikes and steep head angles at speed can be death traps. Take it from me as I should know, my 350 SXF I rode for Flats Movie to the center of South Australia had 170mm taken out of the front suspension and nothing taken out of the rear. I spent days at 110kmh on a 100KG bike on the brink of death wobbles.
So I settled on 125mm out of the front and 135mm out of the rear, this equated to a 25mm shock spacer in the rear shock and 125mm in the front, but I wouldn’t make those until I had the bike off the stand once the rest of it was completed.
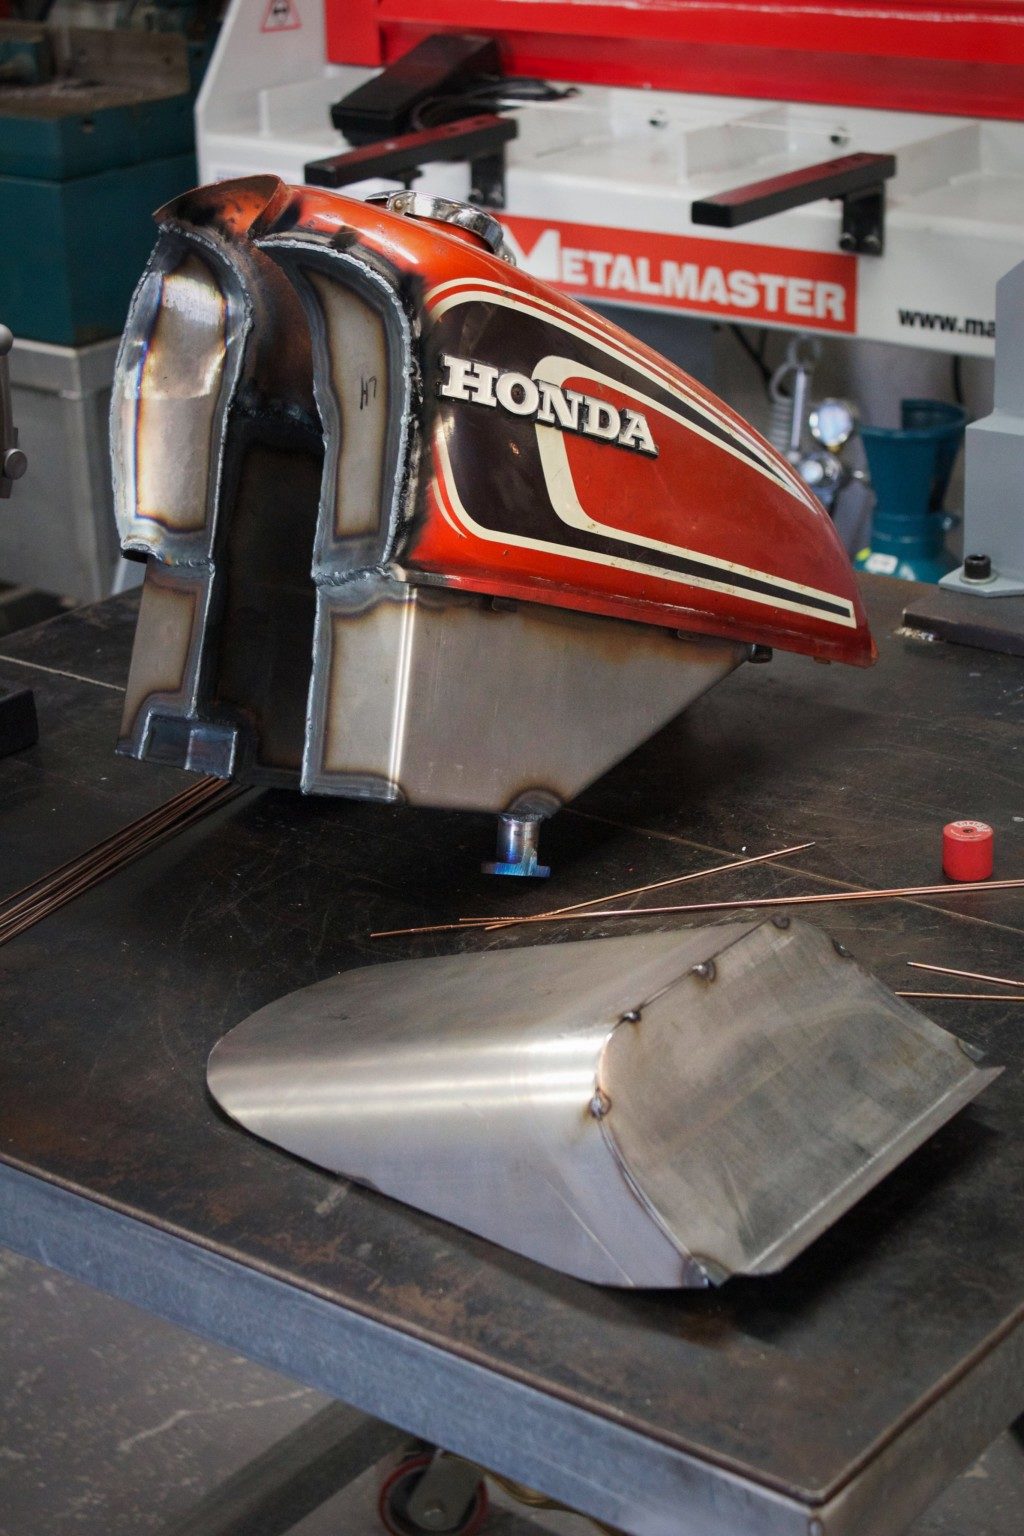
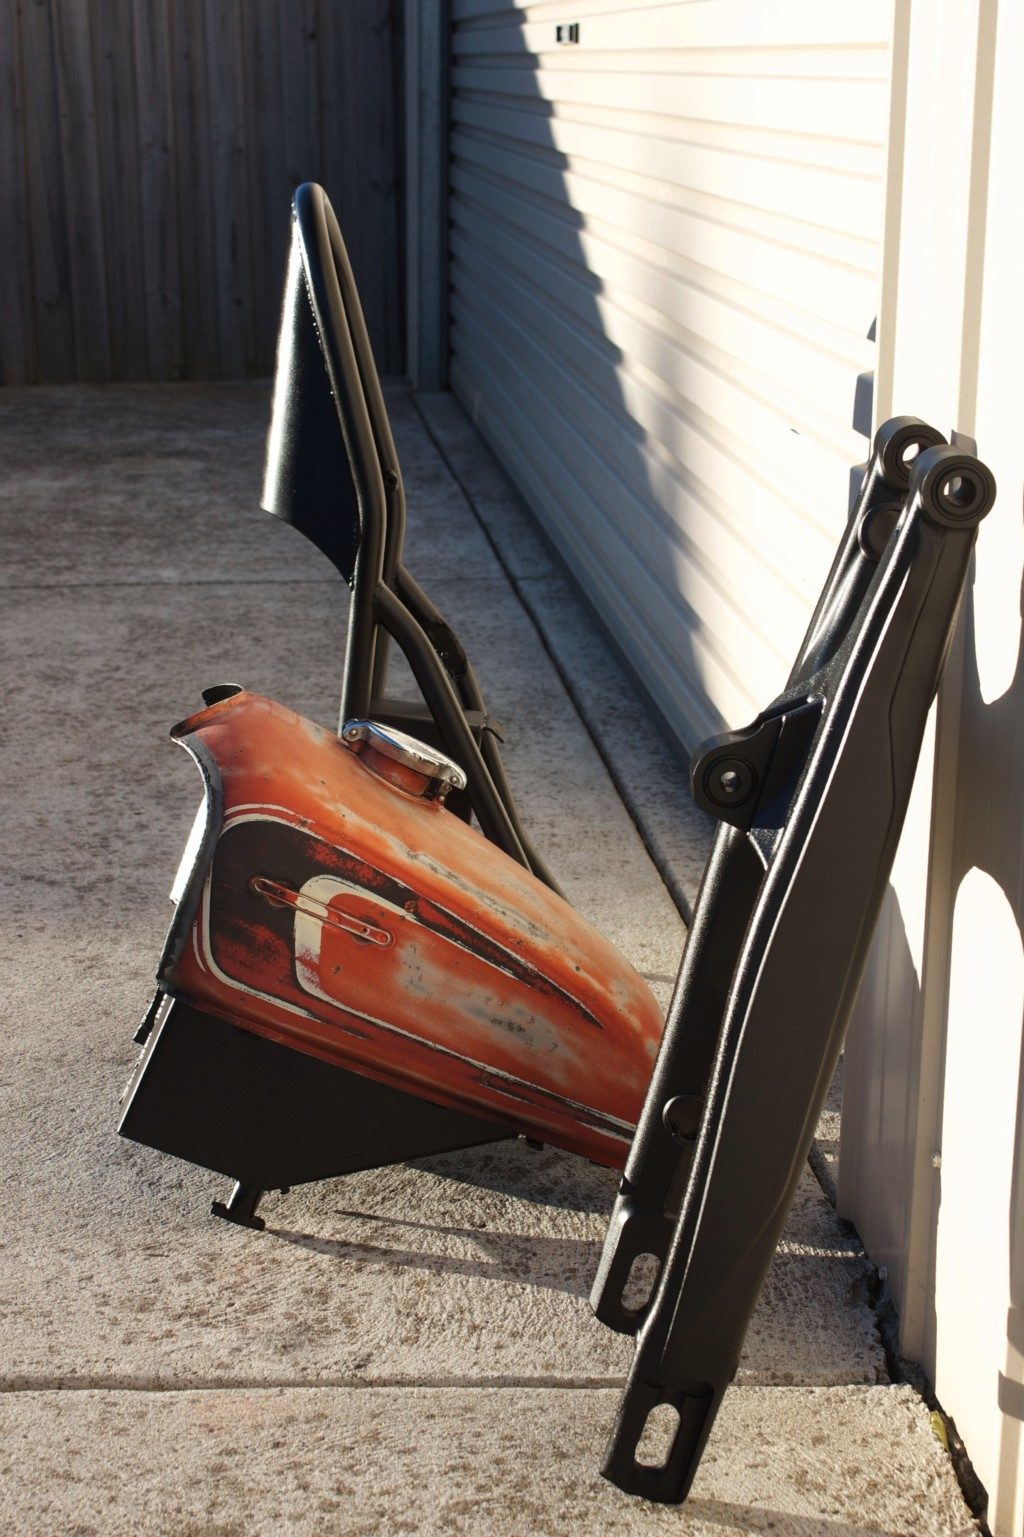
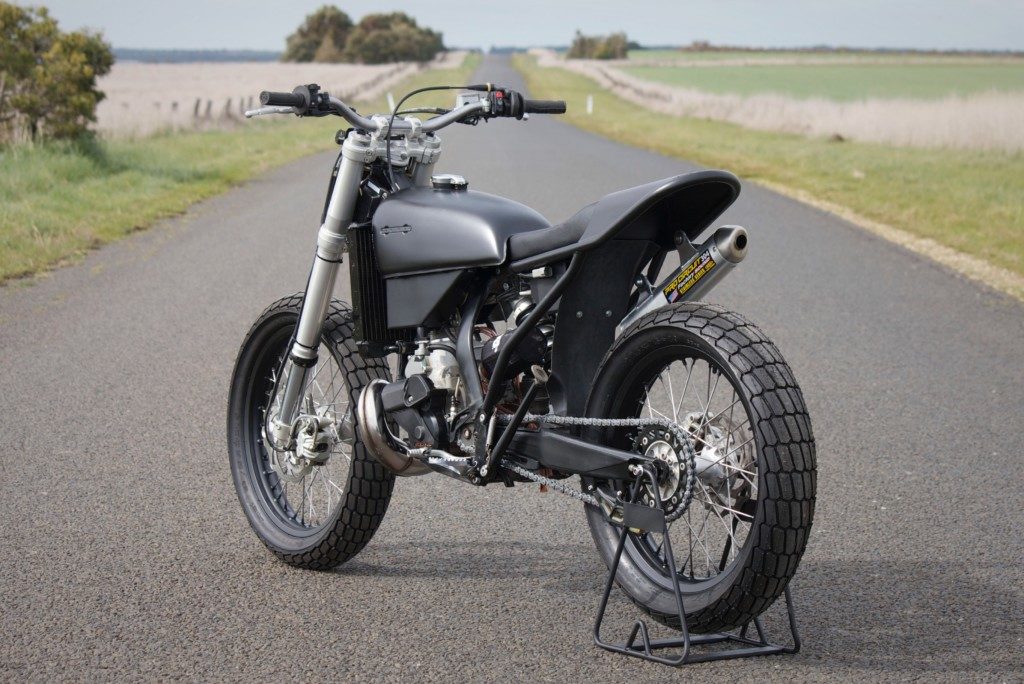
I had spent two Saturdays on the bike so far and it was time to sink my teeth into the shape of it. I spent my third Saturday on the tank, with my new workshop layout I was able to really relax and just work through each job in its entirety, there is a sense of calm that runs through me knowing that I can do each job precisely now and not leave my 12mx6m tin shed of dreams. I contemplated making a tank, but I wanted that timeless style of flowing vintage lines coupled with unique custom touches to make the tank at home on this motorcycle.

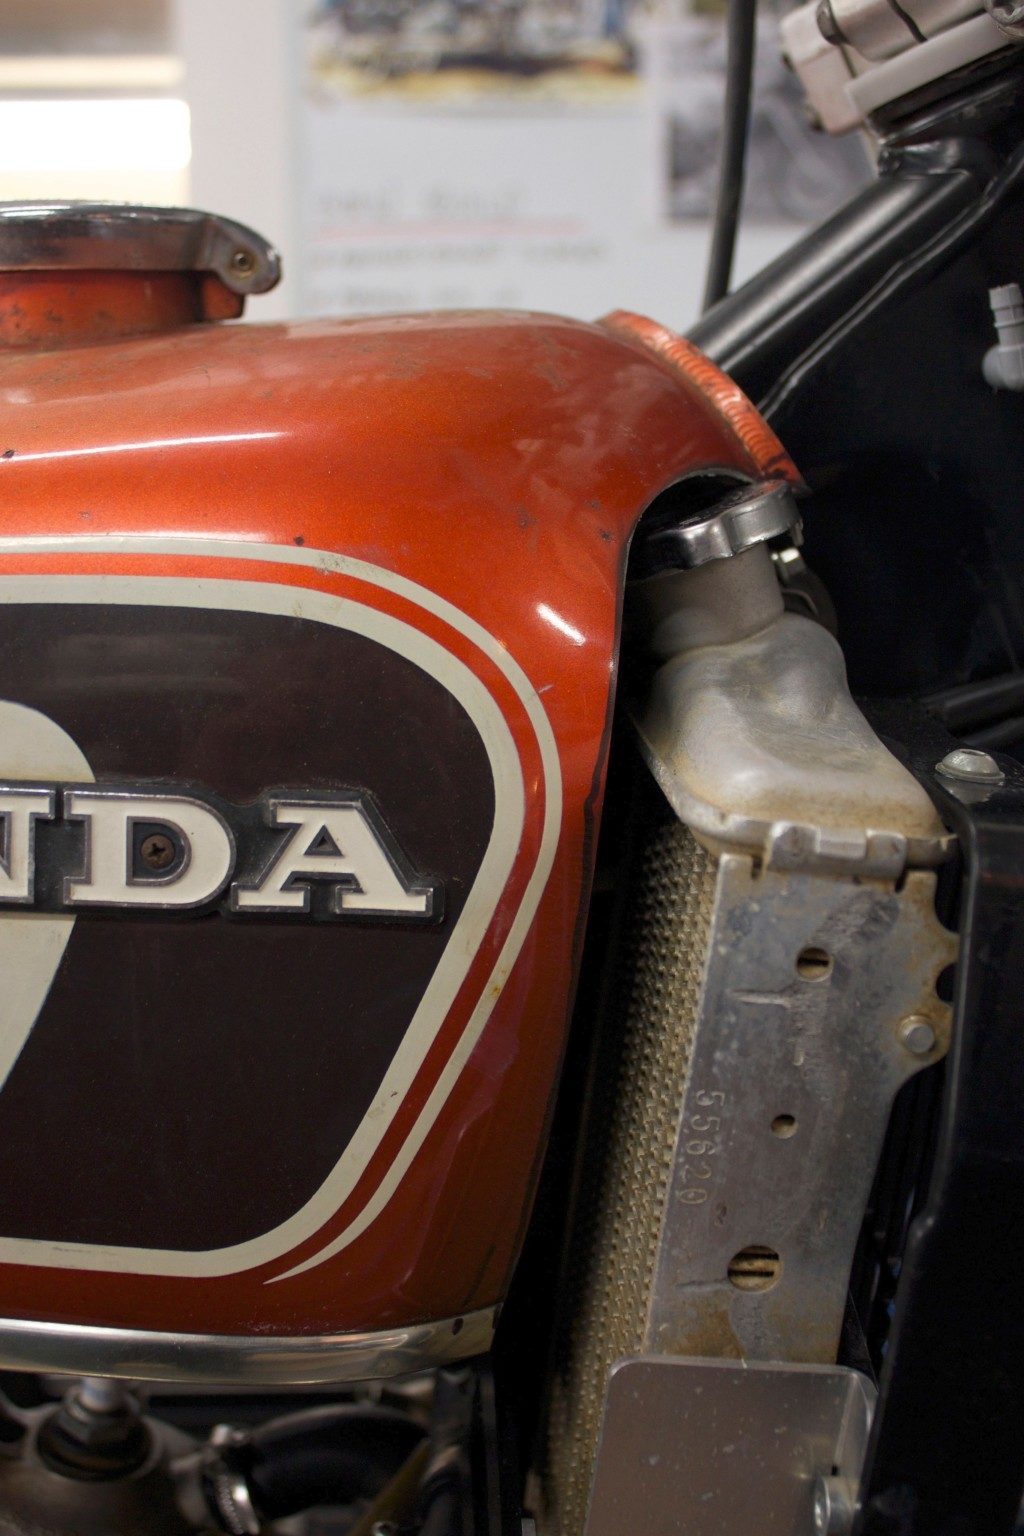
I had an old Honda tank sitting round that I had from a trip back home to Cobden, I sifted through a wreckers and picked out ten of his best tanks and handed over $500. At the time is a big investment but as each tank gets used for each build it makes it worth every dollar. Not to mention he oiled them before storage so they are like new on the inside.
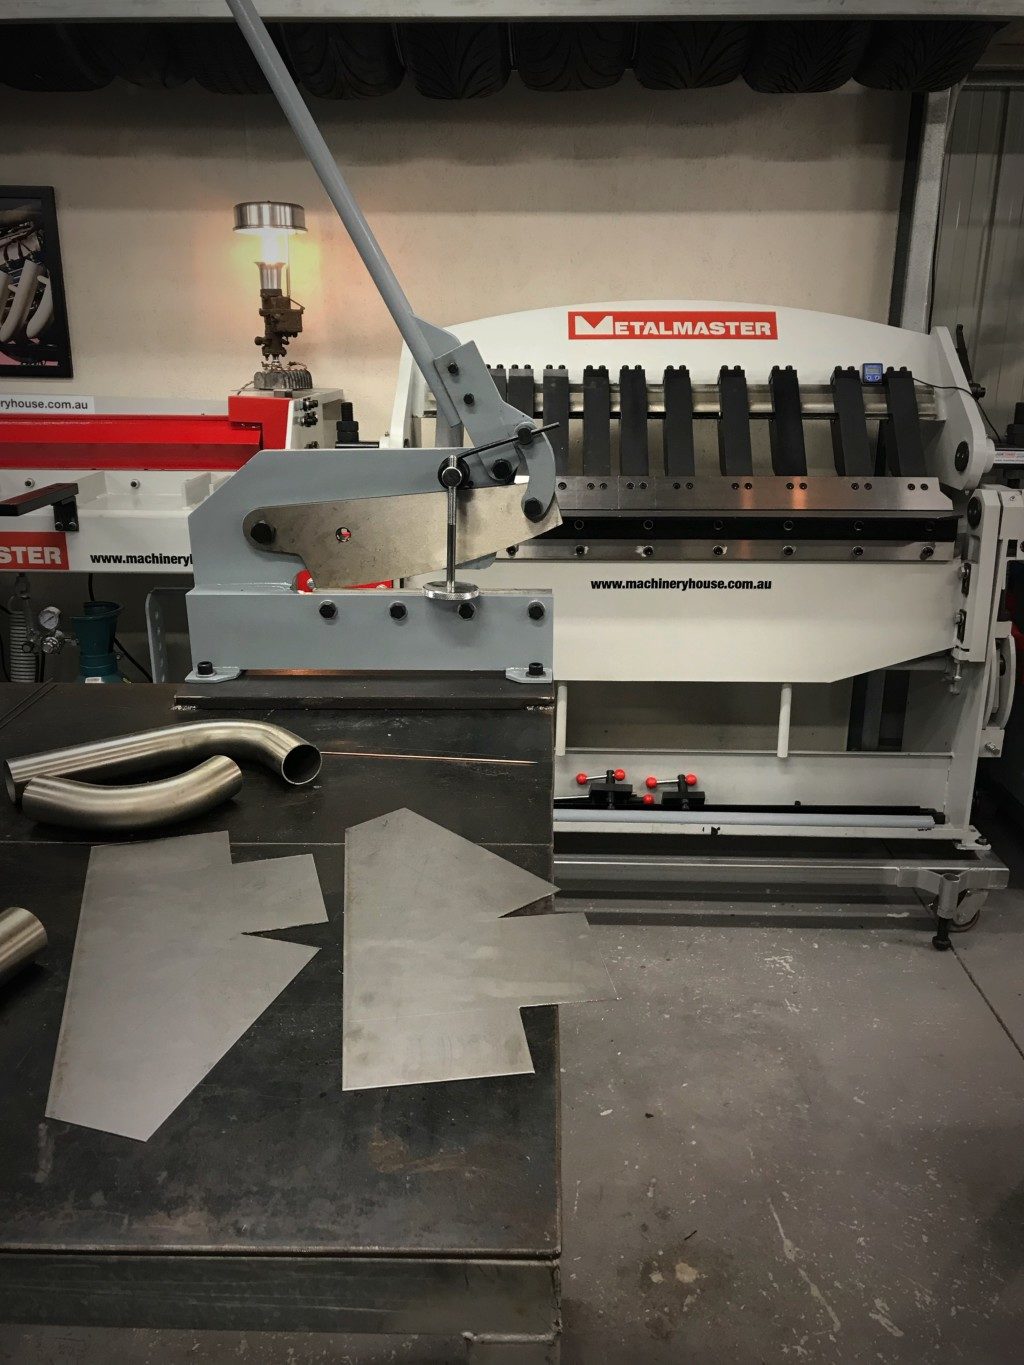
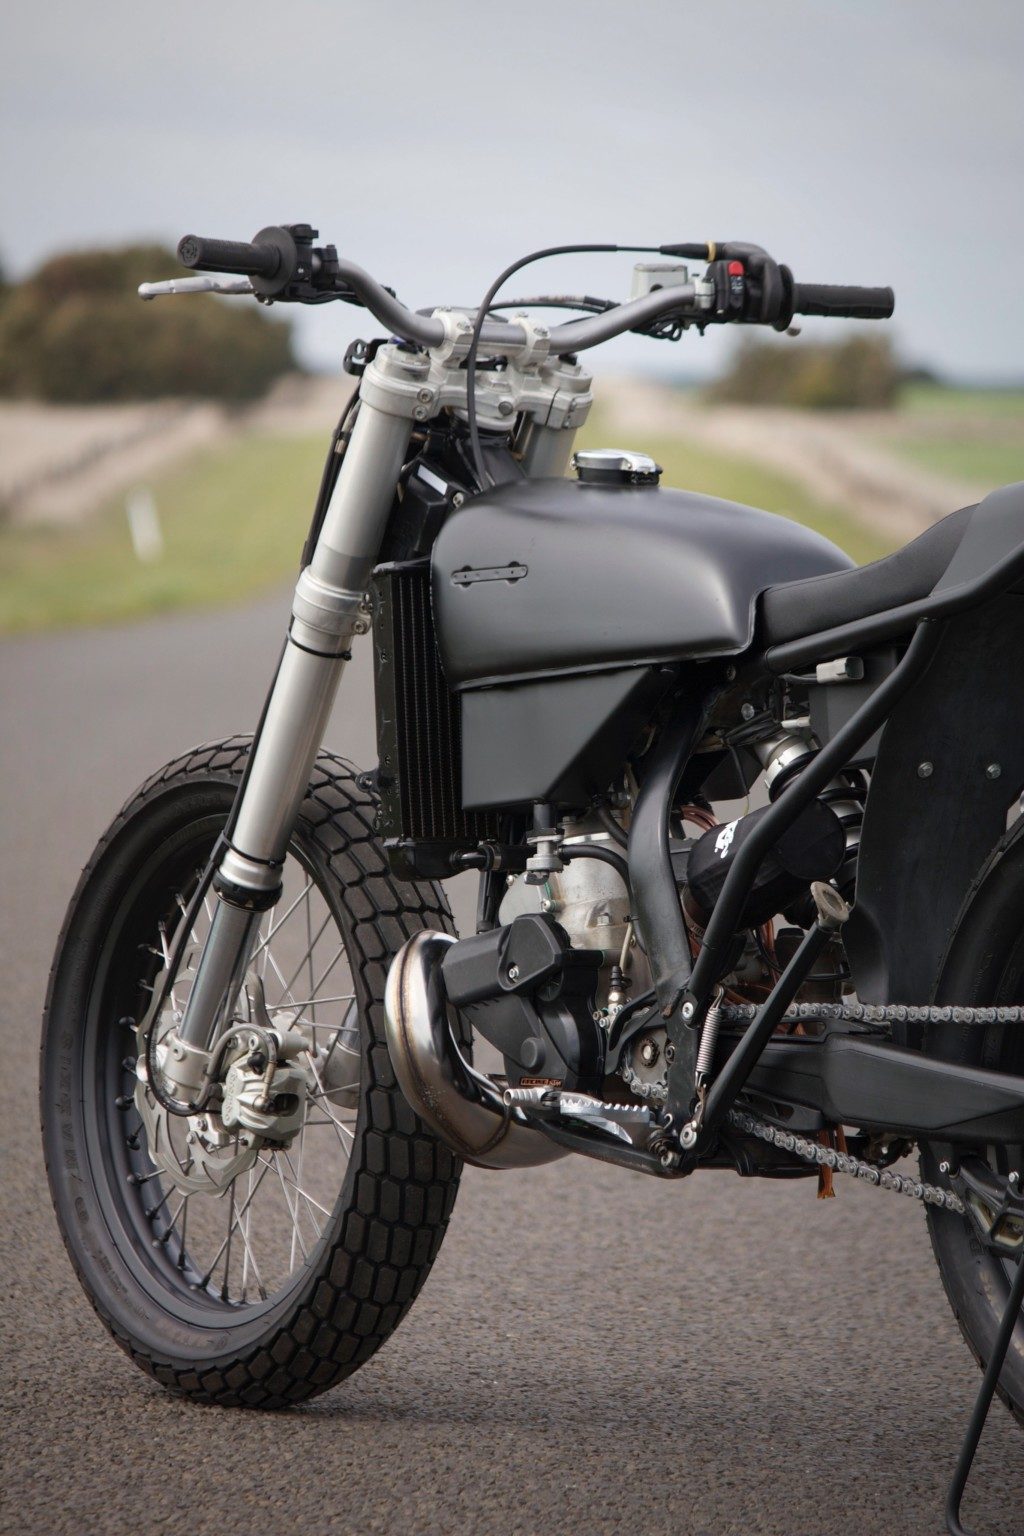
In keeping with Max’s lifestyle I needed this tank to hold more fuel than it already does, to add to that I needed reliefs for the radiators, I came up with a winged style of extra capacity that I folded up on my new folder (it’s so damn good) then welded them on with my new SWS TIG (yeah that’s bloody good too) I used the original tap so that the bike kept the original On/Reserve amounts to make sure running out of fuel wasn’t an issue.
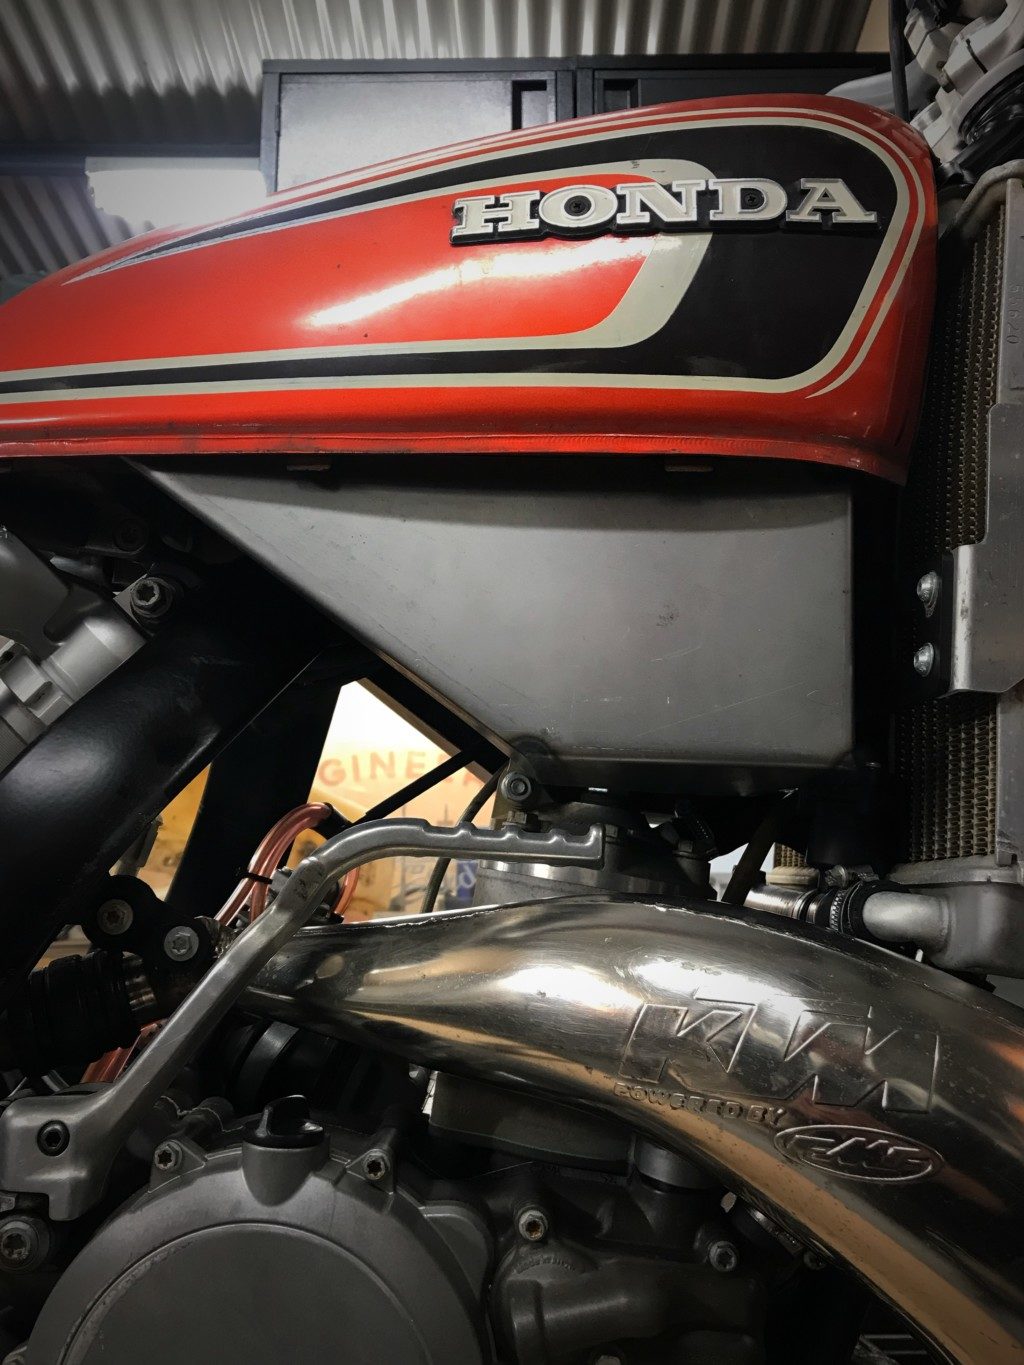
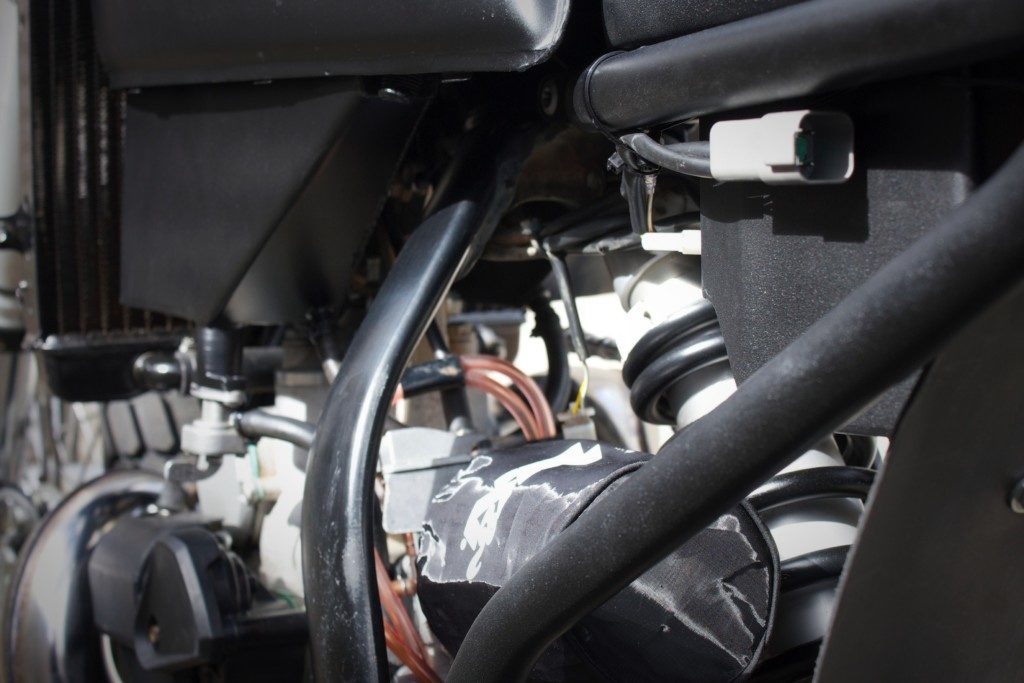
Oh wait…. back to those radiators…. I always always always put way too much effort into my bikes to make the lines flow, take it from me there’s no better place on a KTM to mount anything anywhere else than where KTM have already mounted it. Not to mention the mounting positions, the isolation of the rubber and the axis they are mounted on, this bikes about having performance first and foremost, then adding the styling around that to work in harmony. Again if you get that recipe right you wont be loosing performance by adding style and that is the aim of the game here.
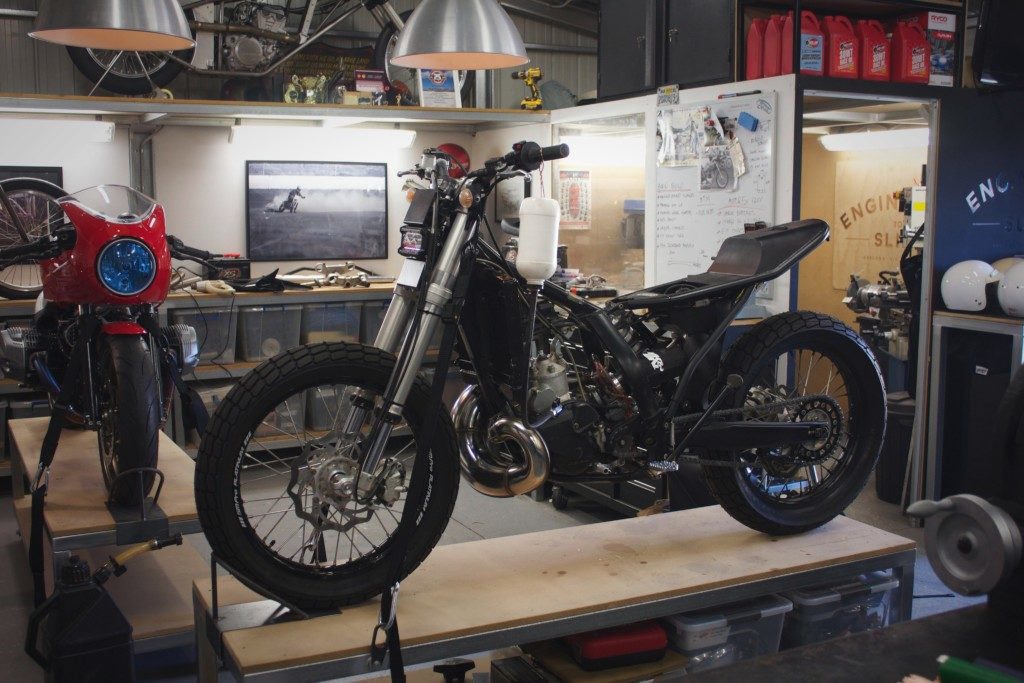
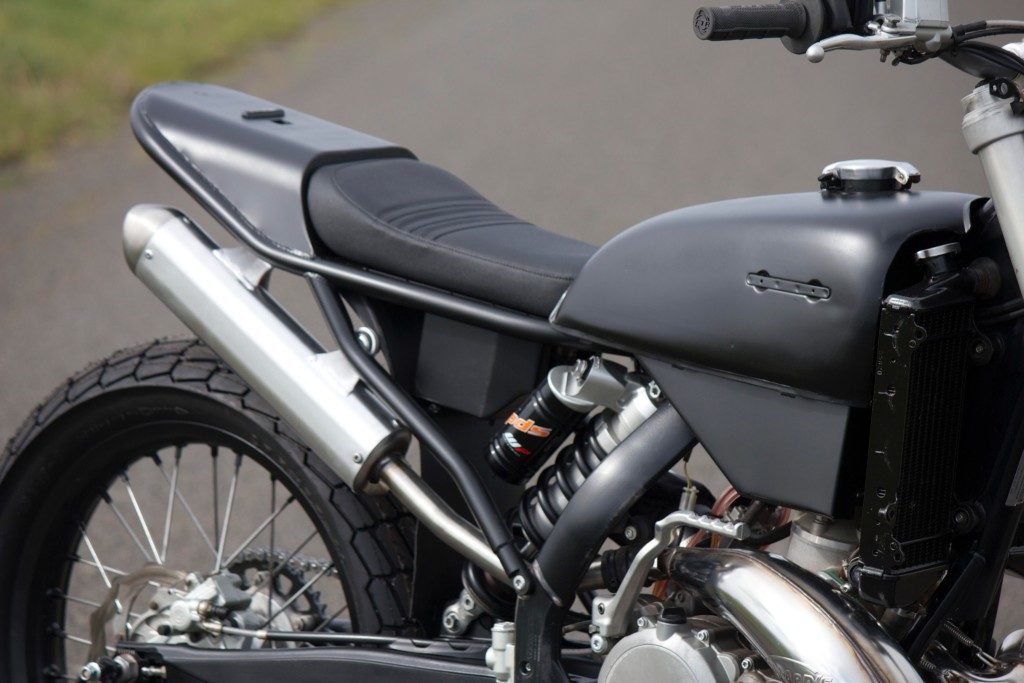
The subframes job is simple, it’s to give Max somewhere to sit, to hold the battery, to hang some lights, to hold a number plate and mount the exhaust.

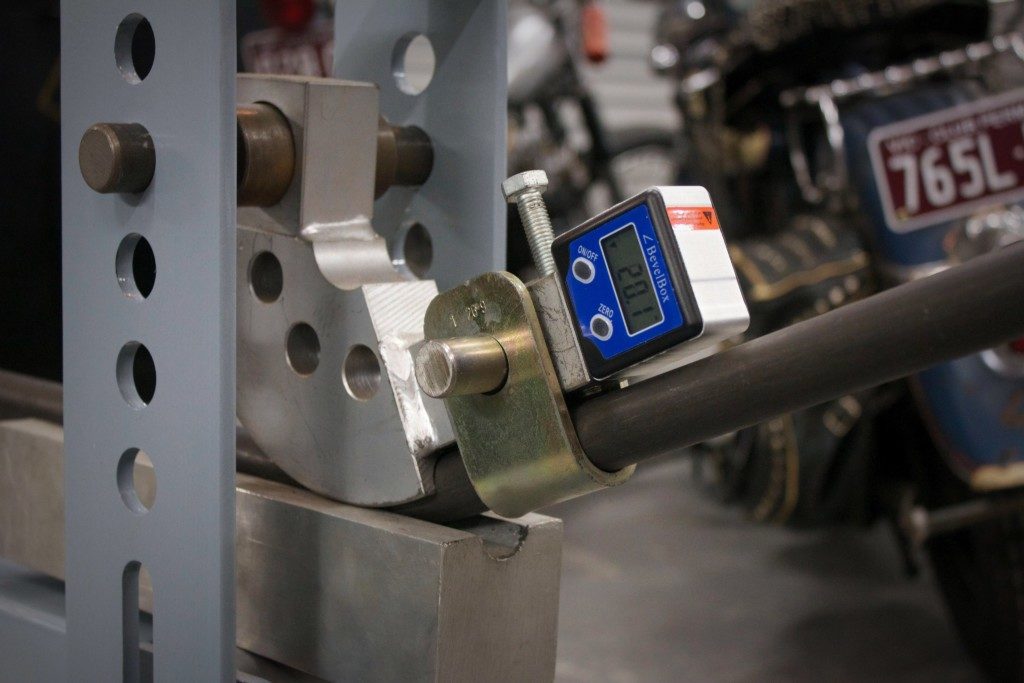
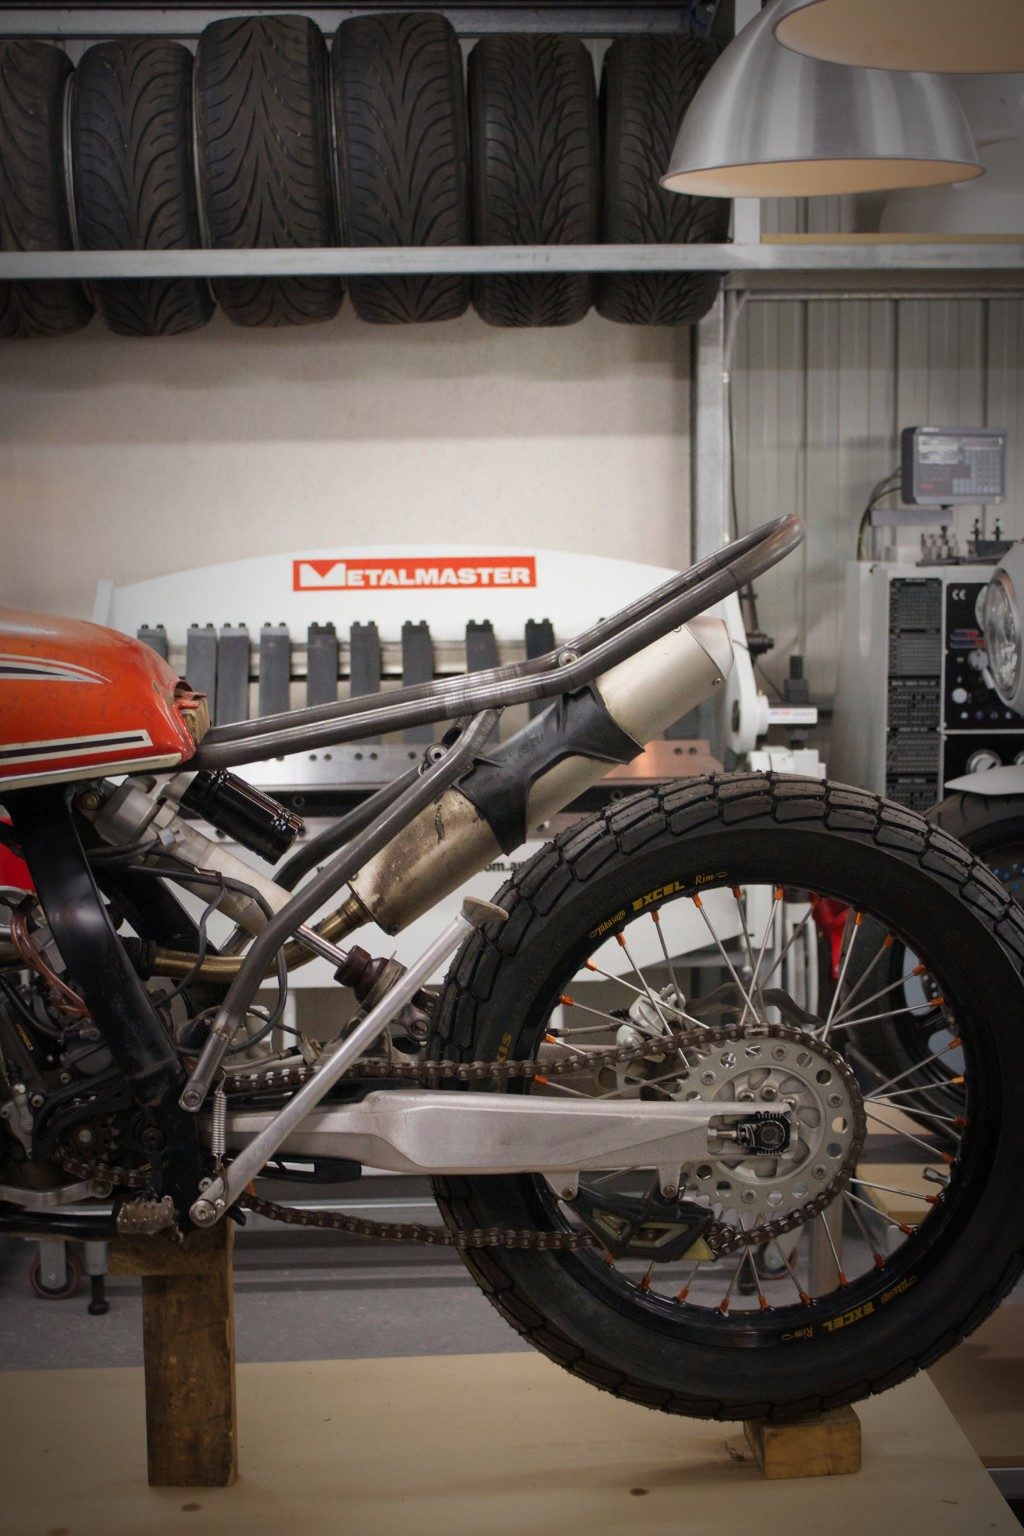
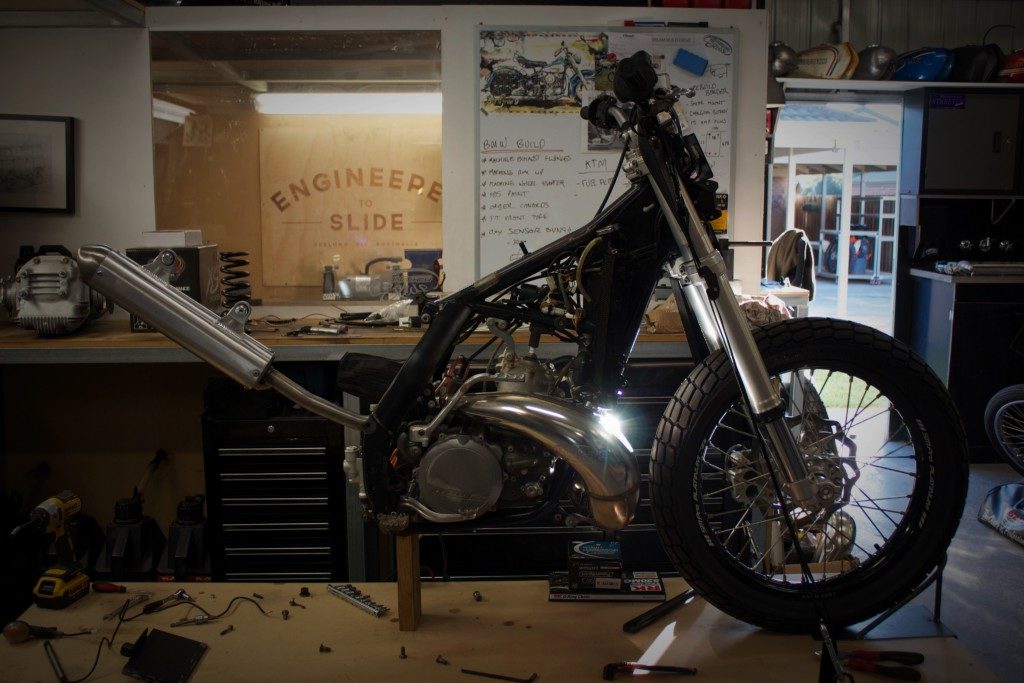
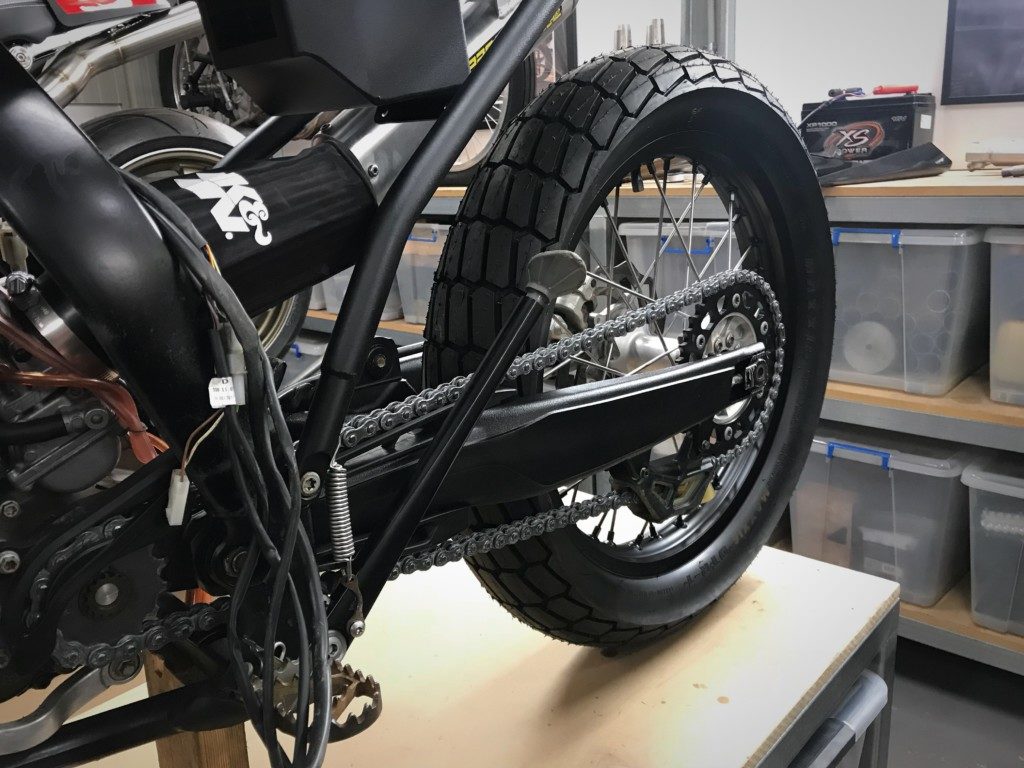
I took that mantra of placing everything exactly where it was before, in another first for me I used a factory exhaust and mounted it in a factory position. Using 1″ chromoly with a 1.6mm wall to bend up the supports and allow the factory exhaust (not to mention the upgrades that will bolt onto this) to hang in the exact same position as it always has.
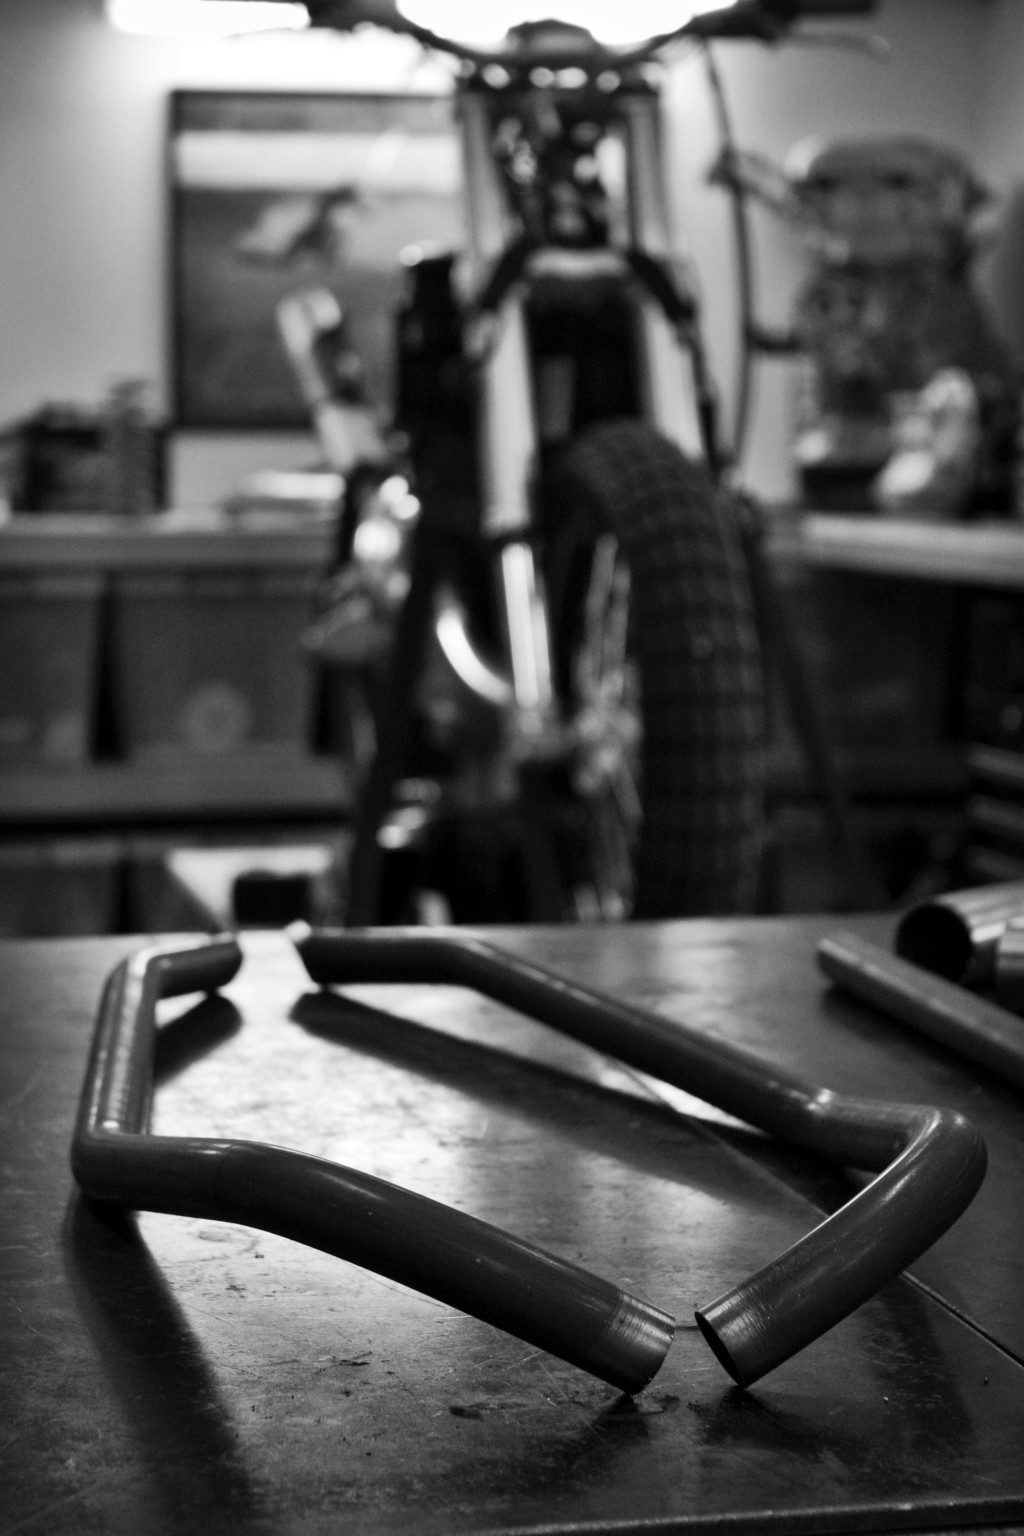
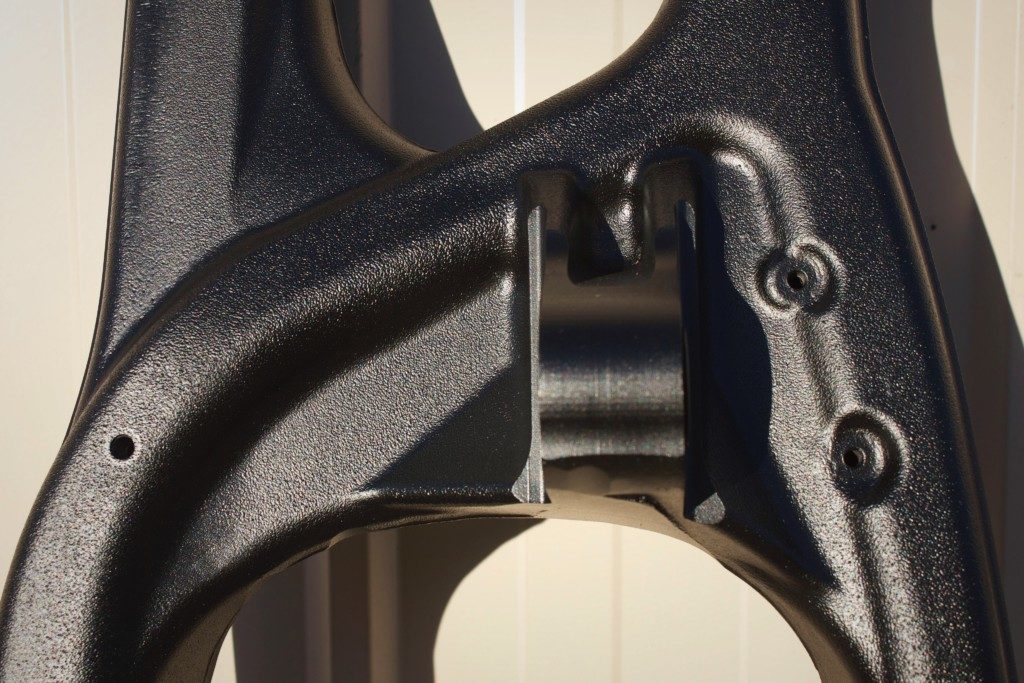
With the subframe rails all made up from chromoly I spent some time on the lathe and the mill making the mounting positions to suit.
One thing I am not scared of anymore is weight, I made these out of solid, yes that a bit slack but if you have ridden a 100kg bike on the road then you will understand the benifits in adding a little more weight.
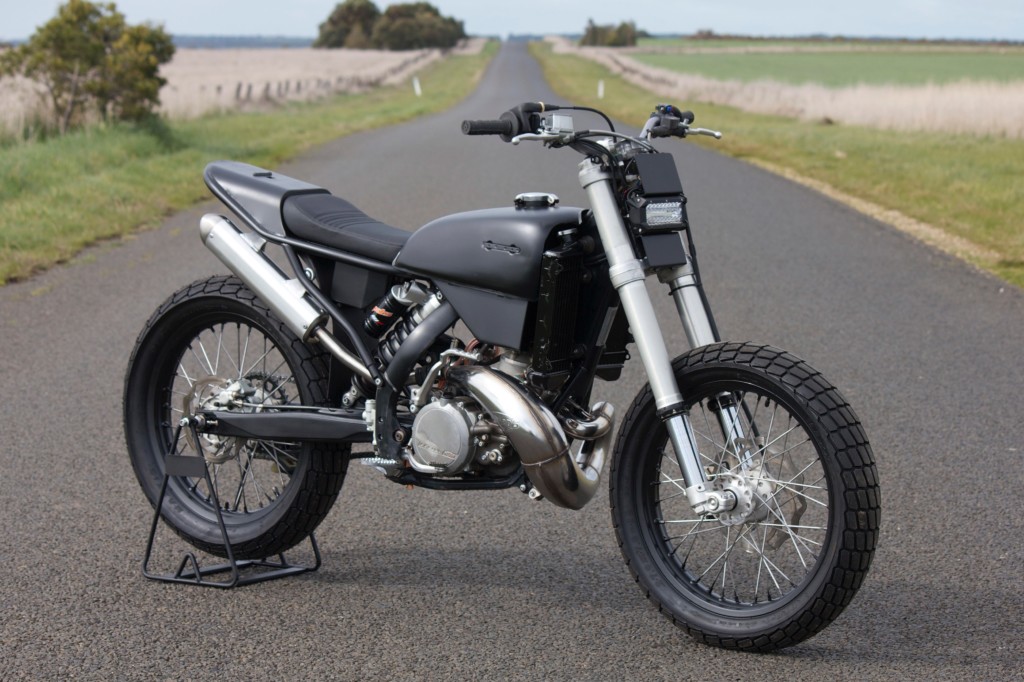
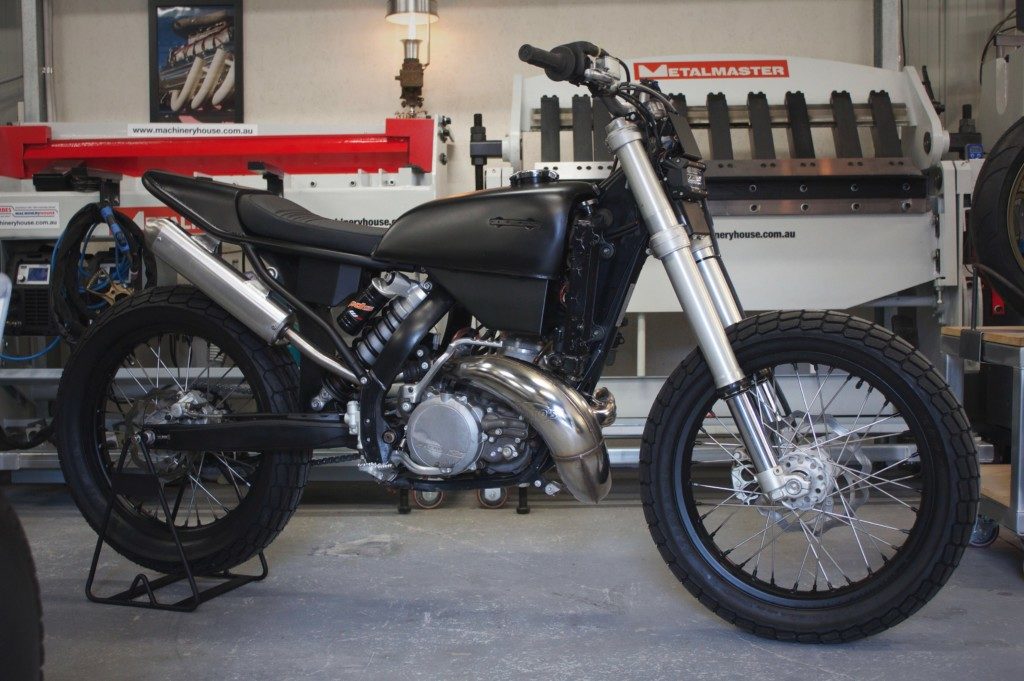
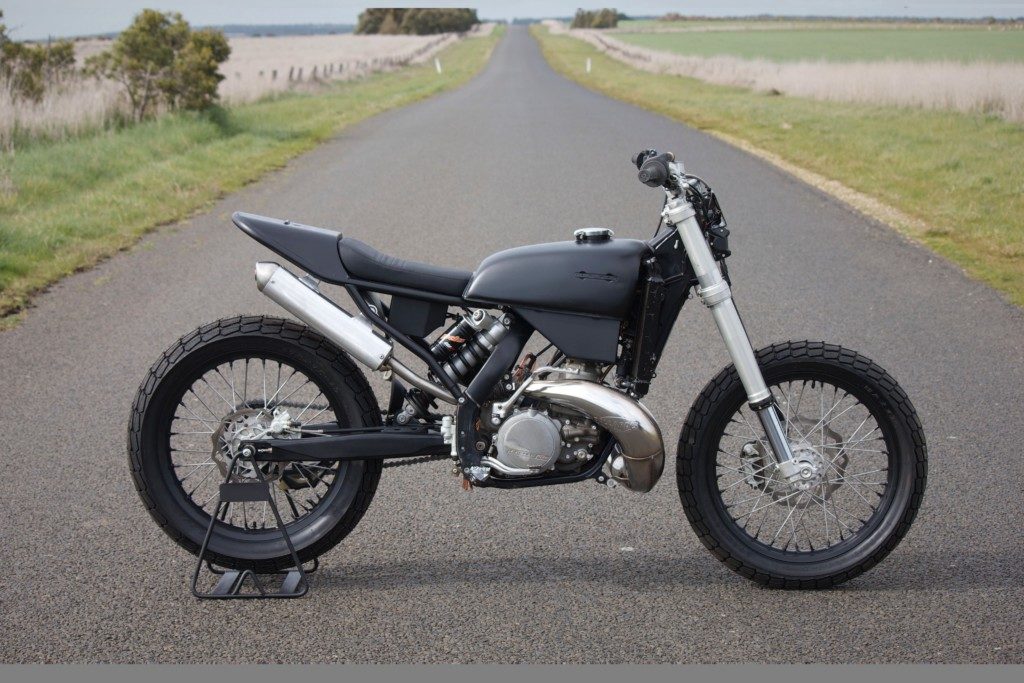
With the subframe rails done I rolled up some 1.6mm sheetmetal and spoke with Max about what he wanted in this styling department. He was after an Indian FTR1200 style rear end.
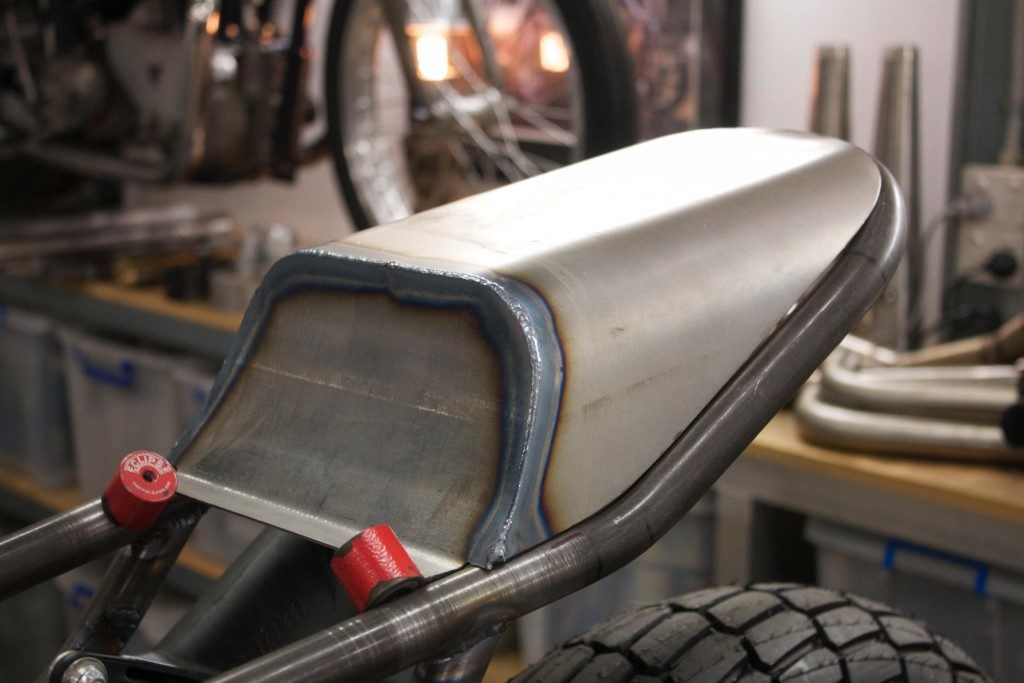
It is that classic flat track tail section with very light and sleek street bike vibes that scream modern day tracker.
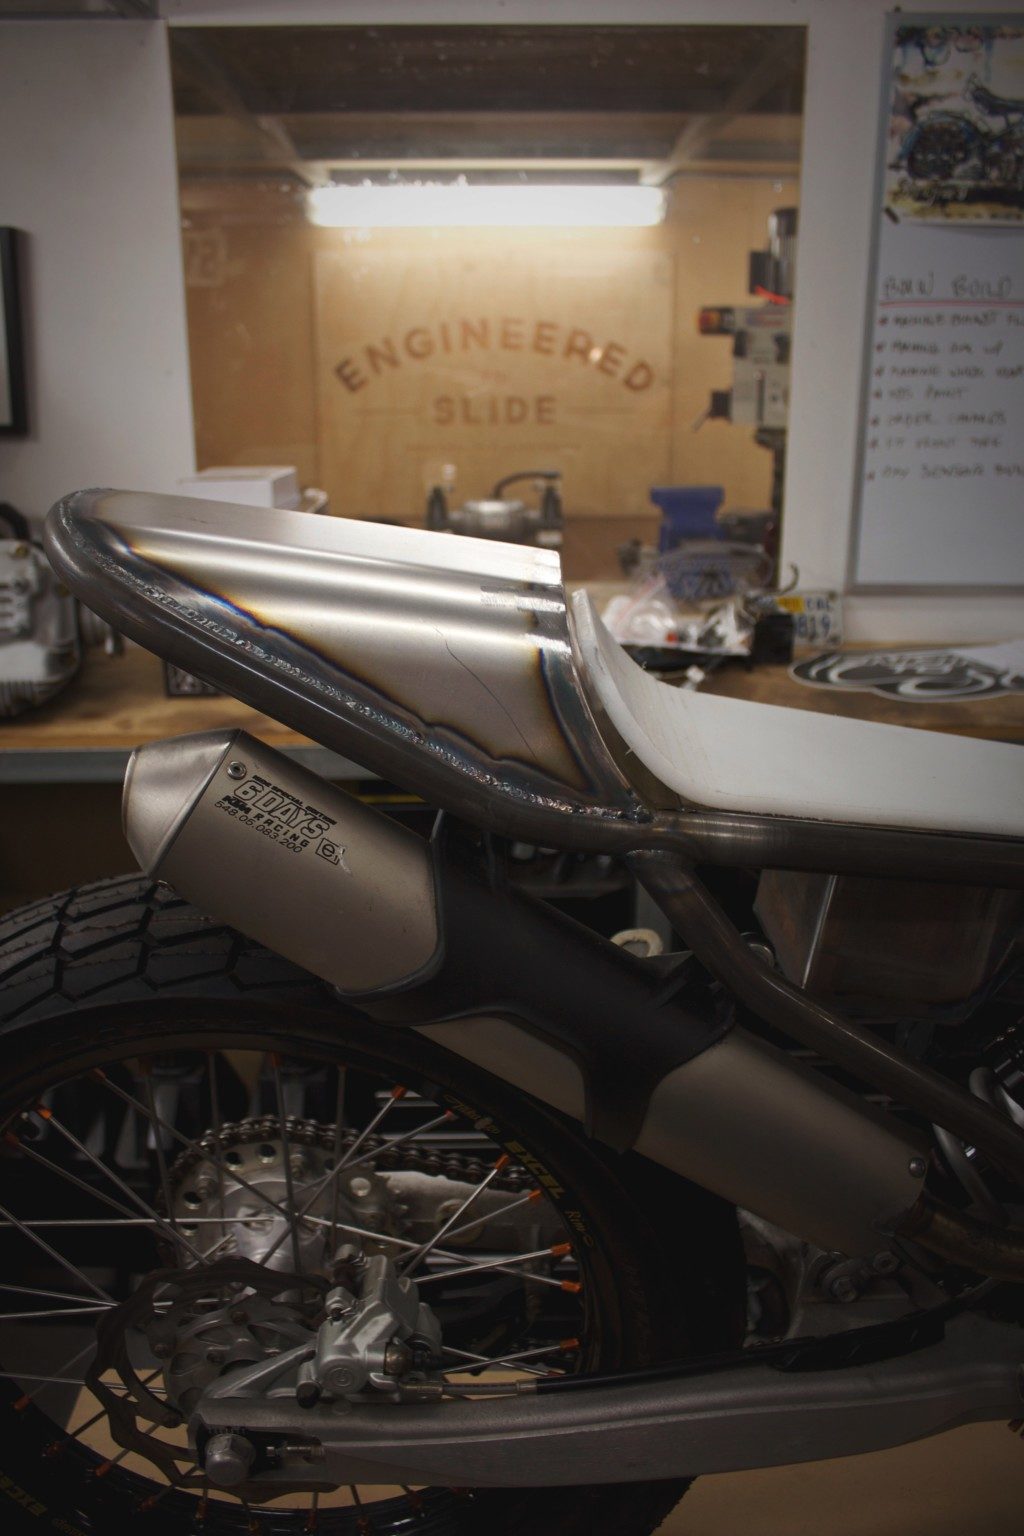
From there I made up a seat pan out of chopping board nylon, my trimmer KJF loves this stuff as he can just stick the foam on, shape it, then cover it and fix it with super strong staples. I bent the shape into it on my folder and then fixed it with a single 6mm bolt as per factory KTM.

With the shape all sorted now I had to make it all work, I added a simple battery box that housed a Lithium battery that was isolated from the frame, I love working on these bikes as the electrical package is about as good as it gets, simple and well made!
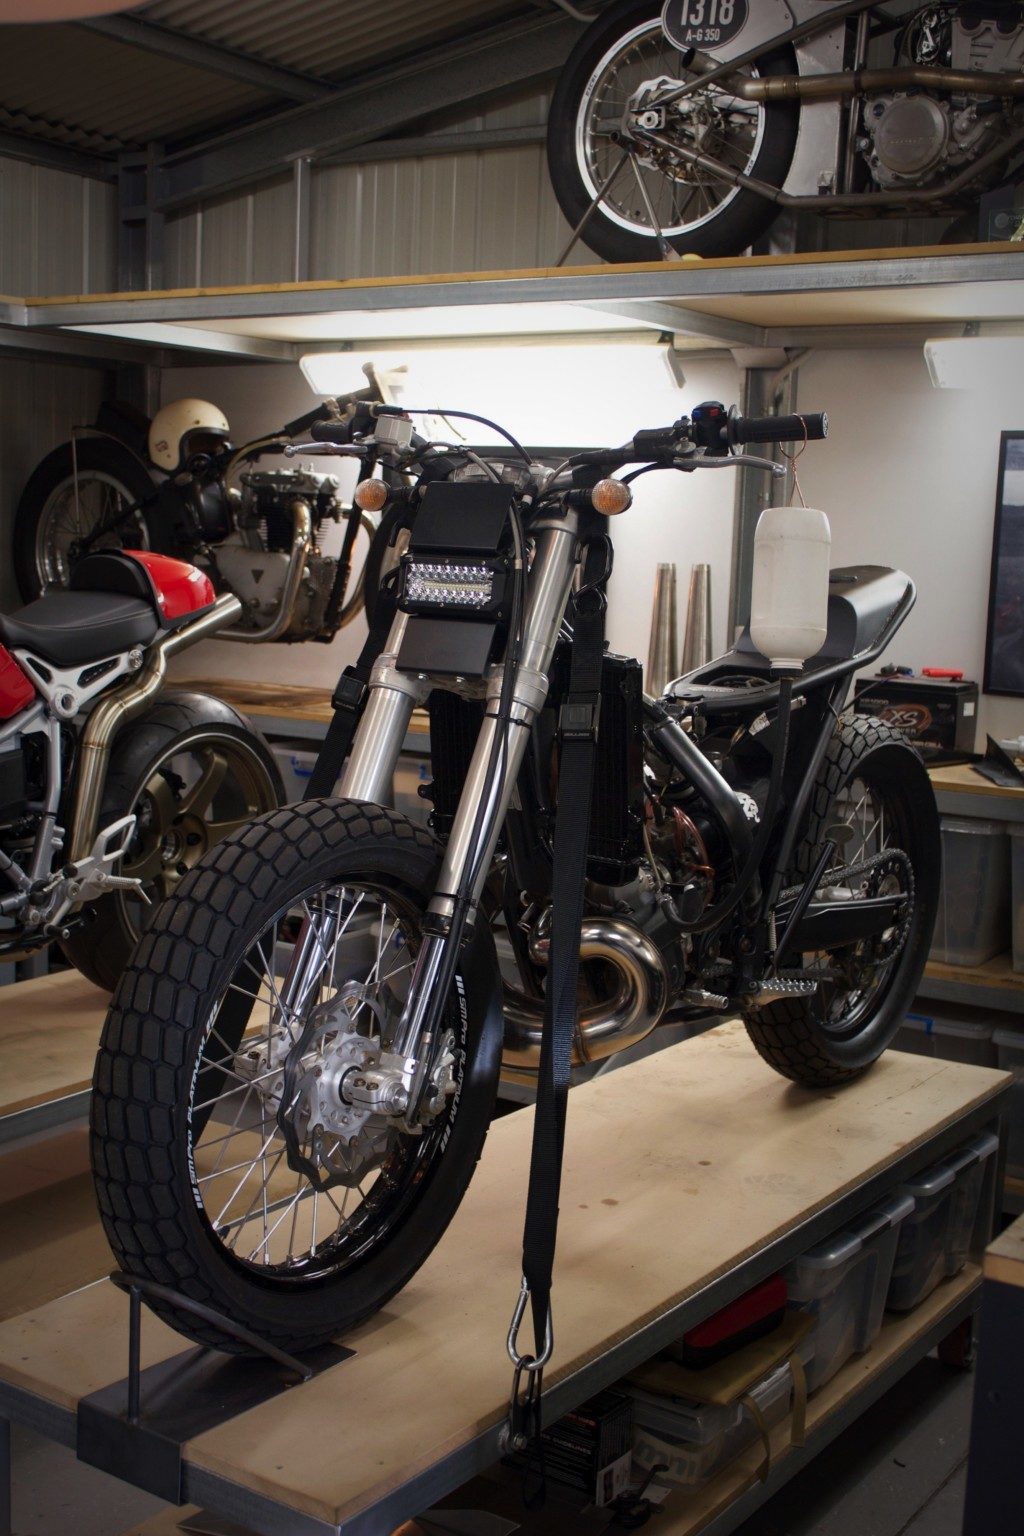
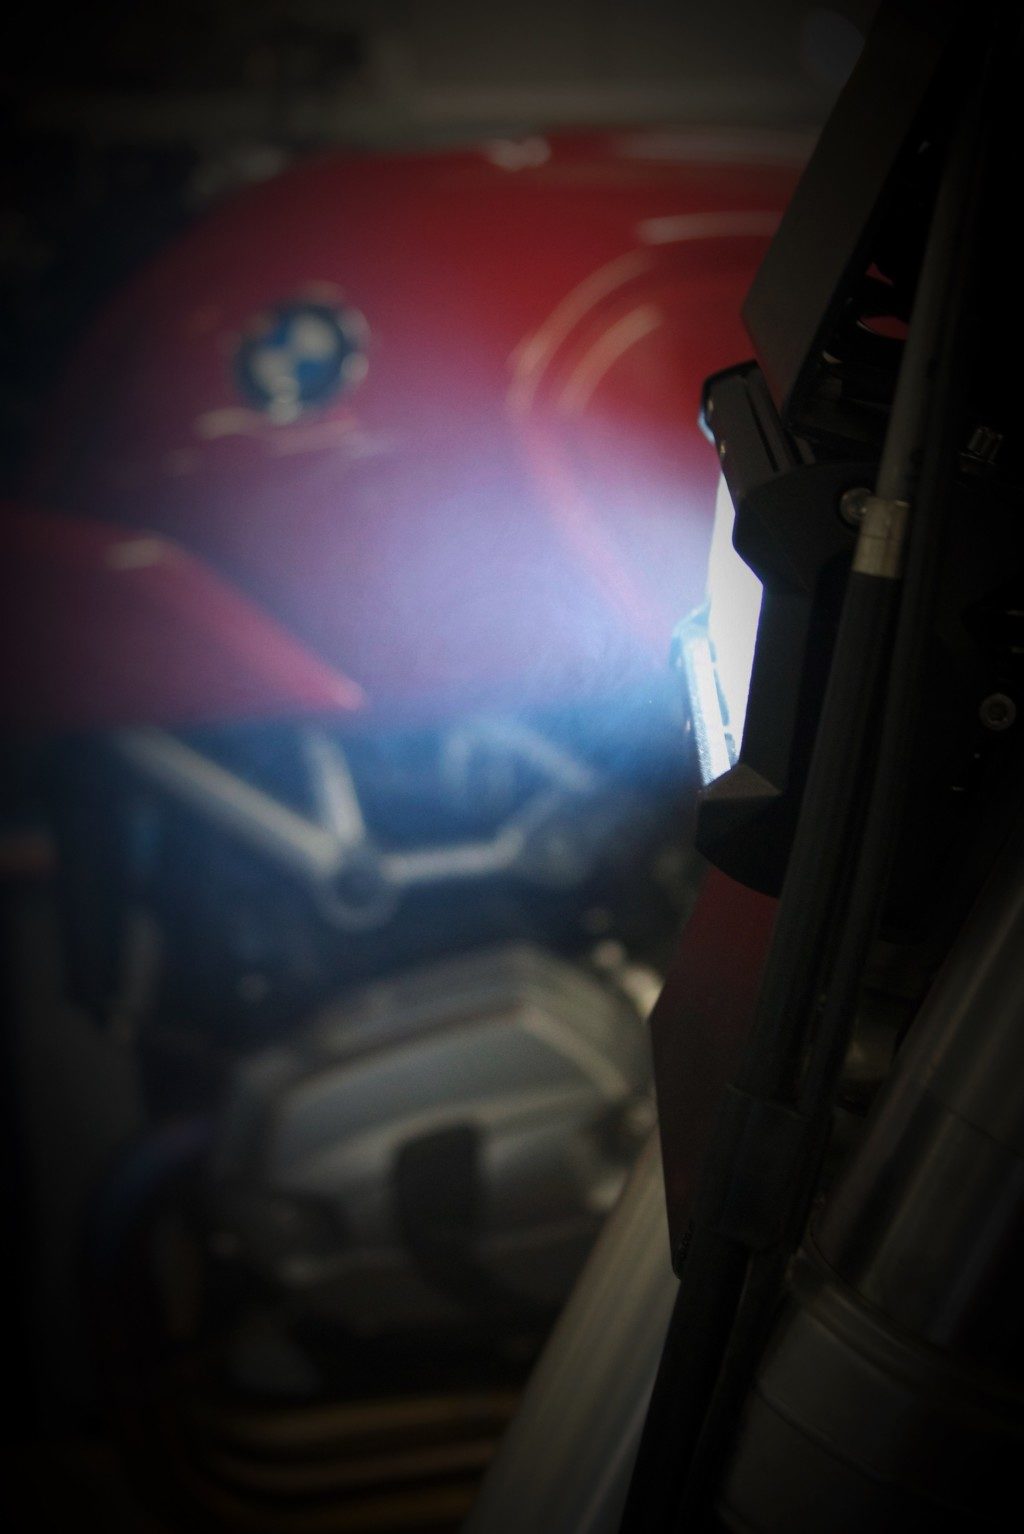
Up front I added an LED Spot/Flood light into a custom alloy 3mm surround that keeps the bike simple and stylish while being purposeful and a little different.
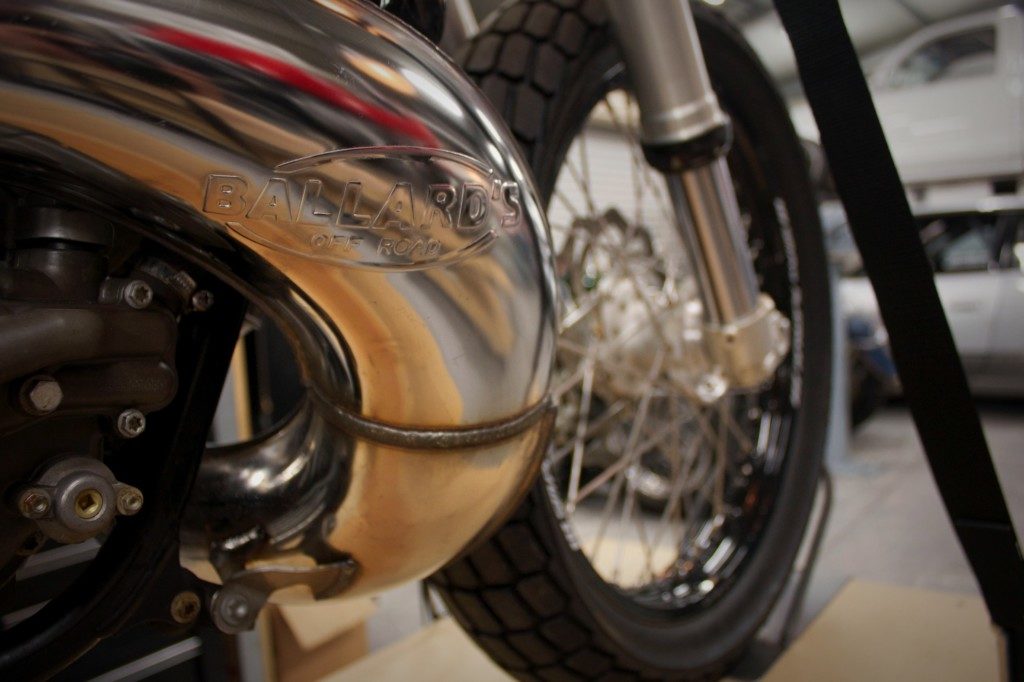
I was at that point where I needed to start finishing off a few items, it was in a timely manor that my MX Store order arrived, the good guys at MX Store supplied the bike with a new heavy duty and beautifully fabricated Ballard’s expansion chamber, a Pro Circuit muffler (those stock mounting points just paid off didn’t they) new chain and sprockets in 14-40 and that Lithium battery I made the box for earlier.
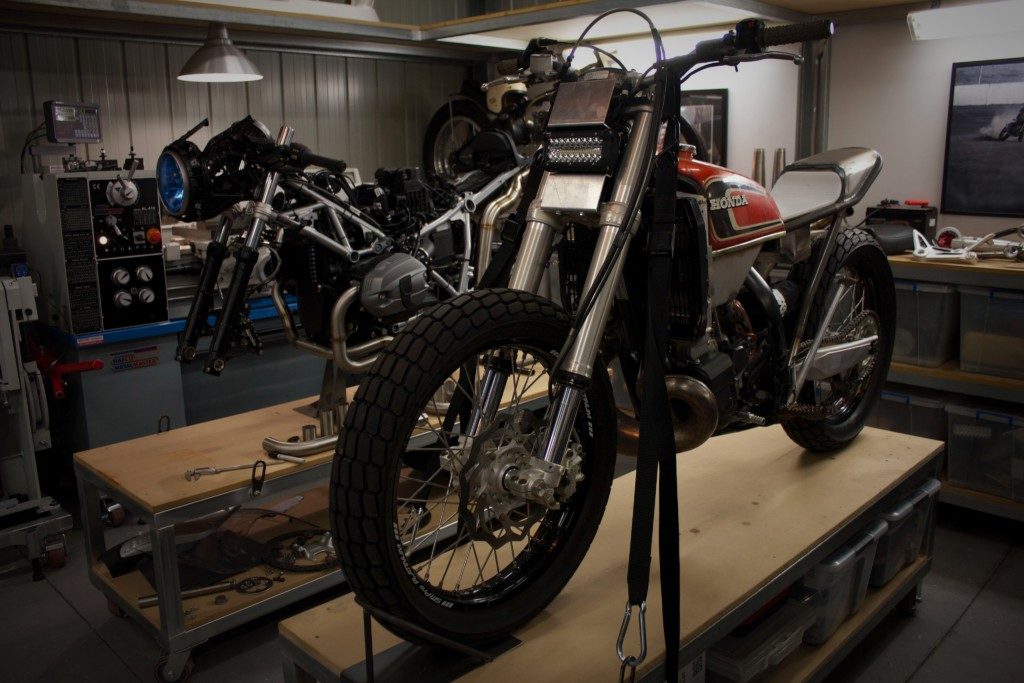
I pulled the bike down and started to plan the finishing touches. I removed the tank, subframe, headlight surround, swingarm, stand and prepped them for paint.
It was a weirdly warm day for this Victorian winter so I made the most of it and sat all the parts in the sun ready for paint. I selected some Satin Black engine enamel spray cans, I love satin black as it accentuates lines but at the same time masks imperfections, when the sun hits the bike it makes the shape and construction methods shine rather than the flashy paint.
I have always been a firm believer in making something spectacular then winding back the colors to simplify and accentuate the shape.
The problem with powdercoat is that you loose the factory texture aswell.
To filter the air for this big 2 stoke I ran the largest K&N filter I could find. I love K&Ns chart of available filters, I first measure the carb flange to get the diameter I need then find whats available in that size, I always add a waterproof cover as well as it seems to act as a first line of defense and literally halves the amount of filter cleaning you need to do.
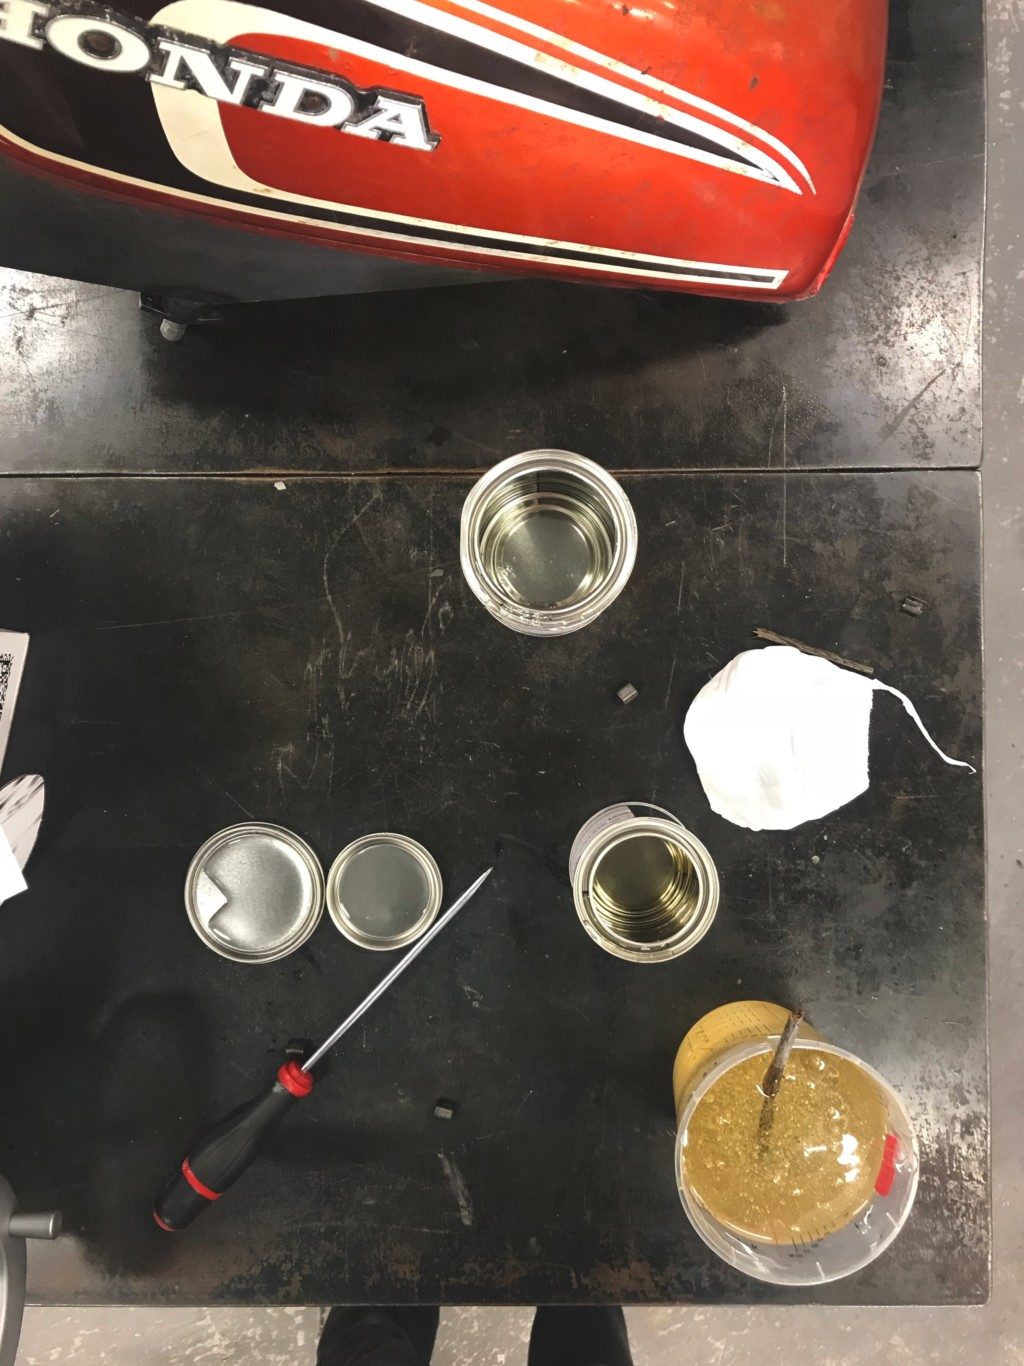
I added a Caswell fuel tank bladder/ sealer kit to the tank for two reasons. The first is to prevent any thin spots eventually wearing through from vibration and the second being to stop the resonance from the engine making its way through the tank and making all sorts of noises. I paid special attention to the tanks mounting positions and made it exactly the same as KTM using the two isolated slip joints above the head of the motor and then a 10mm isolated stud at the back of the tank.
With everything painted I could put it back together, I even painted the rims to get rid of the anodized spoke nipples, another advantage with spray cans is repairs are super simple, just shake up the can and get crafty with it.
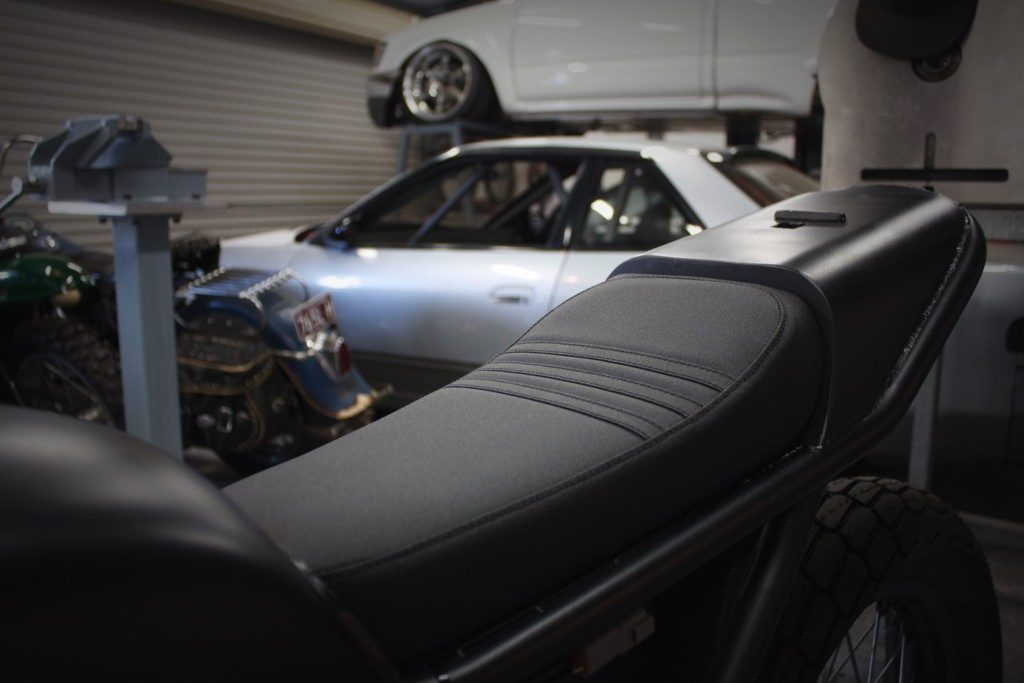
Kris from KJF Trimming pulled out all the stops and supplied me with the seat in just a few hours. The three lines pays homage to the current factory KTM race bikes and will offer some further support to Max as he tries to tame this beast.
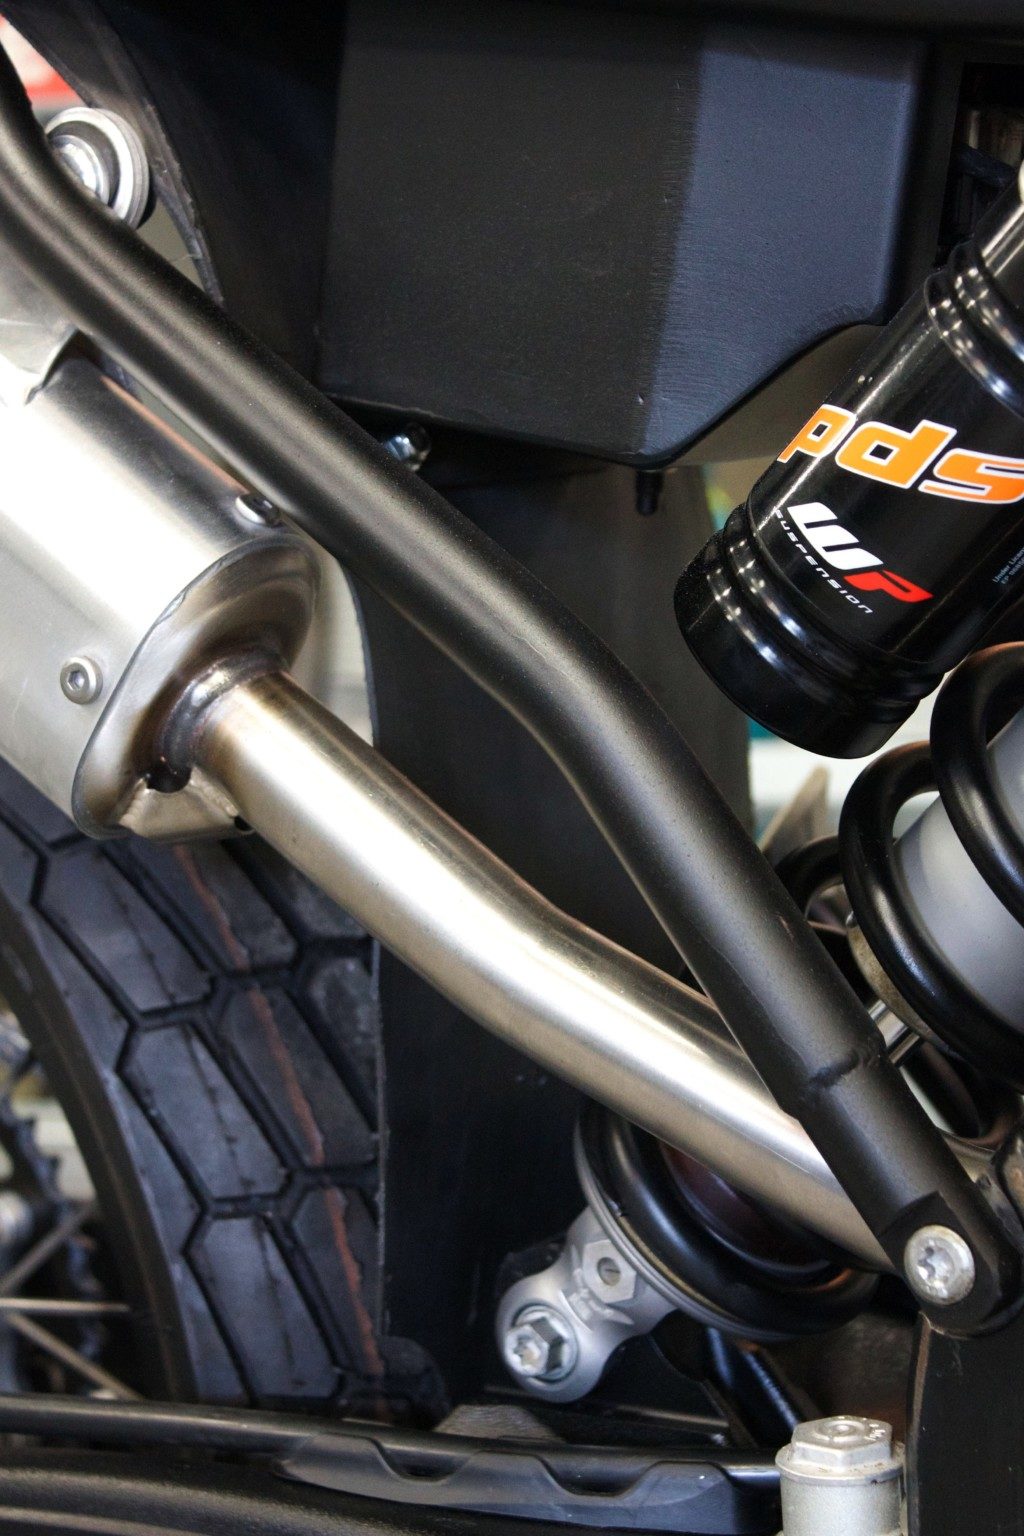
While the forks were out I pulled them down and machined up my 125mm lowering sleeves (20mm OD and 12.5mm ID from memory) and 25mm rear shock sleeve (40mm OD and 19mm ID) with oil reliefs. I took the shock to JCS Suspension for some fresh fluid and a regass.
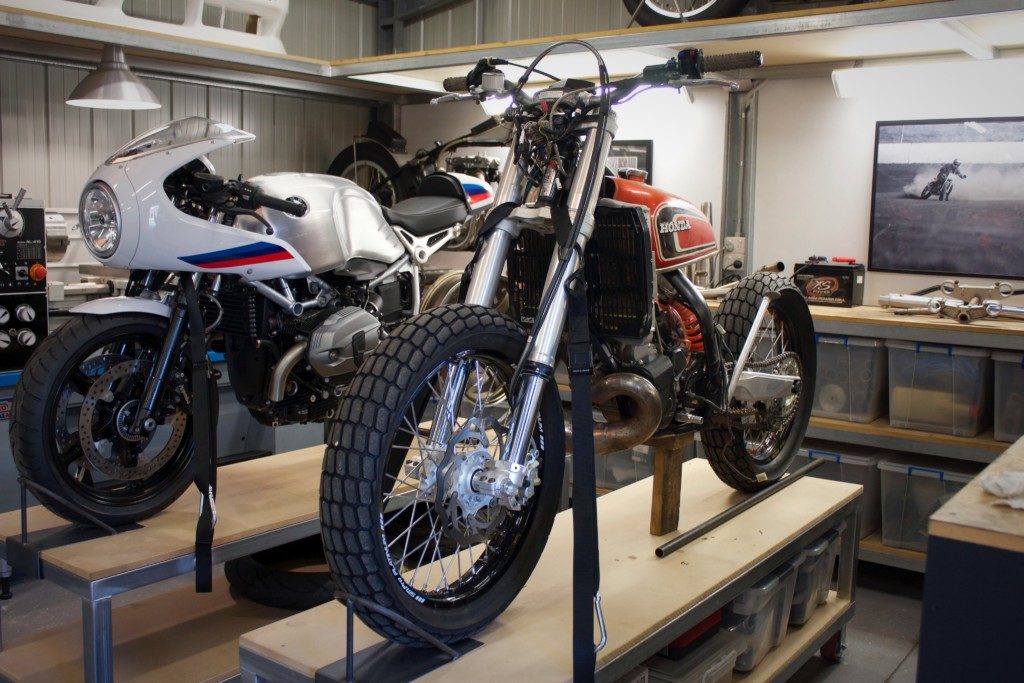
The bike started taking shape, I was getting pretty excited.
I made up a tail light setup that bolts on with one 6mm nut, then plugs into the 6 pin socket under the seat, I added a quick release number plate mount with LED light, then needed to test it all.
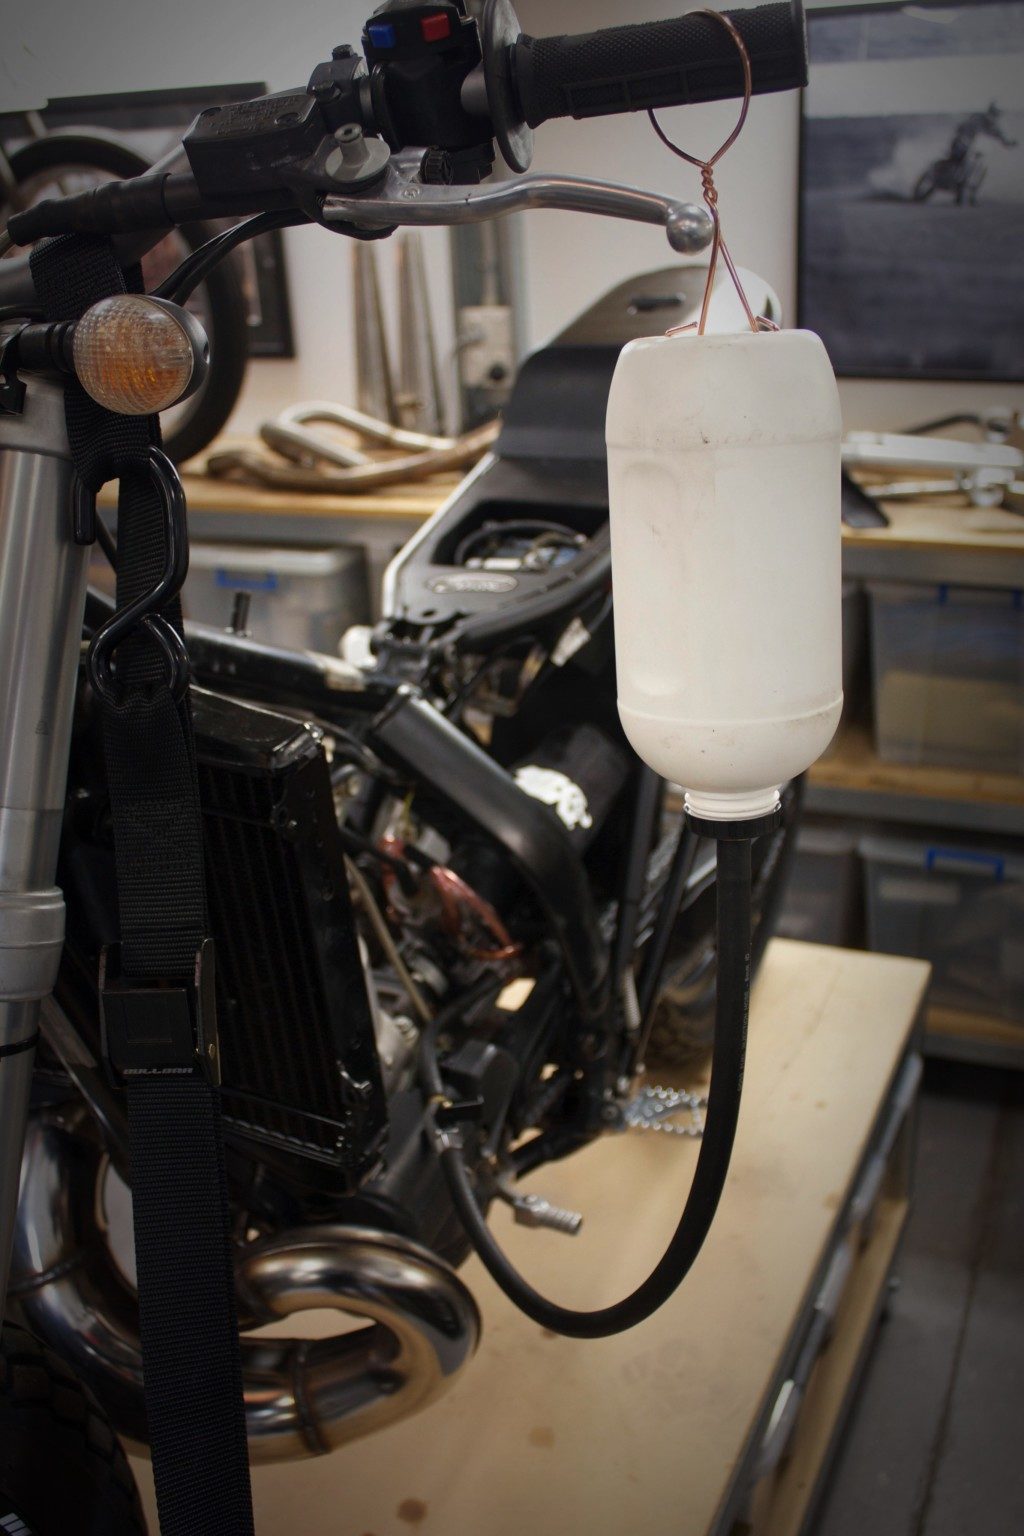
I added some Red Line 2 Stroke racing oil at 40:1 into my fuel drip that hangs from the bars, gave it some choke and kicked it to life.
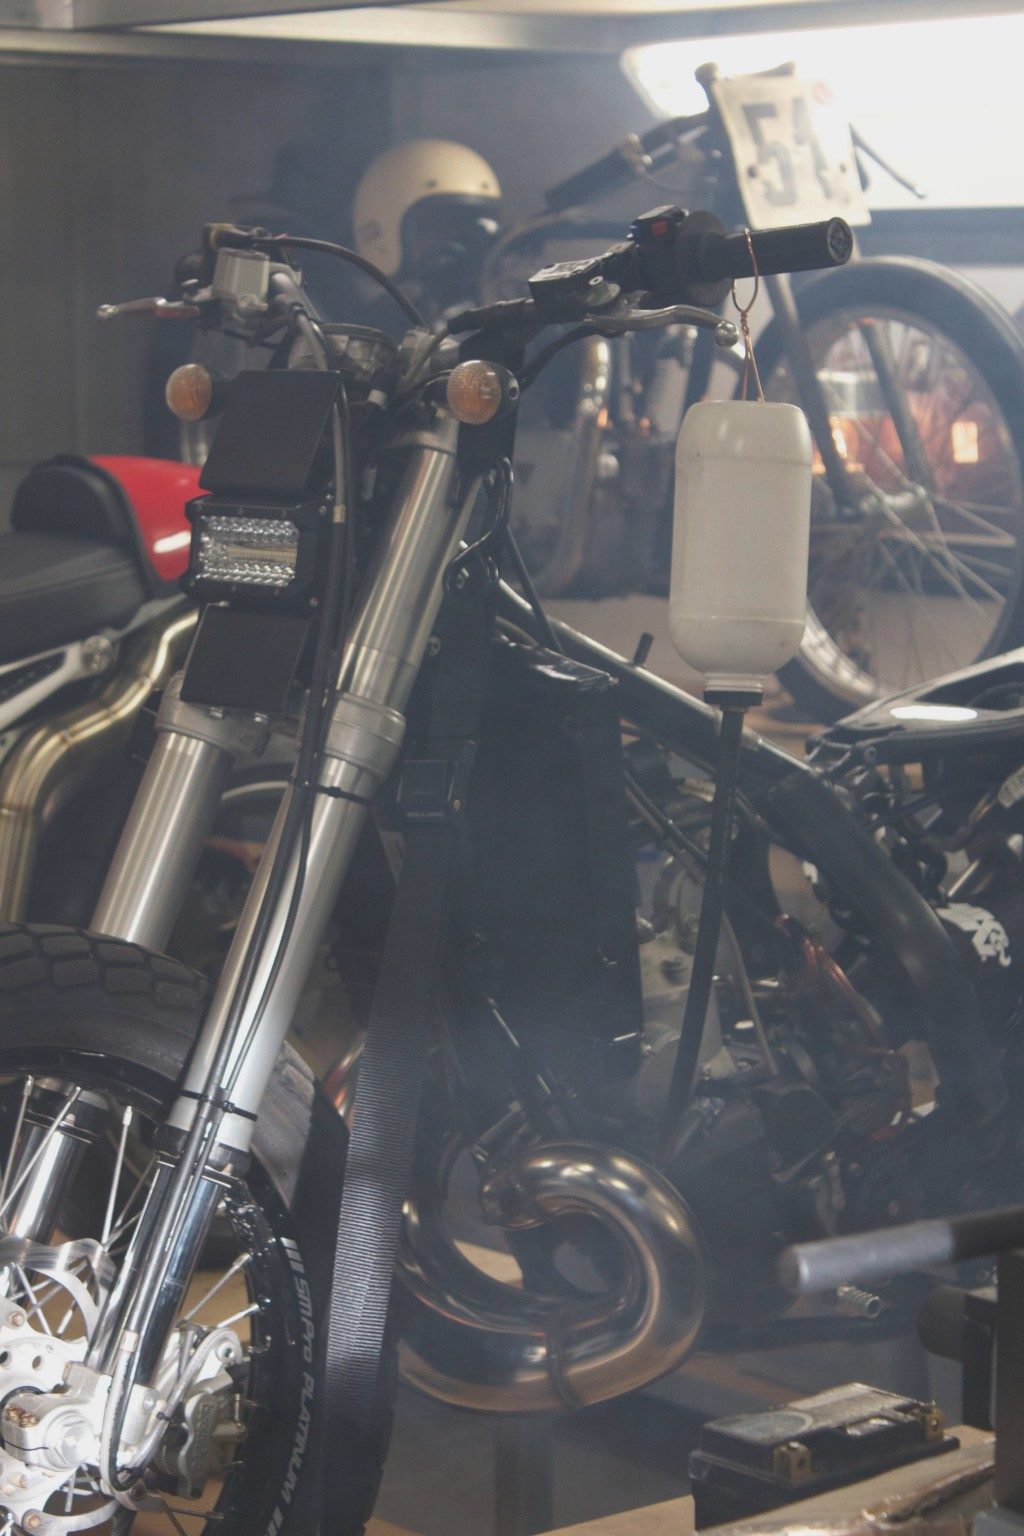
In a matter of seconds I was transported out into the back paddock of my childhood home, rolling around on my KX80 burning up pre mix and having the time of my life. If you grew up on 2 strokes then its something that never ever leaves you.
A quick check of the lights and it is finally time to put the tank on and let this bike see the light for the first time in over a month.
I load up the bike and take it out to a private road near my house, it’s always a special moment between man and machine and it’s the time where my ideas and calculations are proven to be good or bad.
I fire up the bike, select first gear and give it a warm up, the gearing is perfect, I am doing 100kmh in 5th gear easily and still have another gear available.
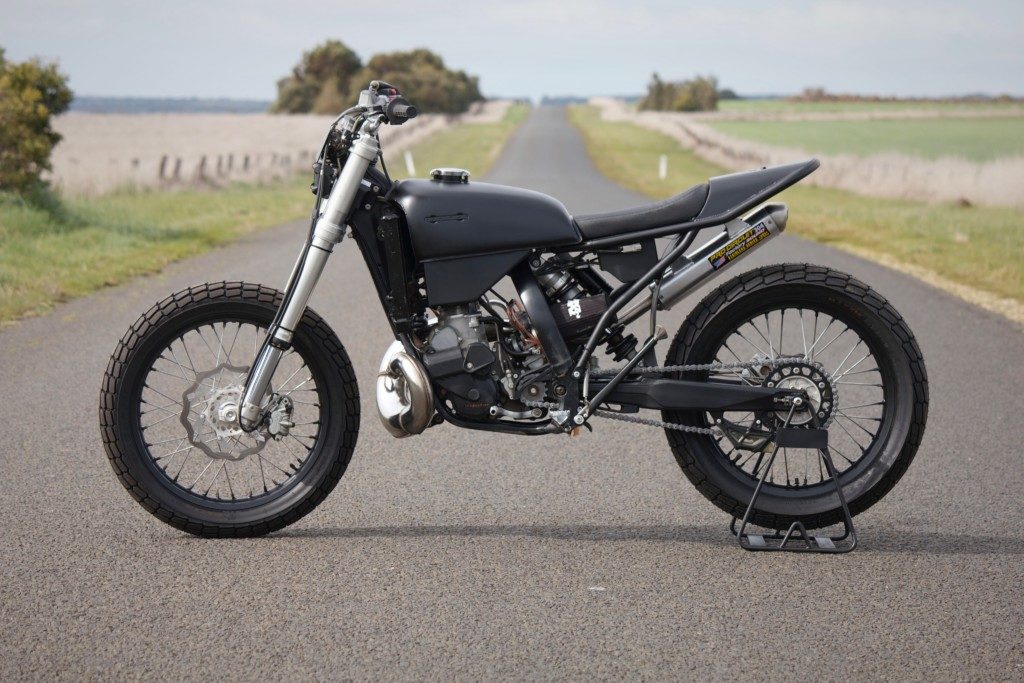
The power is strong, the filter doesn’t seem to be killing it at all, I start to really test the bikes capabilities, top of 5th and into 6th sees a little over 160kmh. My Land Speed Record bike ran 200kmh and I can see the same potential in this, they are worlds apart and I love this 2 stroke for all of it’s capabilities. These brakes need a little attention but Max can work that out in time.
I run up and down the road, each time the van comes into sight I have every intention to load it up and call it a day, but I just grab another gear and prolong the good times.
I think every single bike I build is better than the rest, I think this ones different because the build process was so enjoyable, I kept Max updated with every couple of hours I spent on the bike. I know if I was in his shoes that is what I would want to see, I wanted him to be a big part of the build so that he both saw the process and could change the direction if he needed. Lucky for me we are on the same page and he was just as stoked with everything as I was. To add to that the new workshop machinery, the support from places like MX Store, Red Line Oil, JCS Suspension and KJF Trimmers and their own enthusiasm to help me make the bike the best it could be was something else.
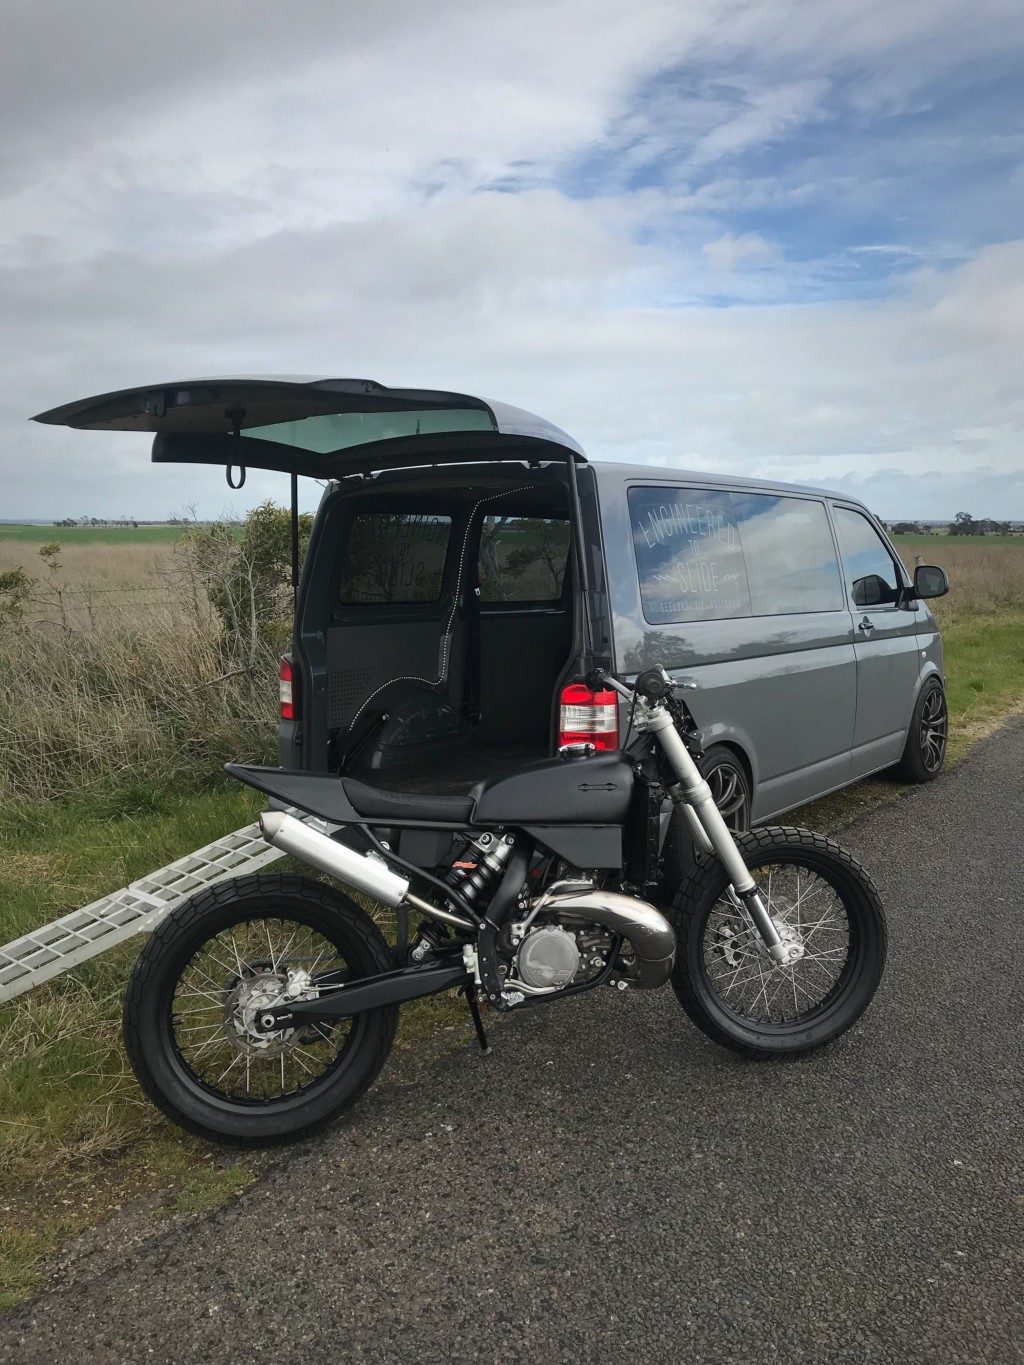
As I write this the bikes in a truck bound for QLD, the payment halves the debt that I am for the workshop upgrade and I have another bike in this world that I am truly proud to have brought to life. I want to thank Max for entrusting me with the process, for initially reaching out to me and throwing me the keys to his back yard in QLD, to having the vision for this build and the means to bring it to life.
Your in for a good time Max, if your in QLD head to your local events like Dust Hustle or Day in the Dirt Downunder to see it in real life, I will do my best to make it up there and continue the good times in Paradise!
As always thanks for reading!
Pingback: Akin Moto KTM 300 Street Tracker – BikeBound
Pingback: The Akin Moto KTM 300 Flat Track - Chop Feed