You know the old saying…. Progress is impossible without change? Well that’s me right there, always in a rush to progress, so I am always in a rush to change, always searching for a better way to do things. I think it’s the biggest thing I have learnt over the years, never ever give up on an idea, if its too difficult then just work through the thought progress, educate yourself and go for it. Even if you do fail then you still progressed, still learnt what not to do, stuffing up is inevitable but still valuable, the path you need to take always becomes clearer through simple progression, good or bad.
Social media is quiet possibly the reason most of you have visited this site, I love posting stuff in the spur of the moment but always hate not adding the detail that people need to truly understand what I am doing. But that’s what this site is for hey!
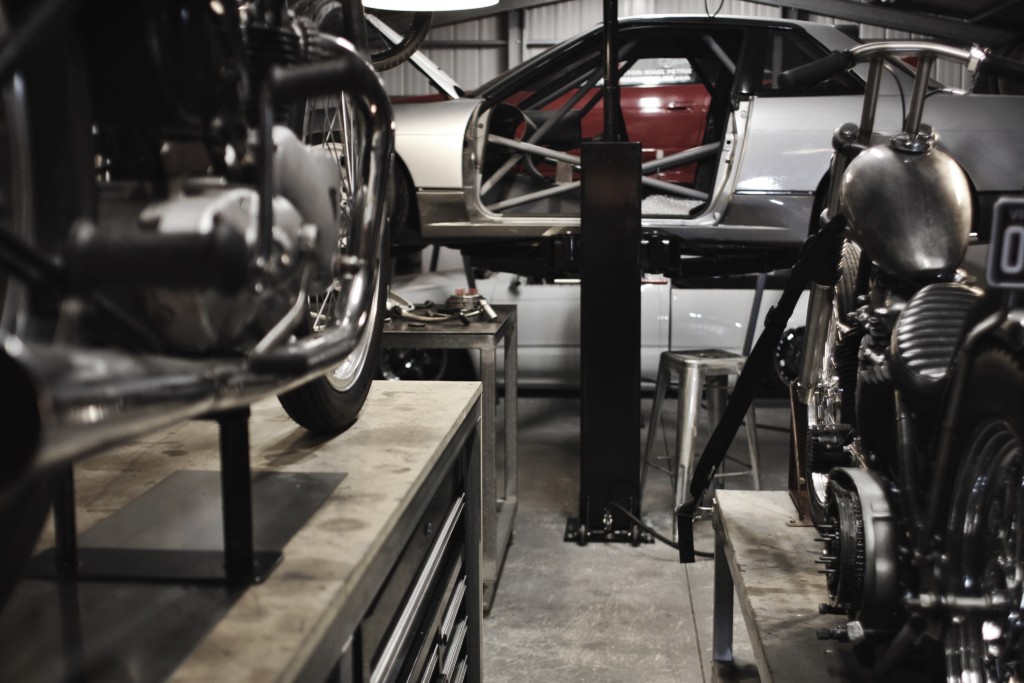
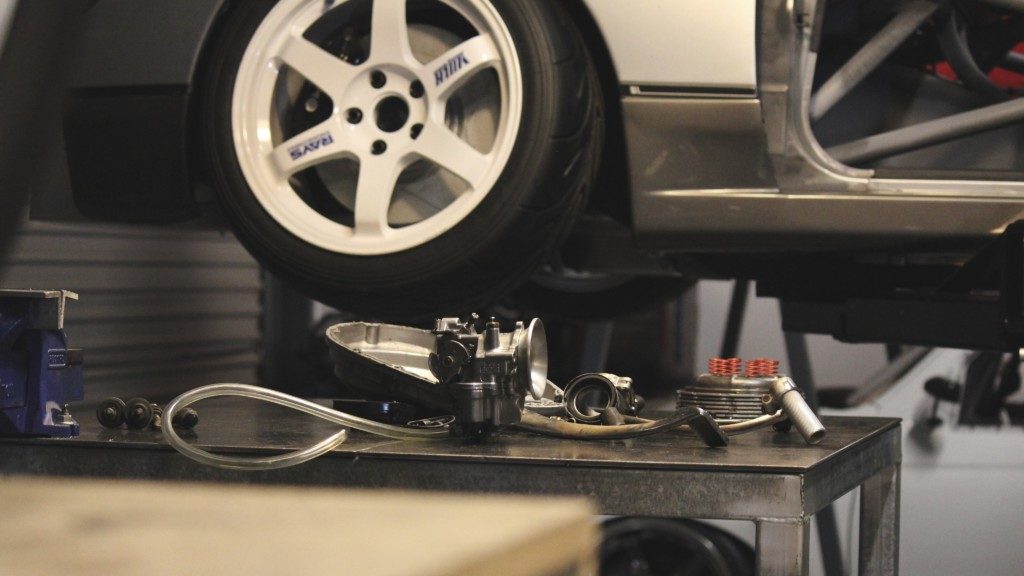
I have had hundreds of DMs about this car stacking setup I have made, I have tried to reply to most but I guess I need to run over the detail again. In short I have a MaxJax car hoist, I bought this because I loved a heap of things about it.
– It is a clear span hoist, that means nothing above or below the hoist that governs it’s set distance or nothing to try and push the car over.
– The fastners are female and sit below the surface once drilled into the concrete so when it’s removed there is nothing sticking up (not like dynabolts)
– The hydraulic unit is portable and 240V so it is as simple as a powerpoint and two lines. These lines are quick fit dry break units too.
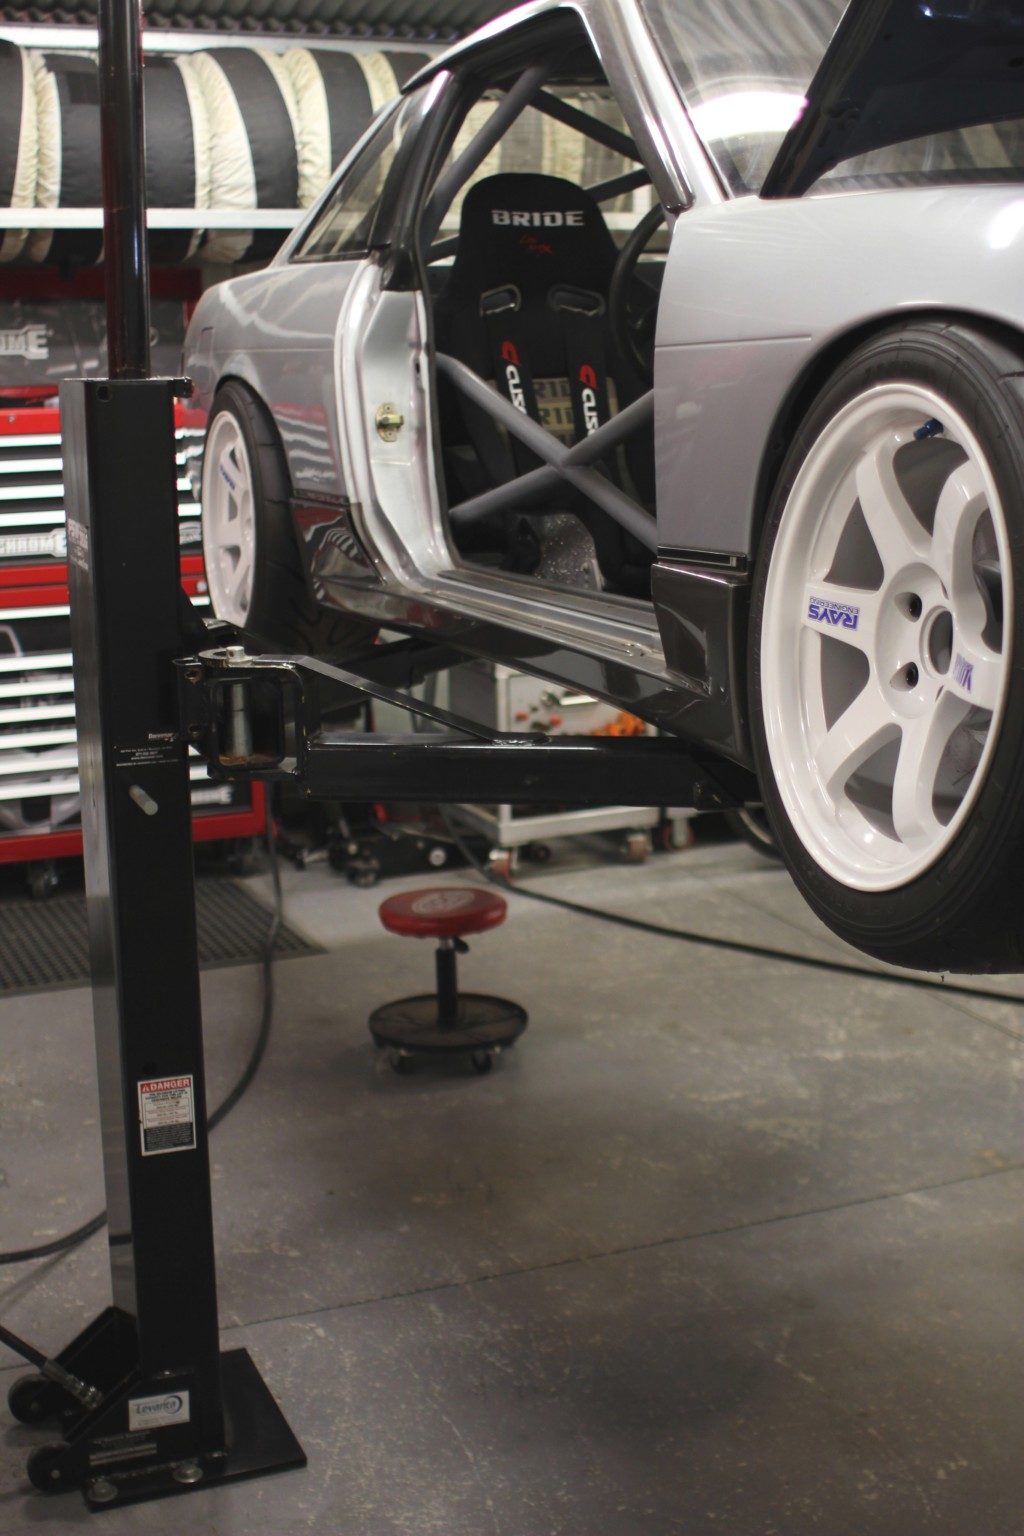
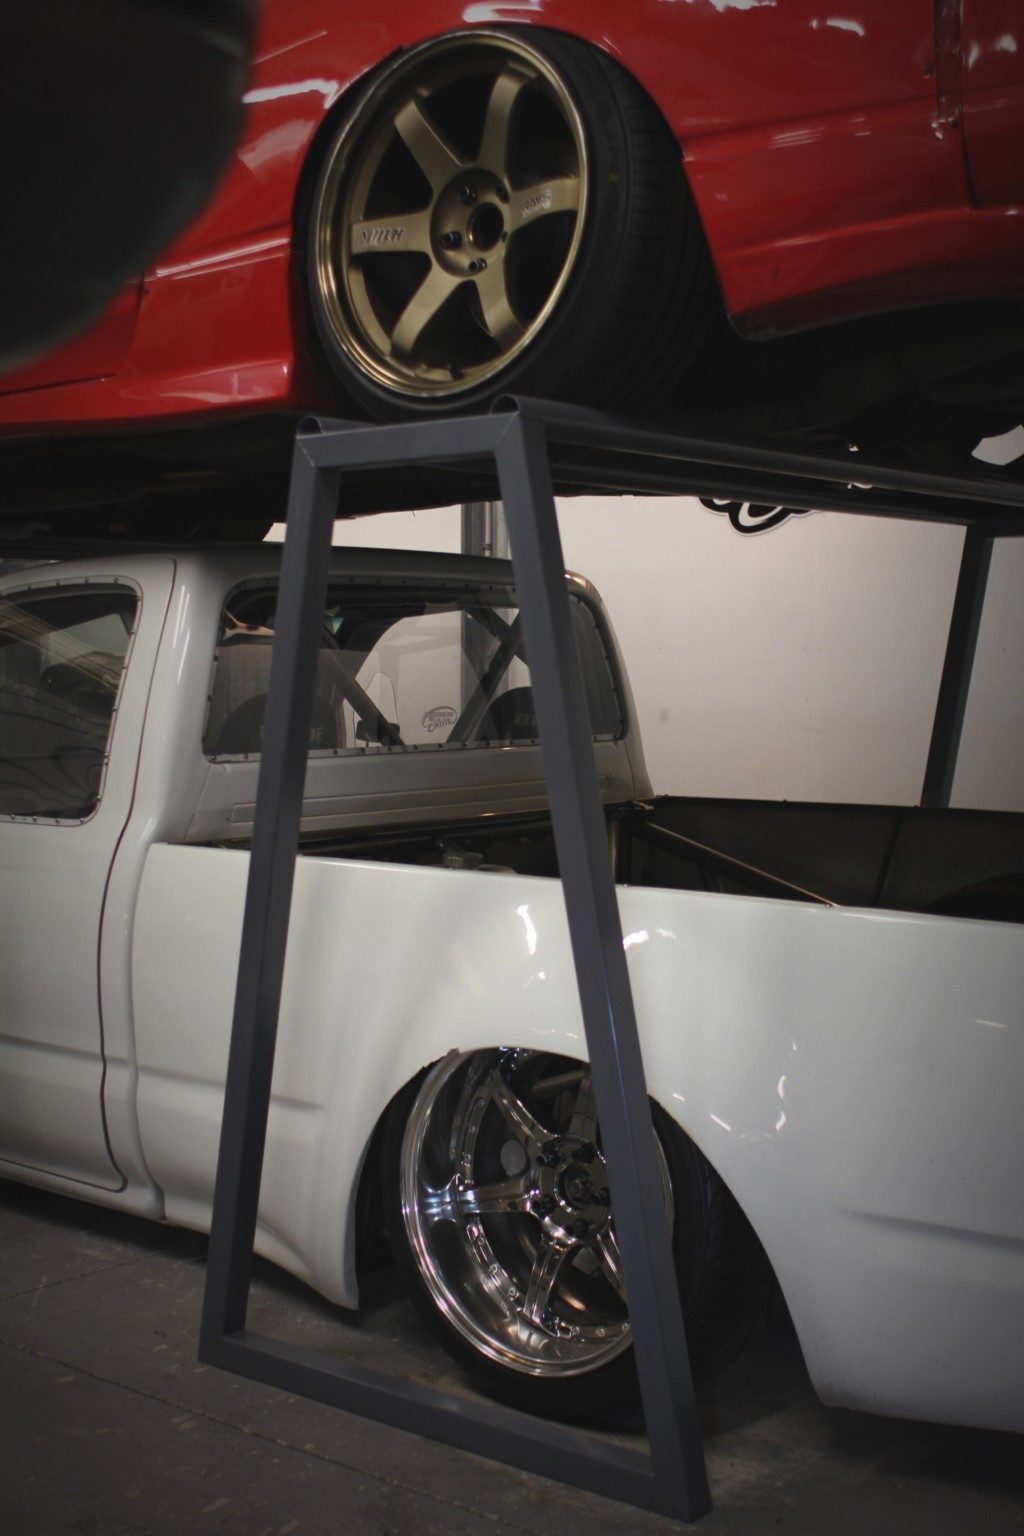
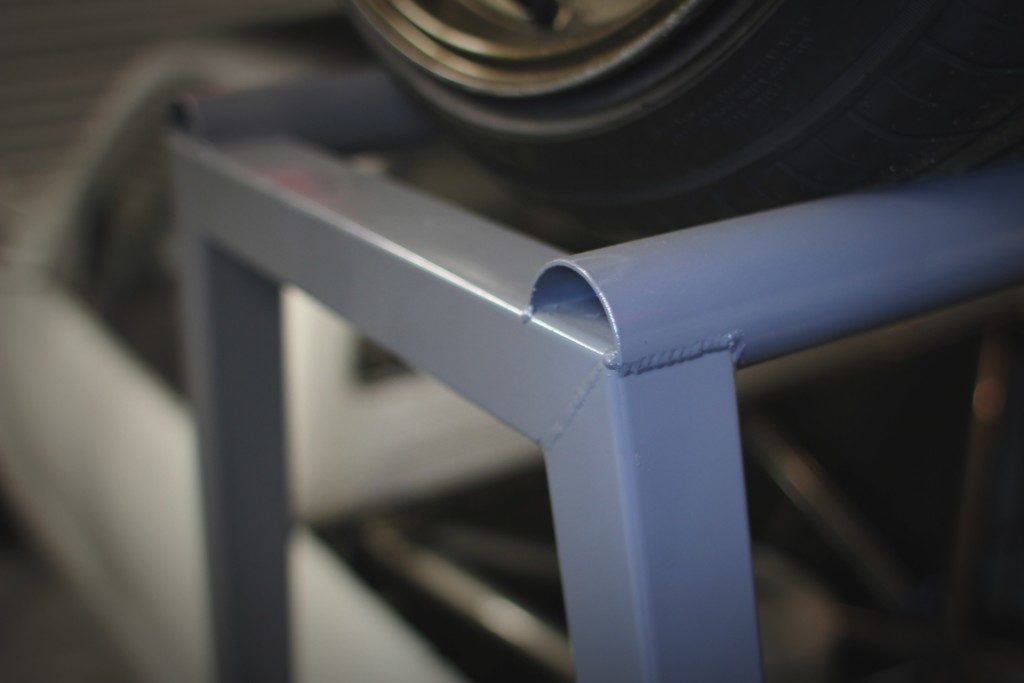
I purchased another set of floor anchors and drilled them into my floor so that one side of the hoist simply spins 180 degrees and the other sits on the opposite side, so this way with 10 bolts in and out I effectively have room for 4 cars in 2 car positions. To lift the 180SX up and off the stands all I do is move the hoist back to its old position and fit the extensions I made for the hoist pads. With the little roller seat I can work on the underside of the car and also my table is made to a height that it cradles the motor and gearbox for simple under car engine removal.
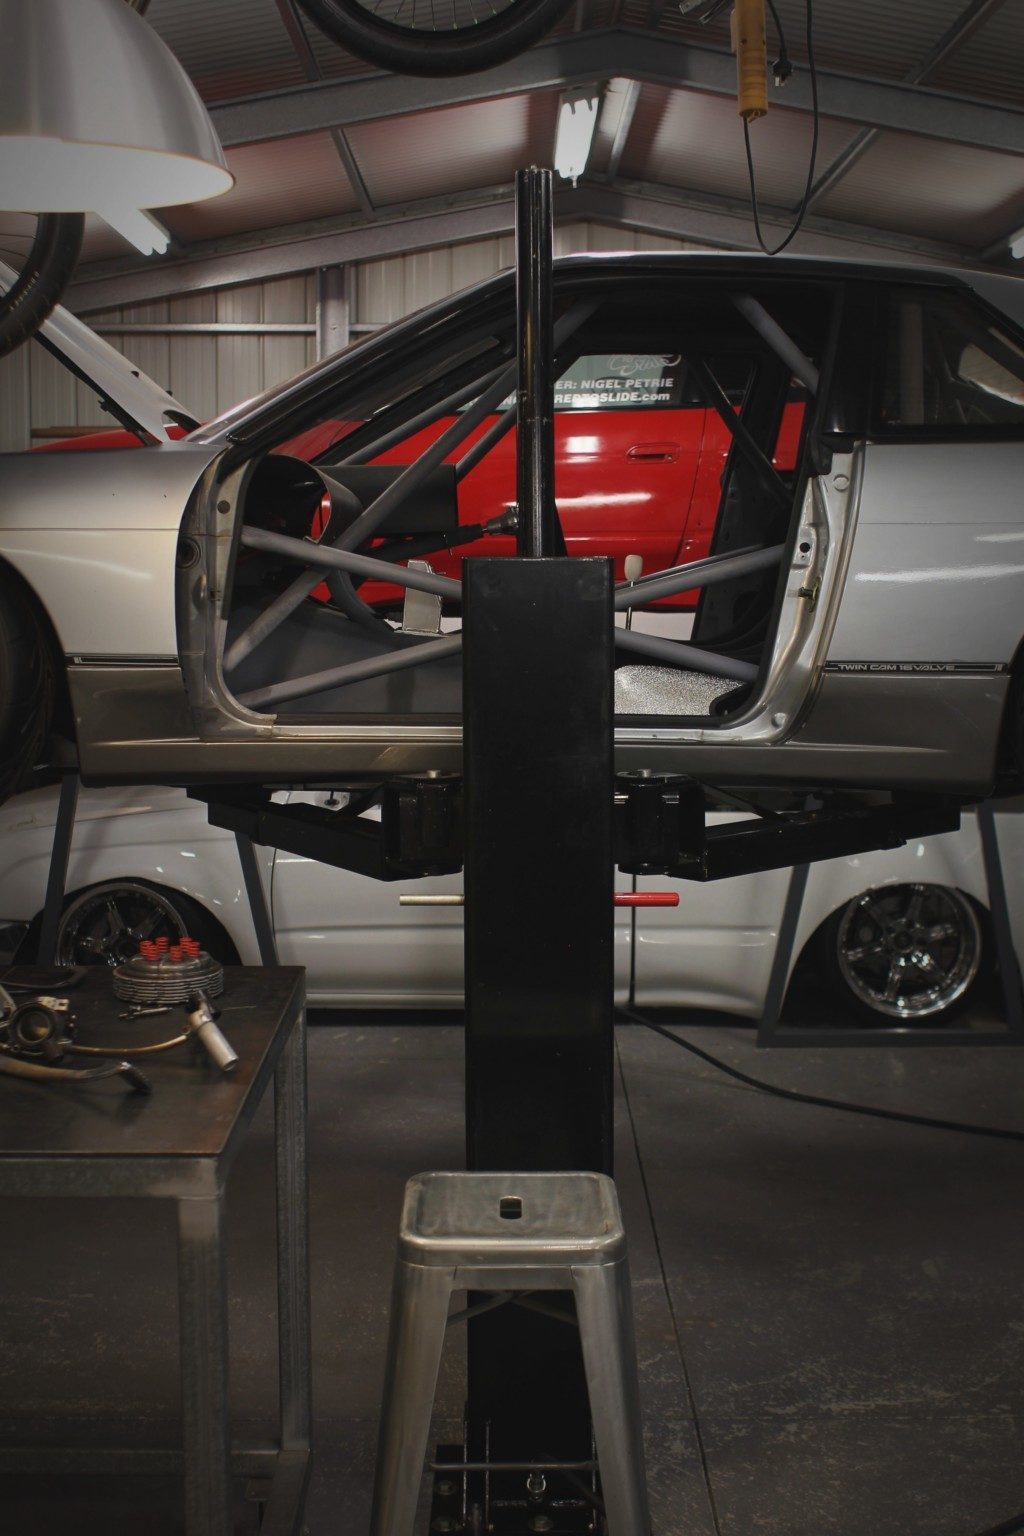
It makes a super universal garage and I couldn’t be happier with it.
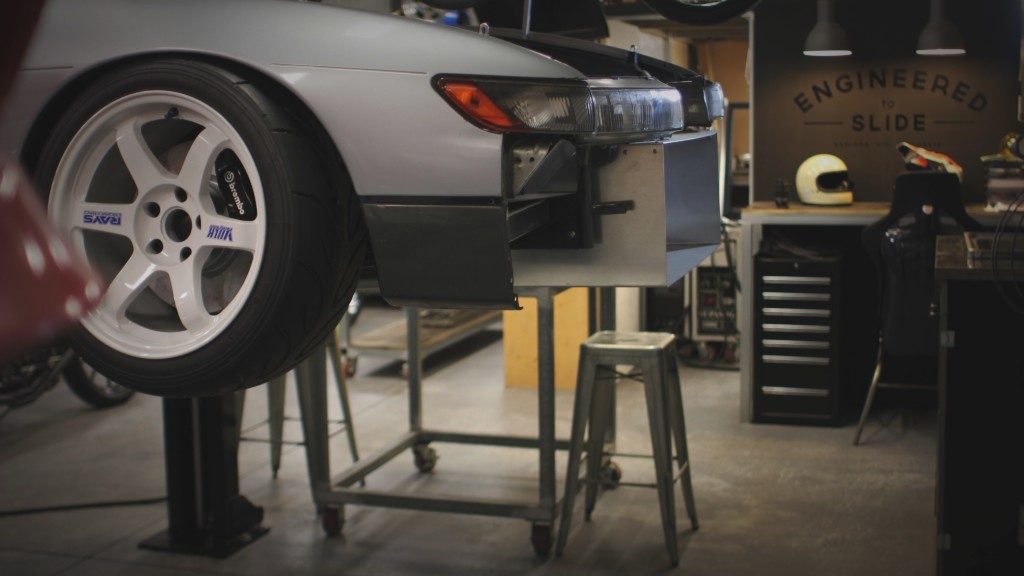
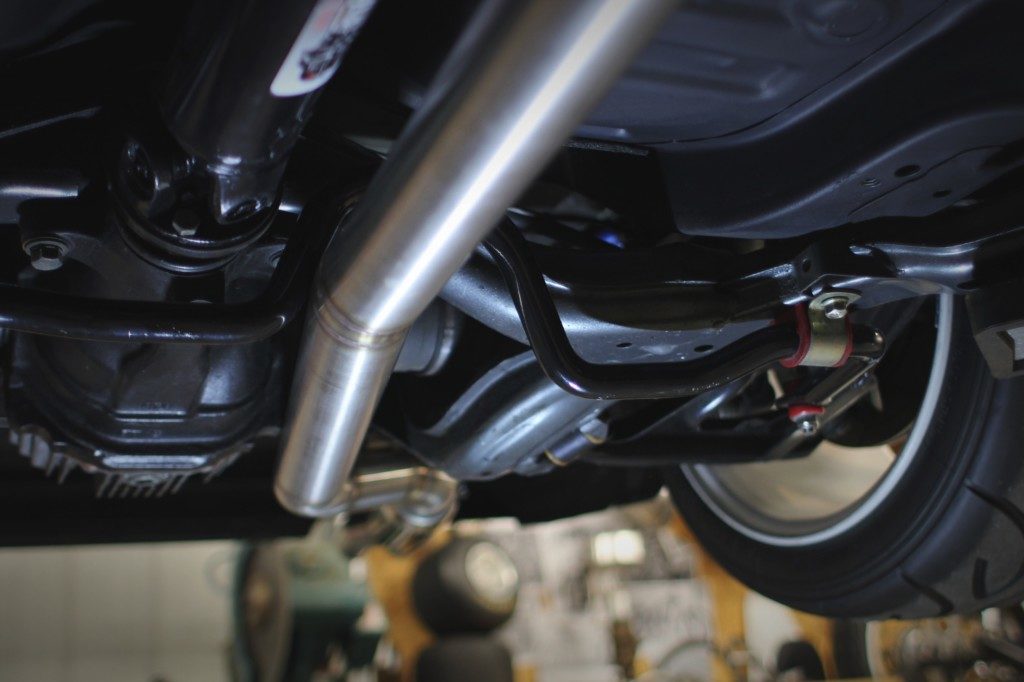
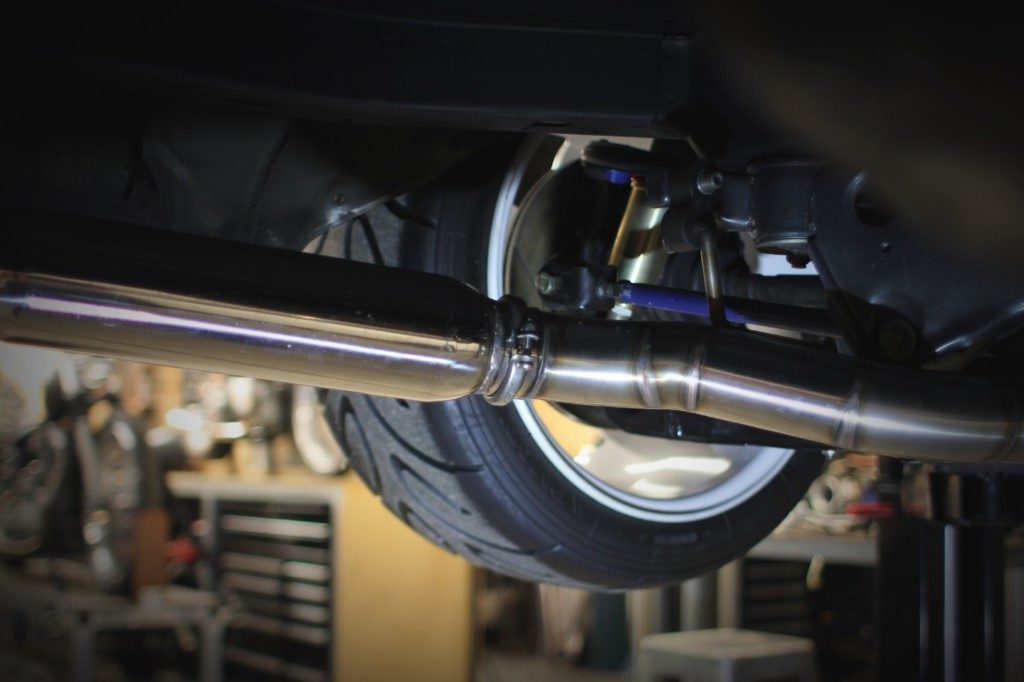
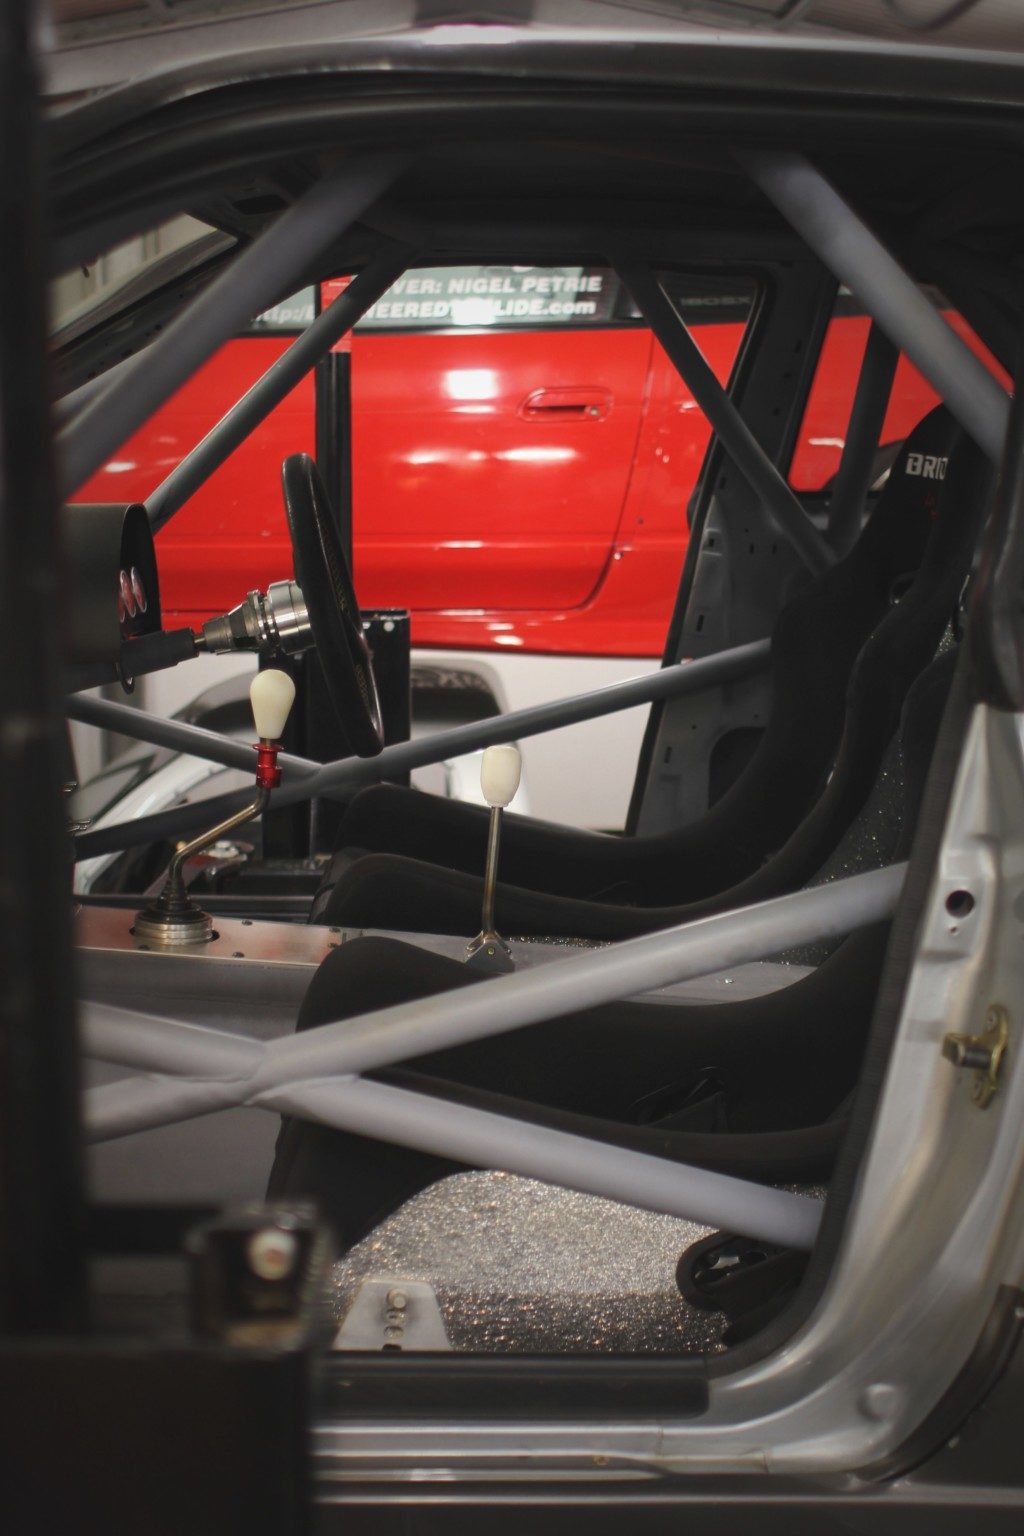
While the PS13 is up in the air I decided to finish everything on the underside and take some detail photos so you get an idea of the effort I have gone to under here.
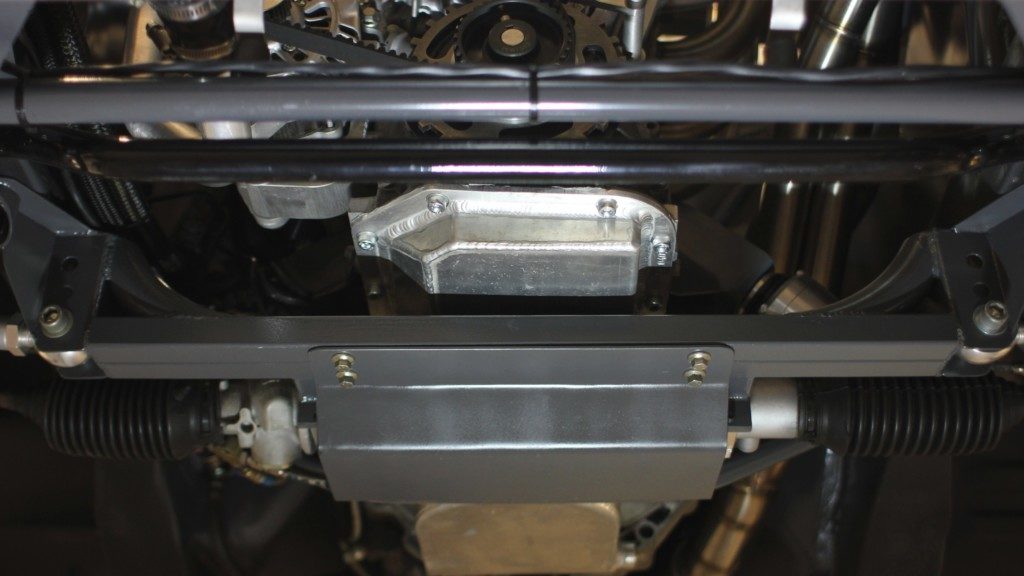
The only thing left to do under here is bleed the brakes.
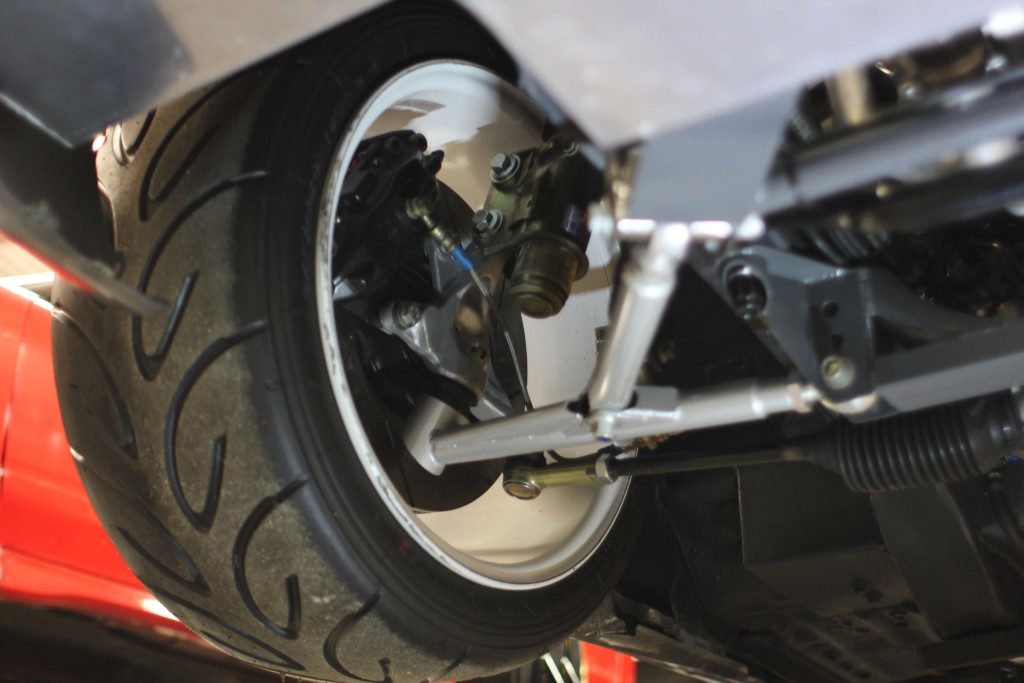
I am pretty happy with everything.
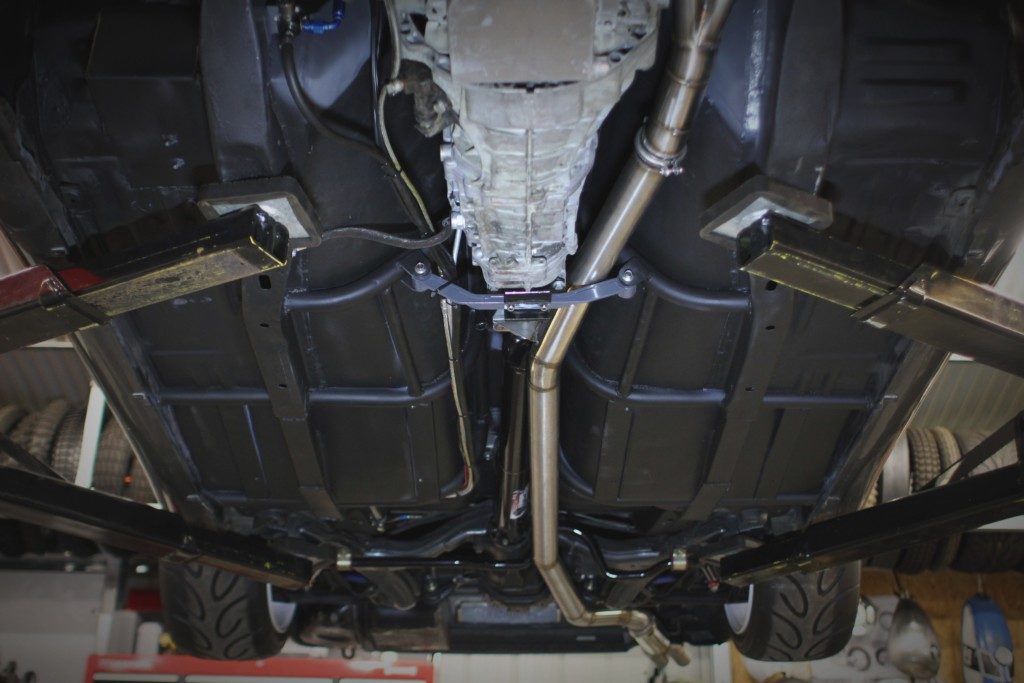
Yes that is an entire new floor and firewall, my plan was to fabricate it as neat as possible to give it a stock appearance.
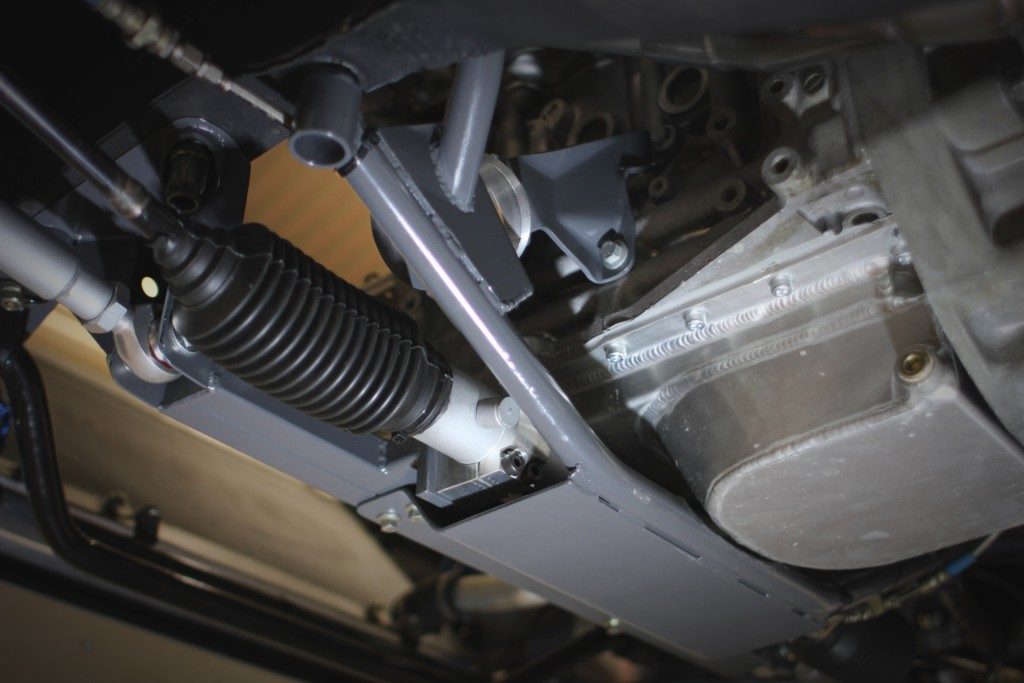
I am keen to weigh the chassis now too, all these new chromoly crossmembers I made took a lot of weight out.
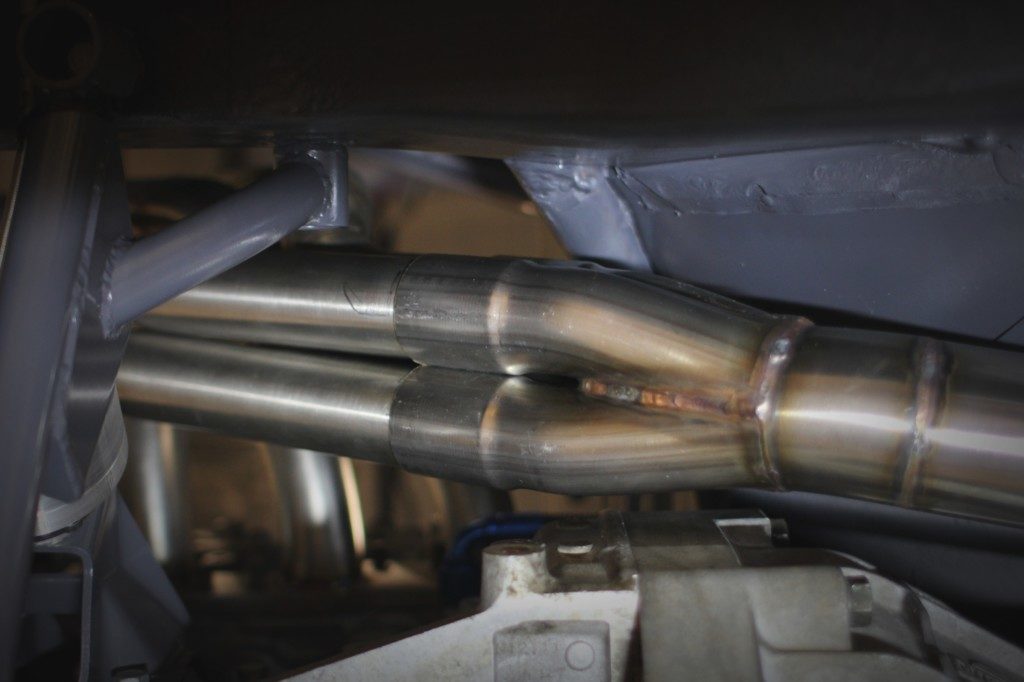
I am also keen to fire it up and get the heat into this exhaust I built, it’s going to glow!
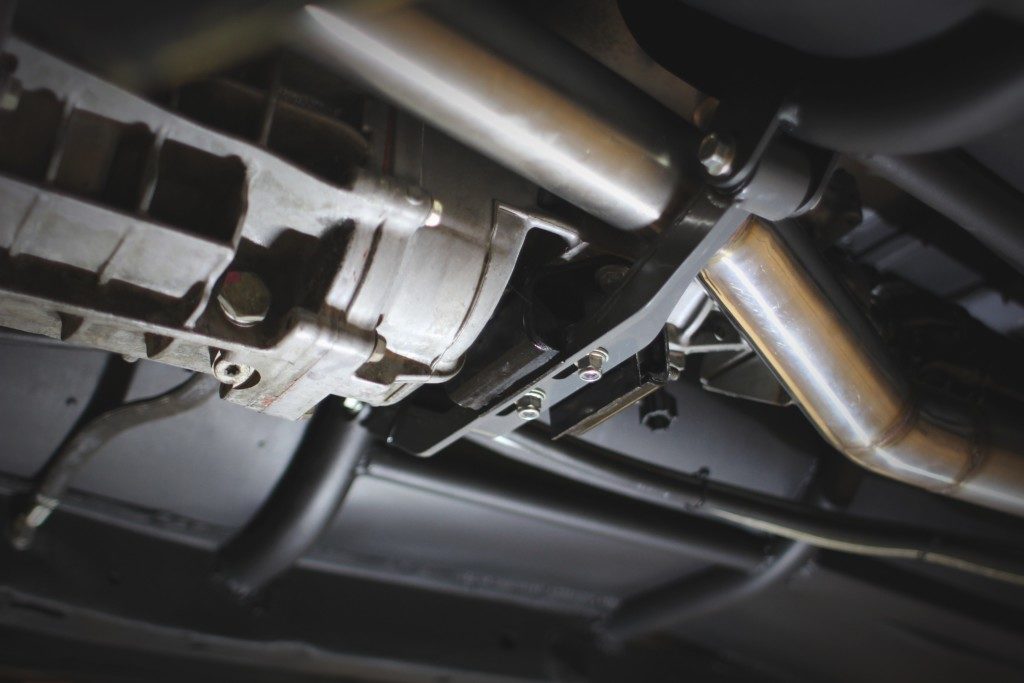
As it snakes through the new 6 speed gearbox crossmember.
And heads rearward.
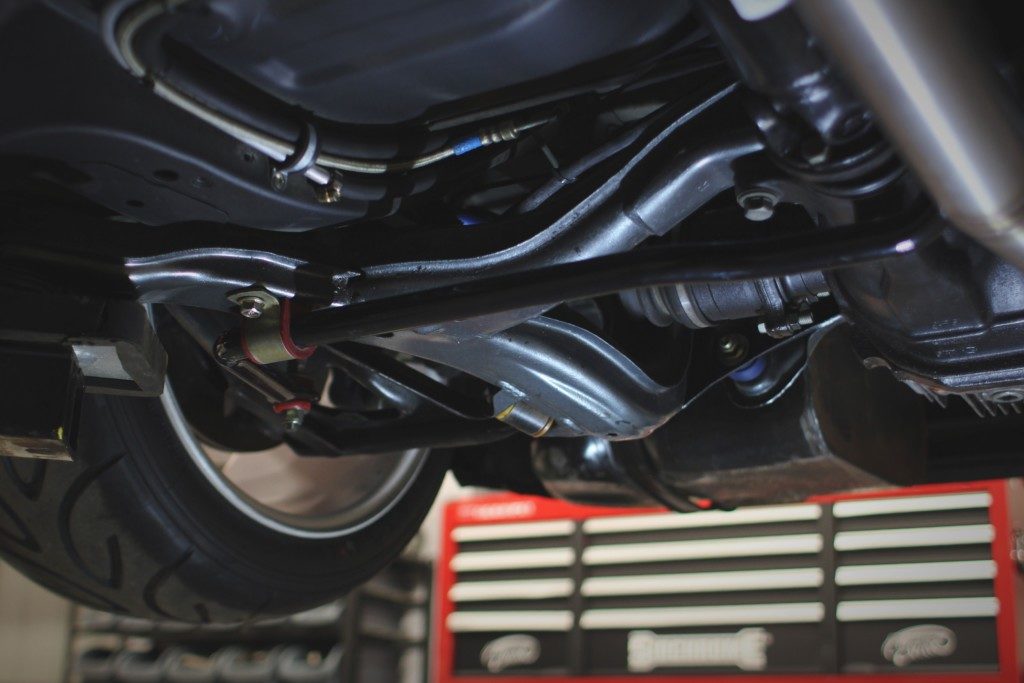
Fuel lines, brake lines, handbrake and suspension all complete.
I am really excited to hear it come to life.
With my toolbox so close by I can get a lot of stuff done in a very short amount of time.
So that is the process of stacking cars and the progression that’s happened over the past few weeks.
History check!
Looking around its safe to say that I like to get things off the floor.
And when your talking about bikes this also rings true.
I had a minor meltdown a few weeks back and decided that enough was enough, my Flat Track KTM 350 that I had spent waaaaaayyyyyyy too much time on is now no longer, infact I pulled three bikes down to parts and sold the entire lot on Gumtree. I just felt like I was loosing a battle and needed to work out what I really needed in my two wheeled world.
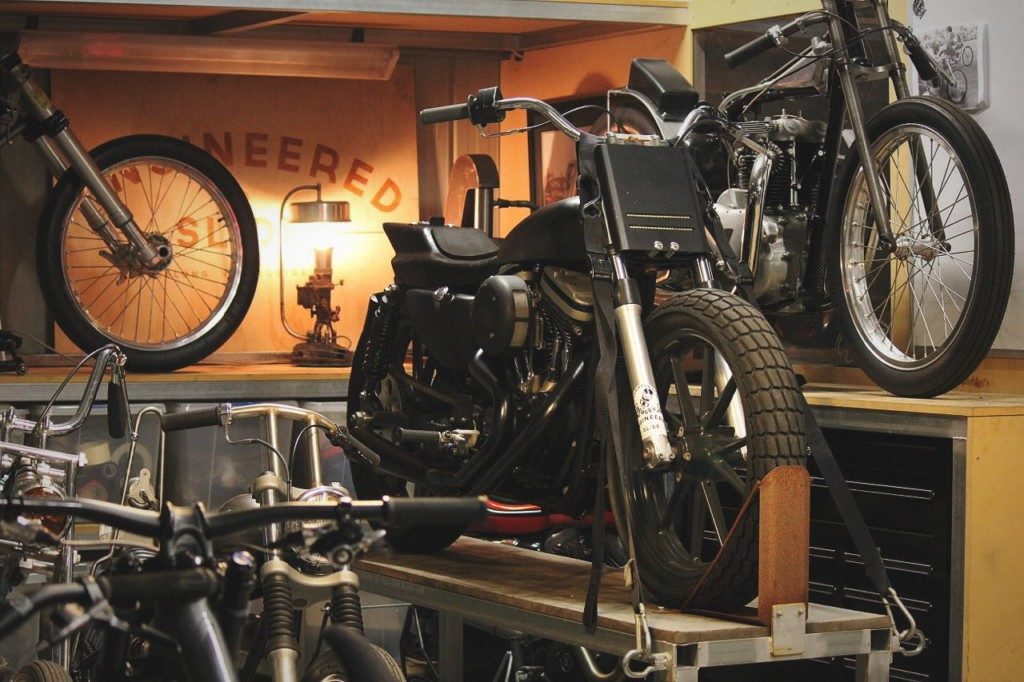
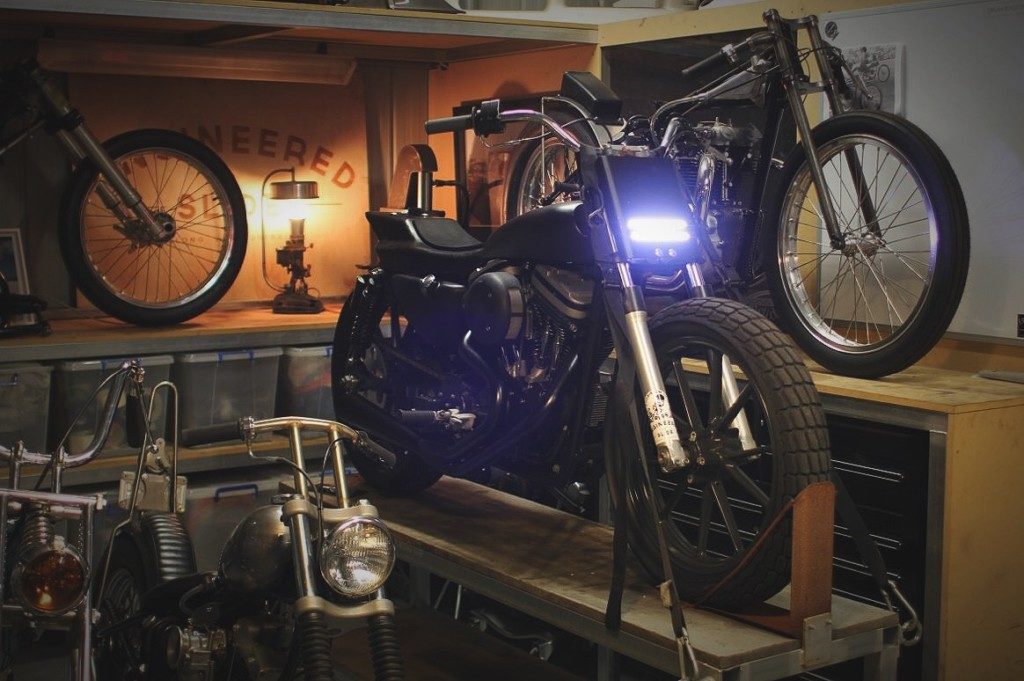
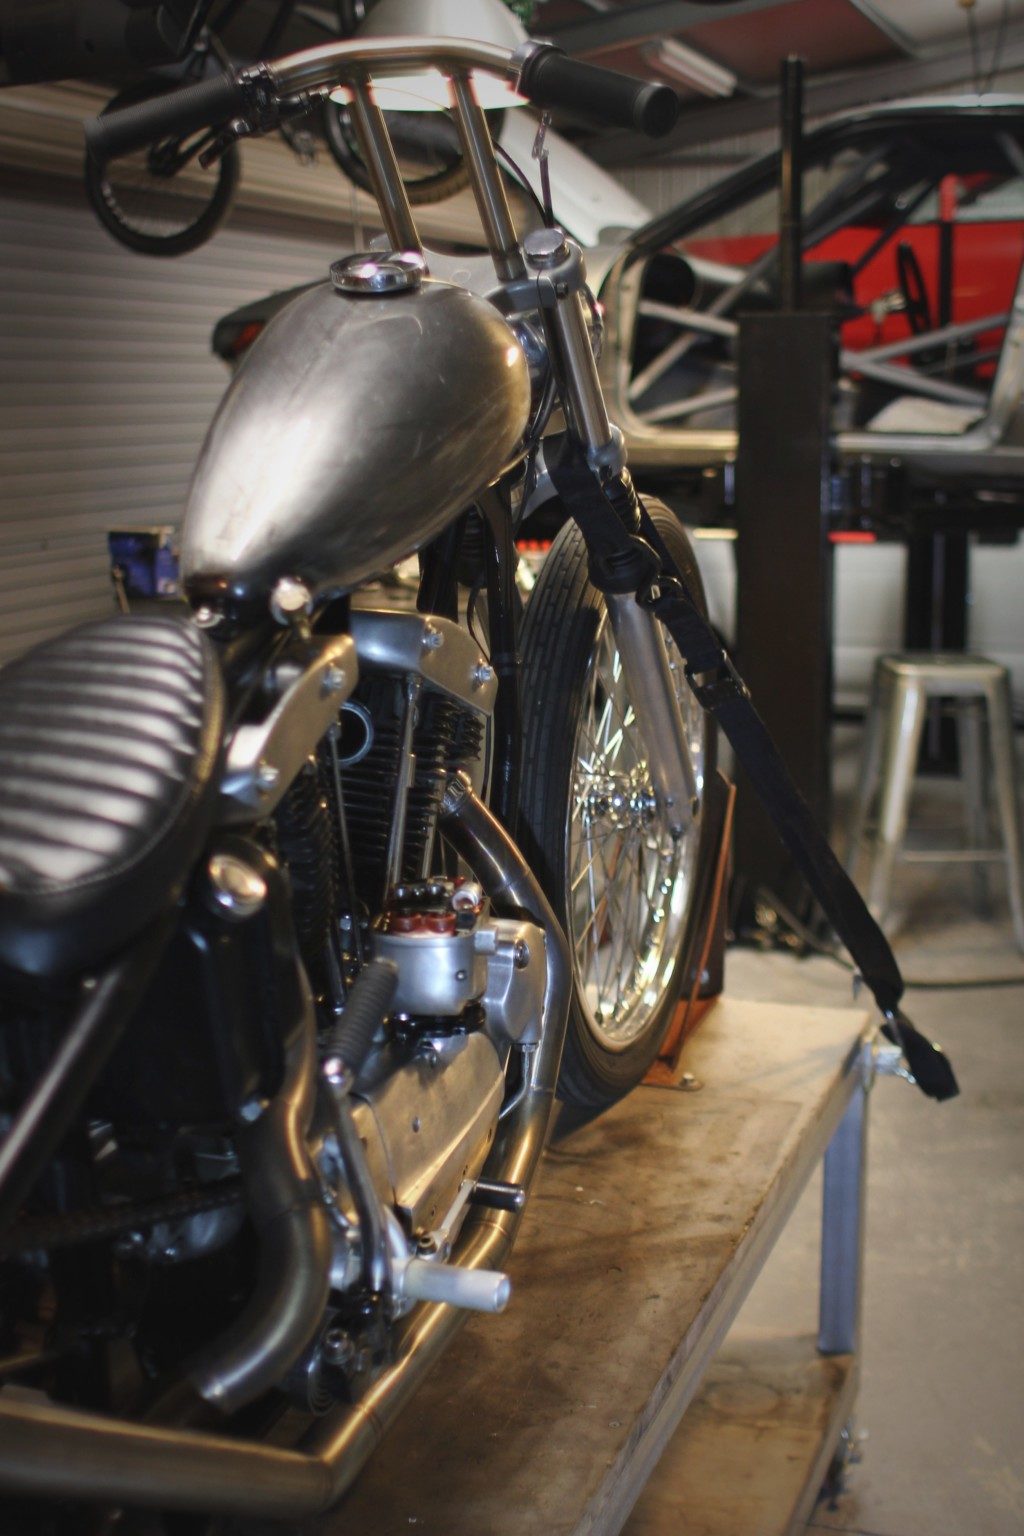
I figured out the things that I needed and didn’t need, this 1986 Sportster I definitely need.
With a really clear direction on where I was going I decided to fix all the things that had been bugging me over the past year of riding.
I remade a heap of things, made it a little more legal, ran all new oil lines, remade the exhaust, reworked the tank and made it truly insulated (as the motor vibes were really trying to rip it apart).
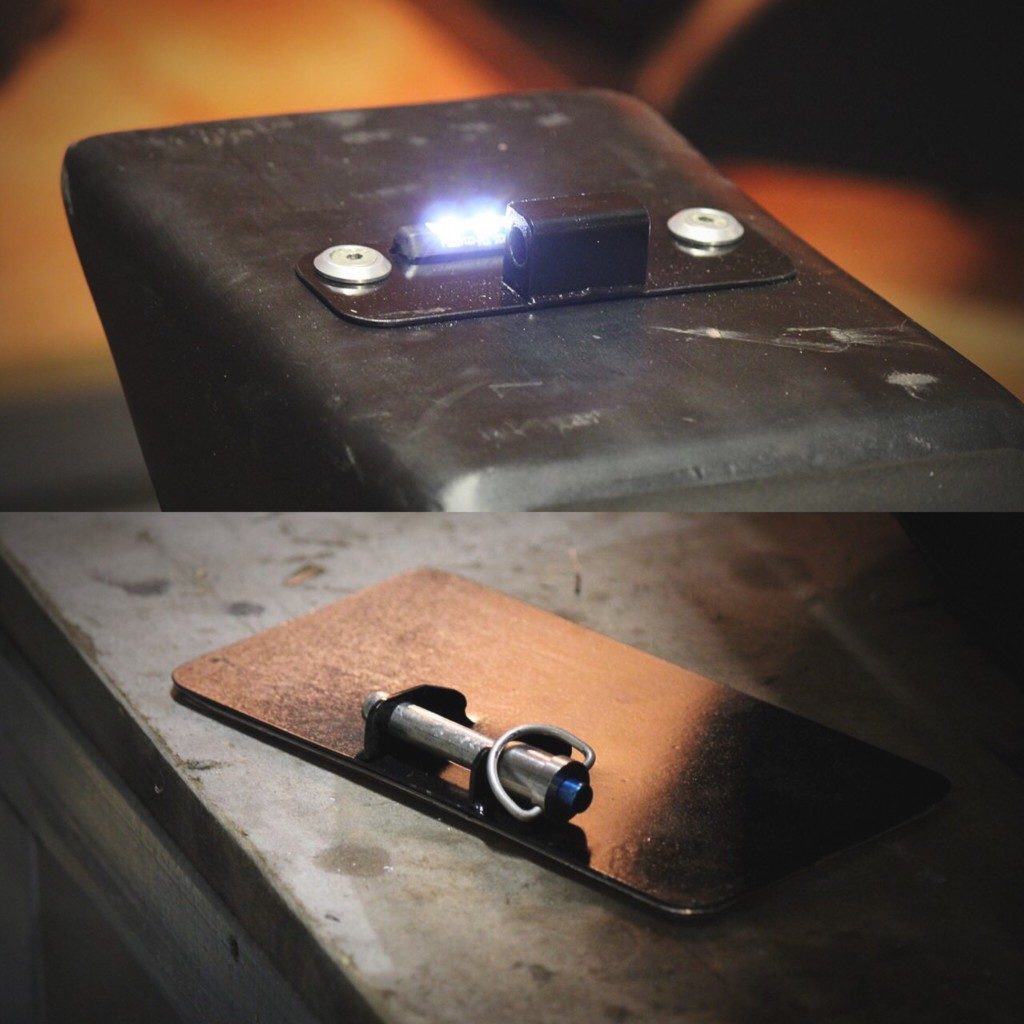
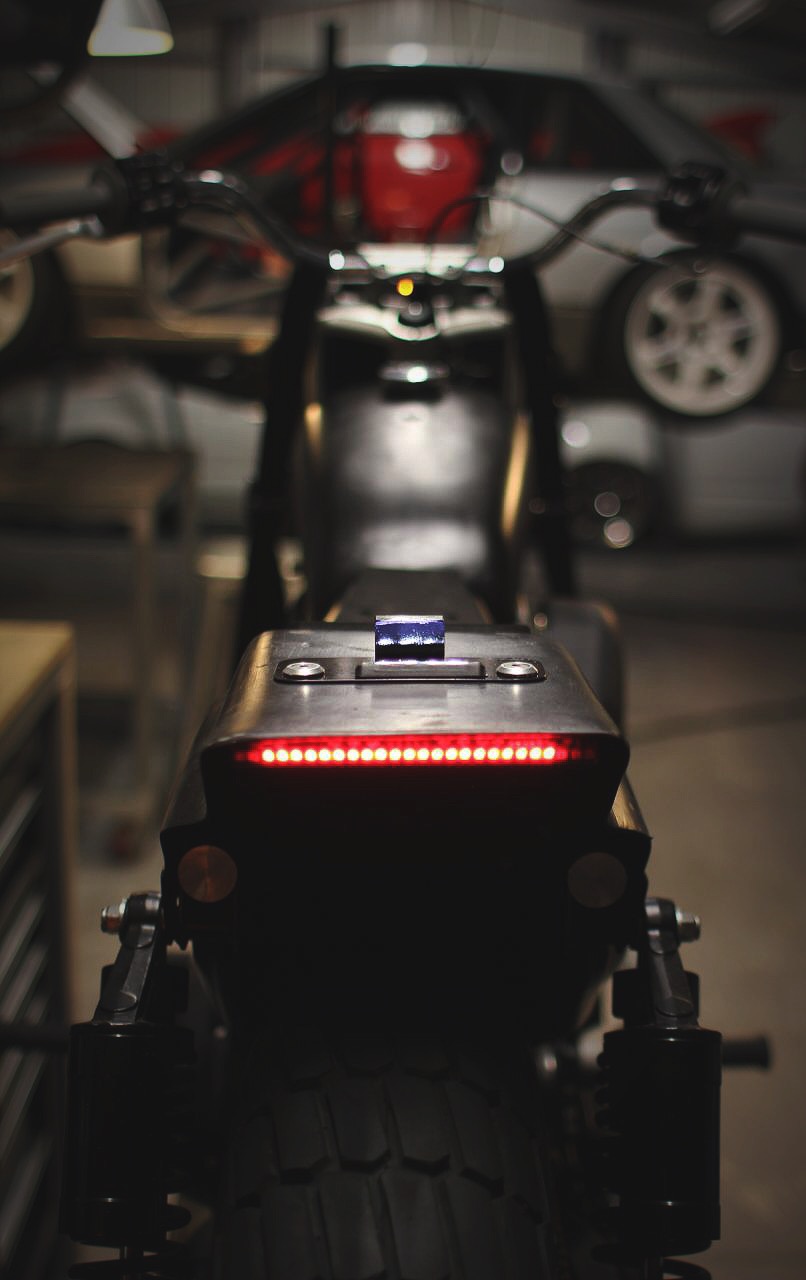
I made this number plate mounts that’s removable and also well lit.
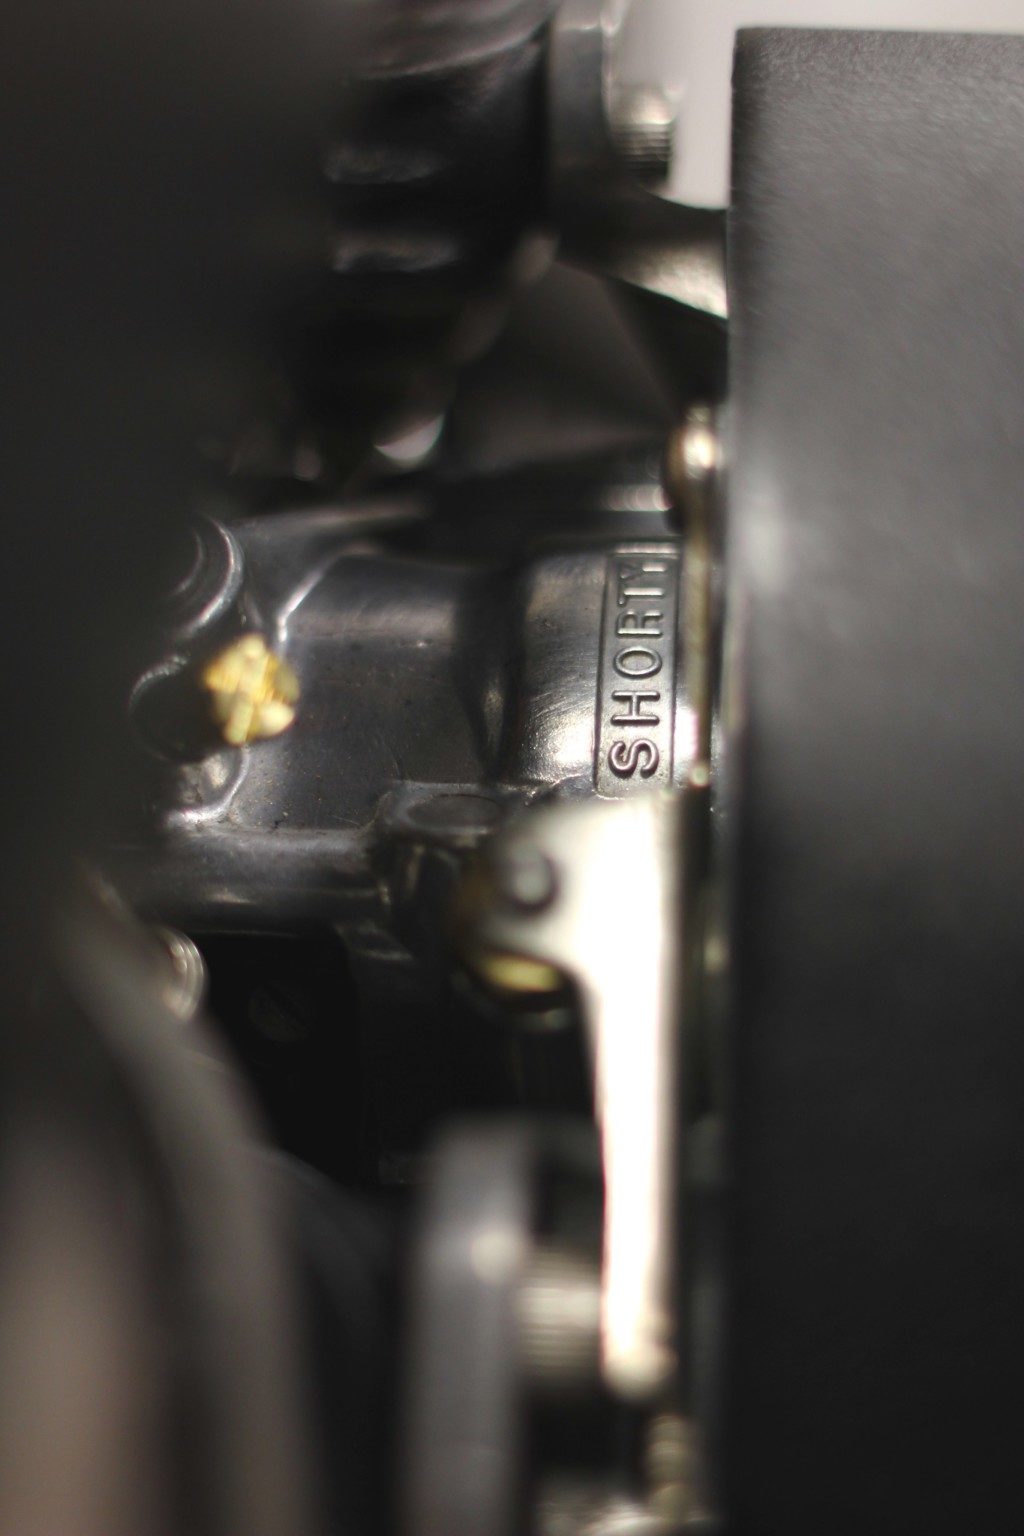
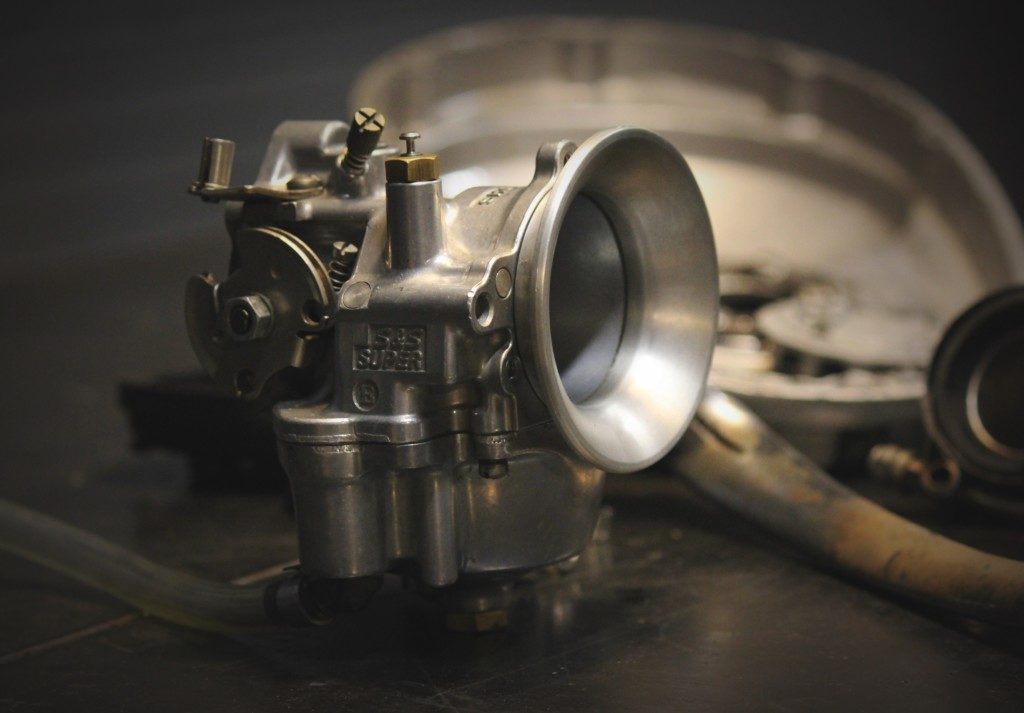
Put a rebuild kit through the S&S Super E Carb.
Then fired it up and went for a ride down the Great Ocean Road to Lorne, it was flawless and a blast to ride.
You know why I love motorcycles? The exact same reason I love cars, being able to build something, understand 100% of it, improve it, modify it and make it your ultimate machine, well it just so happens I can legally ride my ultimate motorcycles any day of the week, but my cars… Not so.
Using old motorcycles also means working on old motorcycles, for some strange reason this is what drives me, I thoroughly enjoy the mechanical vulnerability, I know that in my hands the motorcycle will get better with age because that’s a promise you have to make to yourself otherwise there is no point in owning one.
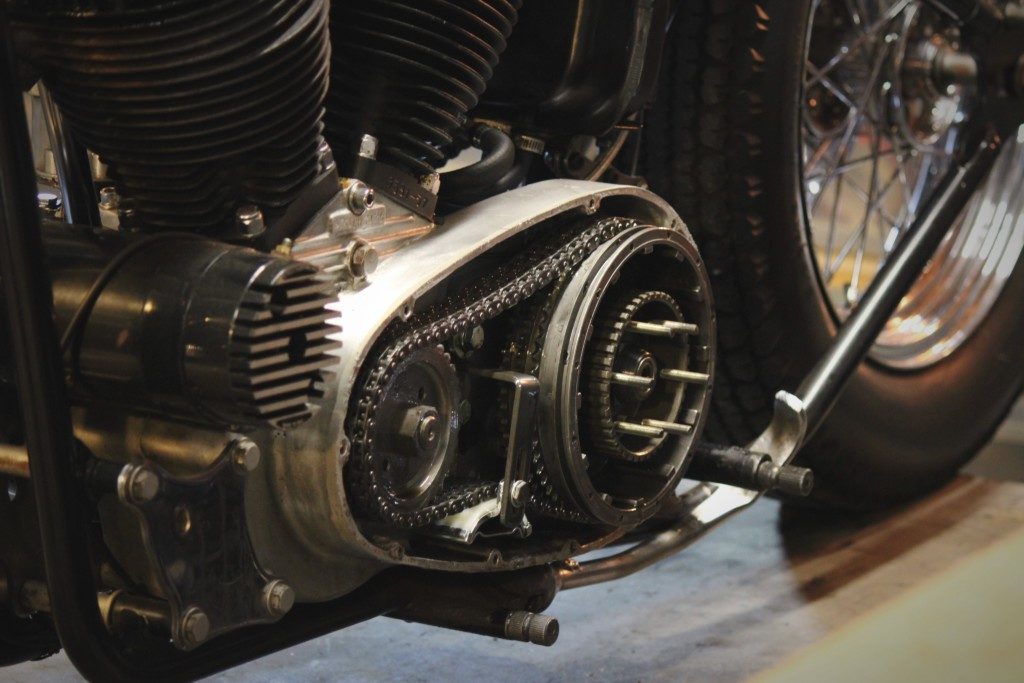
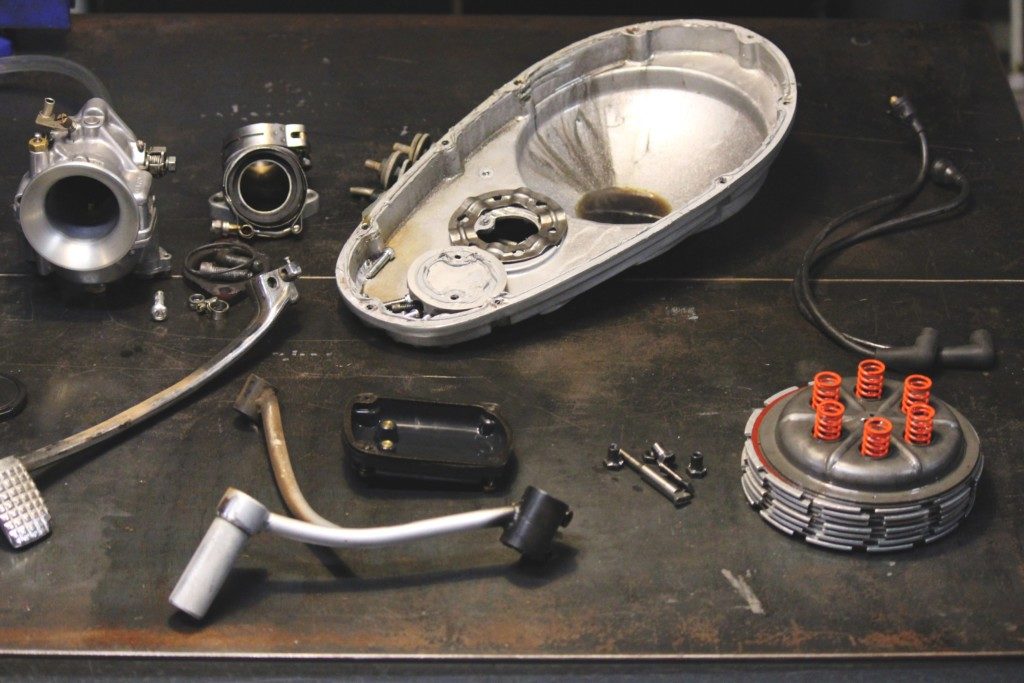
So off with the primary cover and clutch and then time to replace the worn kick start ratchet mechanism. Its also a good chance to replace the gearbox oil and tighten up the primary chain.
This bikes 50 years old this year (well the motor is) and its probably had 20+ owners in that time maybe more.
I am also giving the magneto an overhaul with a fresh set of points, condenser and coil, these are basically the only electrical parts on the bike (that make it run) so its worth doing once in a while.
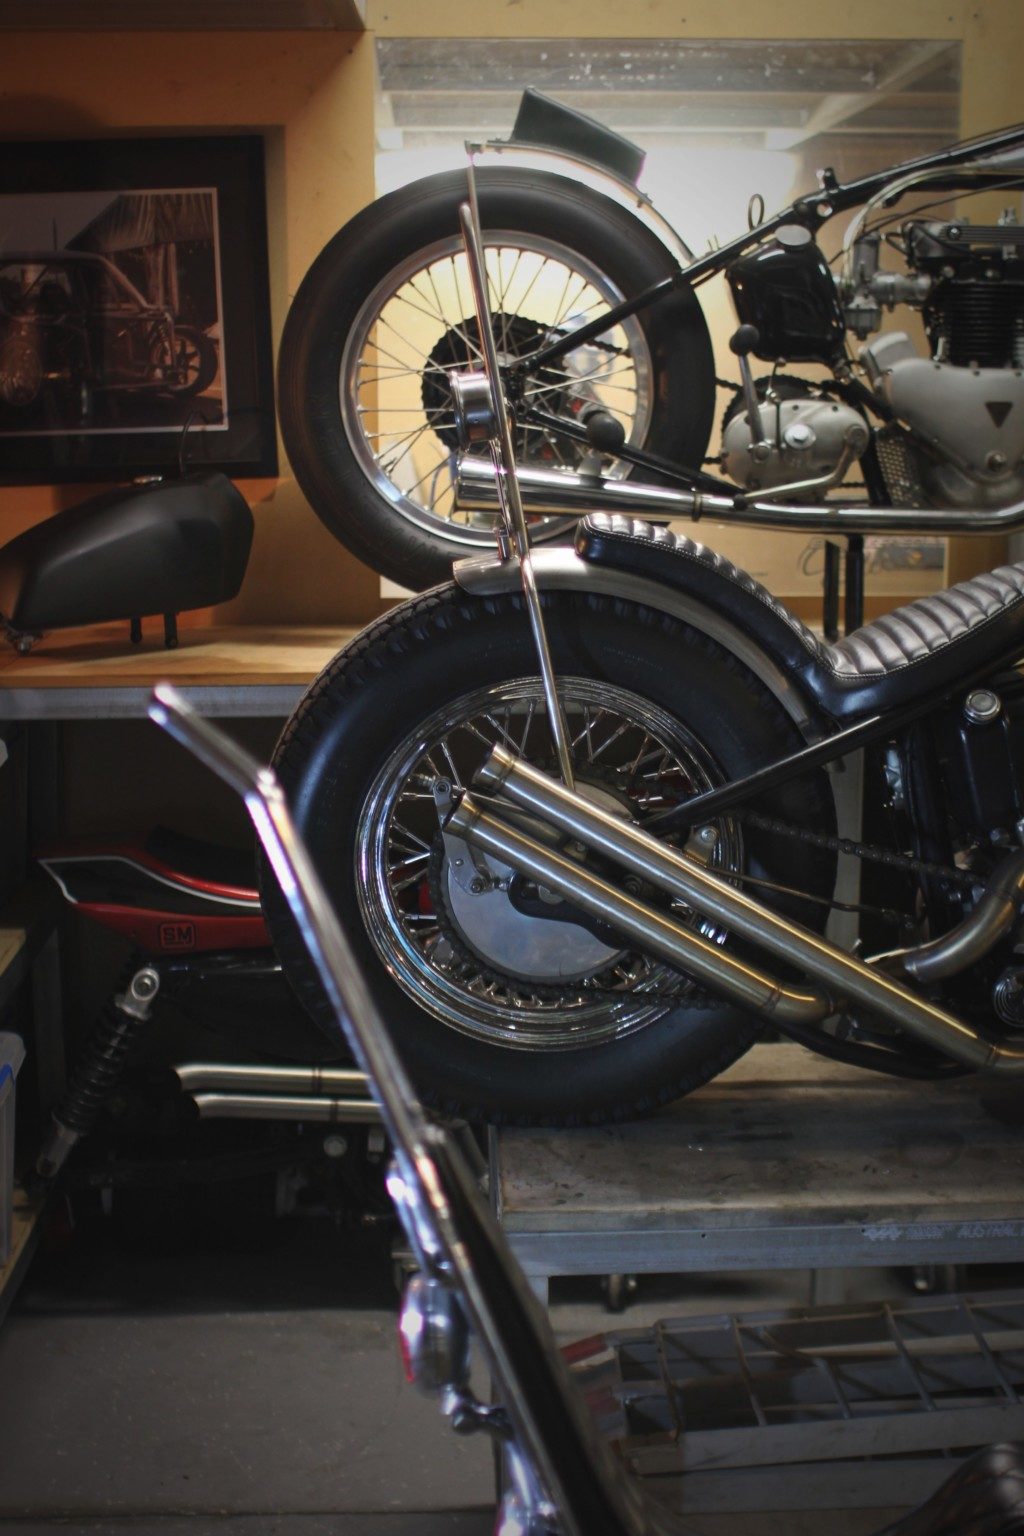
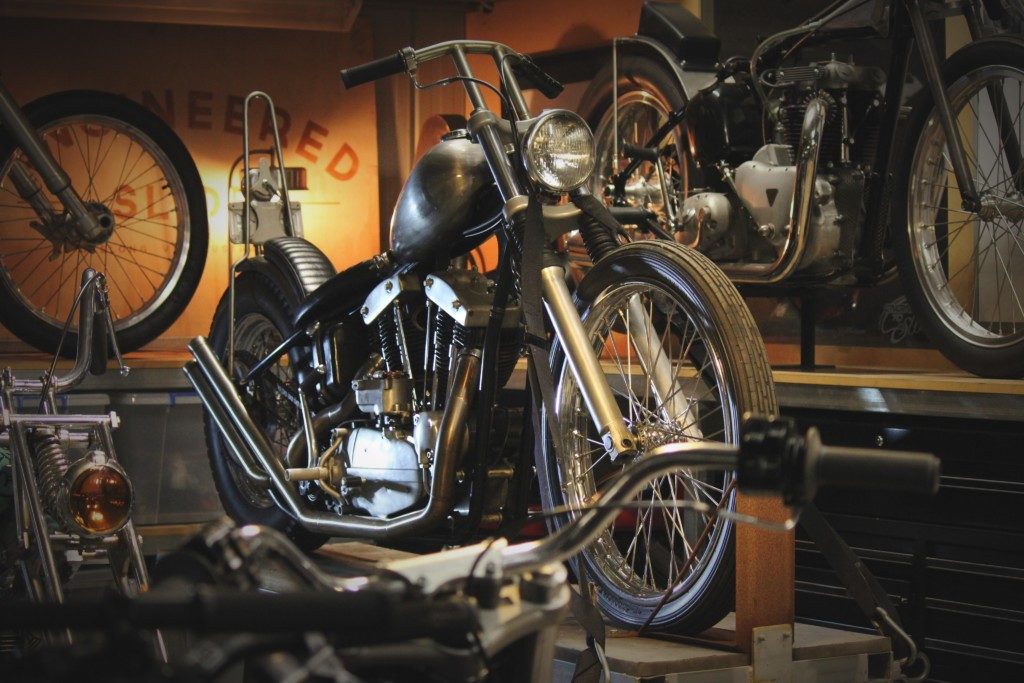
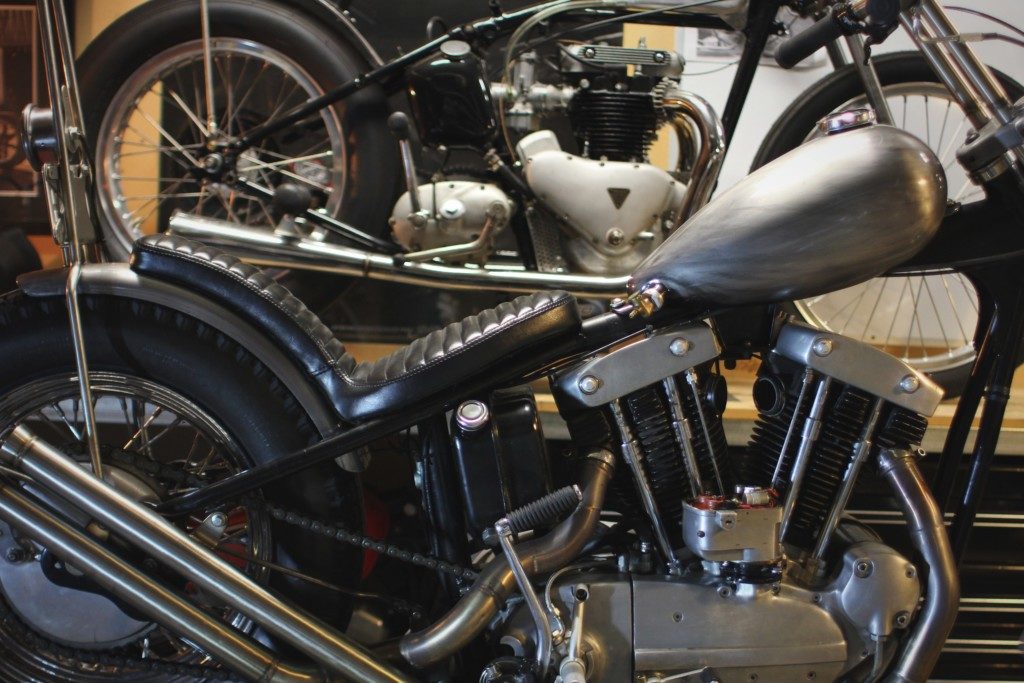
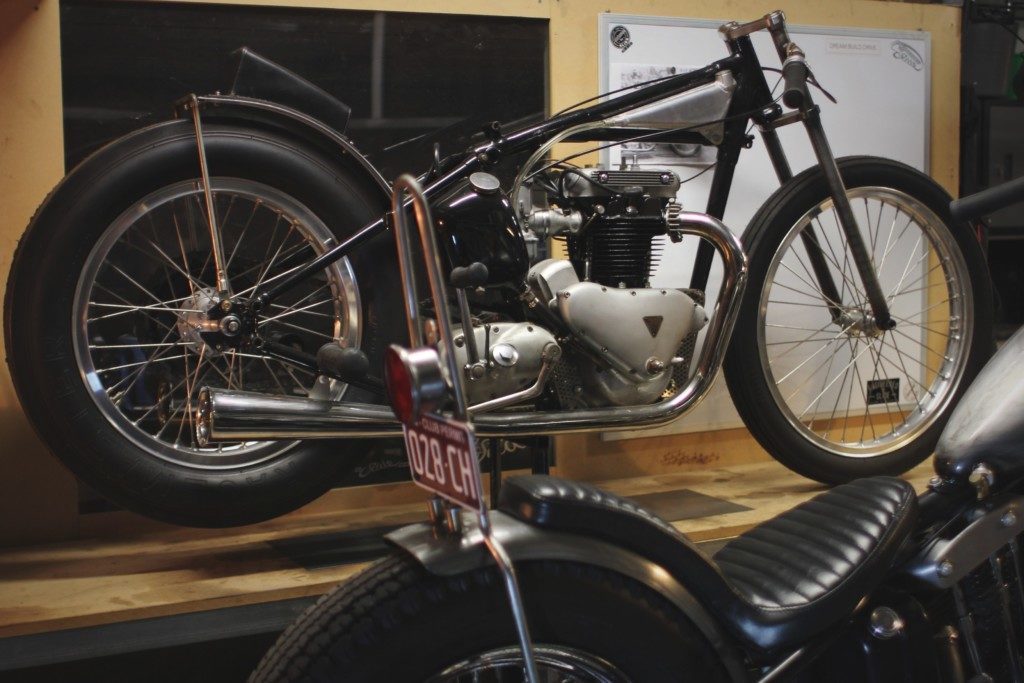
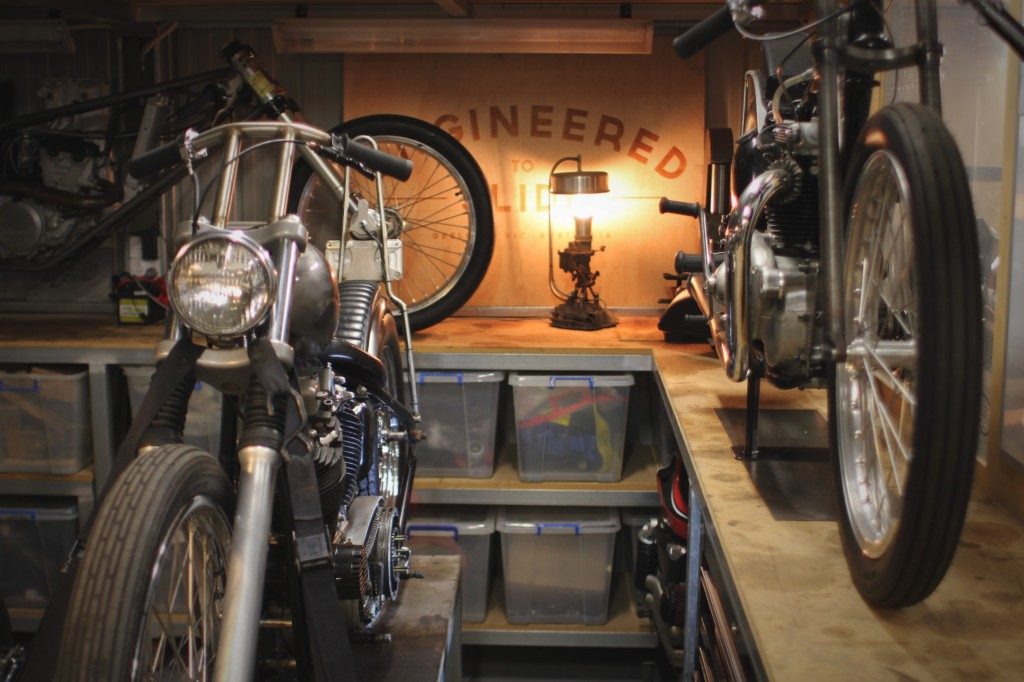
Behind it on the bench is the 1951 Triumph I built, I also had a few things to finish on it.
The guys at Prism Supply Co (who build some amazing stuff) sent me some of their vintage cloth wire for a kill switch I had in mind.
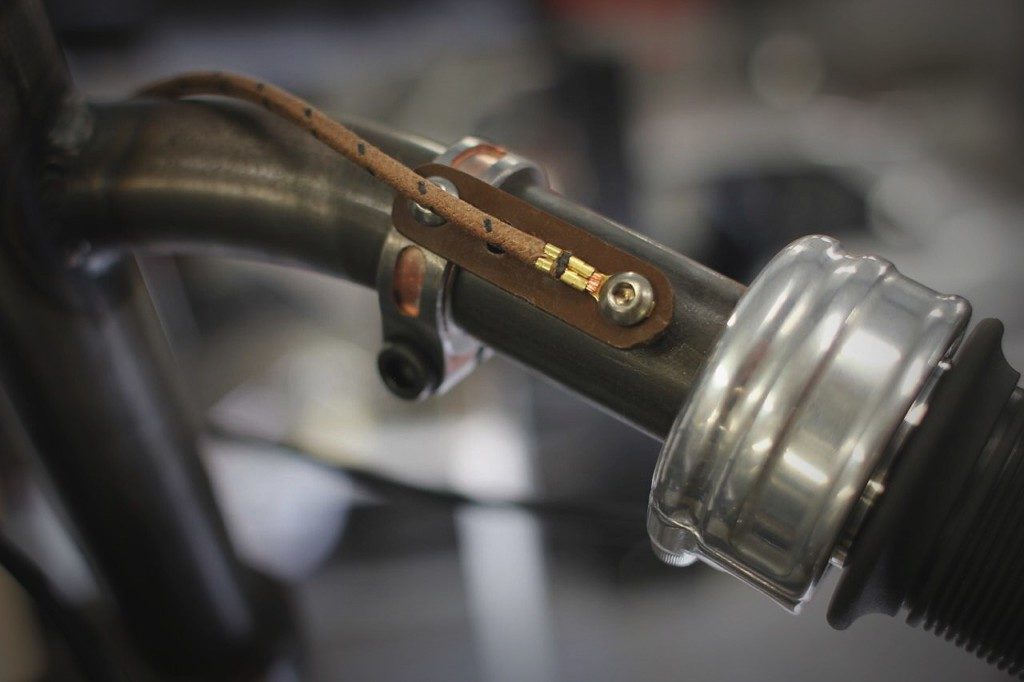
Its as simple as a piece of circuit board material, an old BMX seat clamp and a few screws.
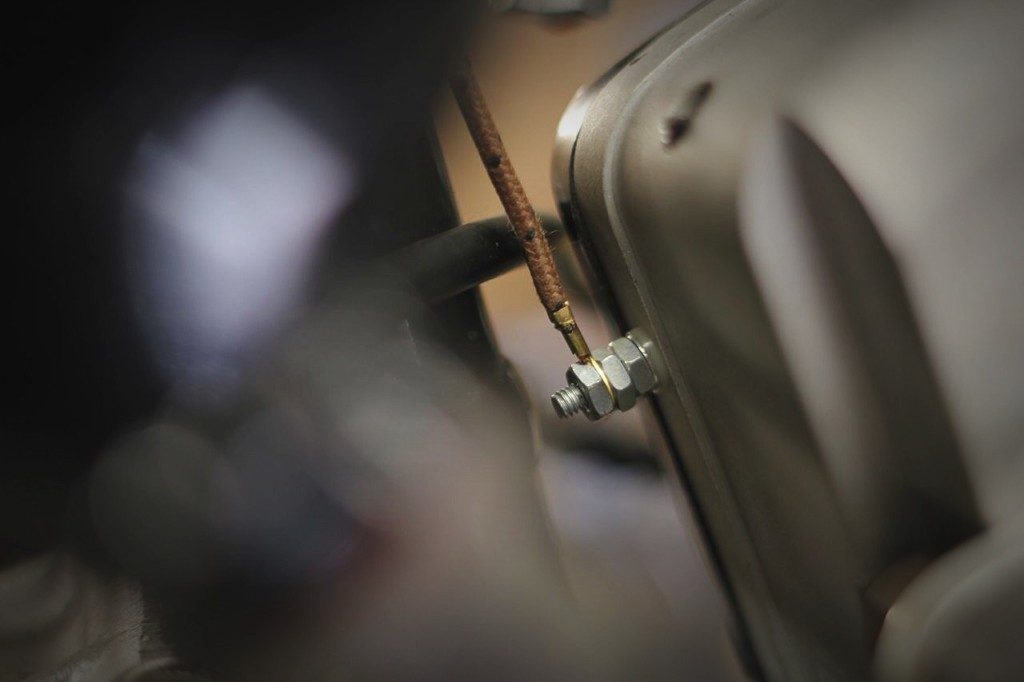
Used to earth out the magneto and kill the spark.
So whats next? Well I have laid out plans for something pretty spectacular in the coming months, regardless if that happens or not you will read about it here in detail.
As always thanks for reading!