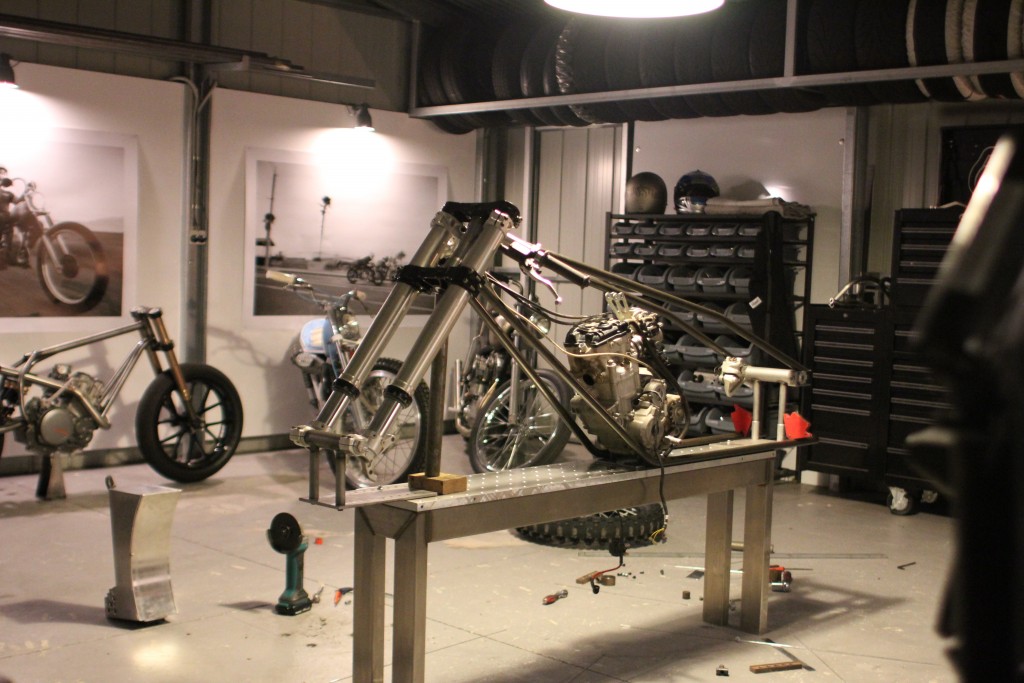
10/2/15 With the bike finally all pulled apart and all the parts needed for the new build layed out on the floor I was ready to start the fun bit! I was so eager to get home and finish the steering neck, remove the cartridges out of the forks and get the layout on the jig correct. After I sat everything where it should be I could draw up the radiator and the fuel tank, these two components are the key to performance and looks.
After using alloy filler rod to layout the chassis design I was able to calculate the angles and dimensions of the radiator and fuel tank, the fuel tank will house the pump, filter and regulator block. Its imperative I get this right. I have about 130mm in width and 400mm in height to play with. I only need around 3 litres of fuel to safely do a few passes on. I want to incorporate as much as I can into the tank, a seat, provision for a battery, loom ECU and also voltage regulator.
11/2/15 Made up the fuel tank last night, it looks good but I am worried I made it too tall, I’m not too confident welding aluminium so I just tacked it all up, I incorporated a battery holder on the base of the tank and left plenty of room around the battery to insulate it. I still need to buy a filler cap to weld on, a few fittings for an inspection tube but apart from that I think it’s coming along well. I hope the EFI setup works like it should mounted in this different tank, only time will tell I guess.

12/2/15 Last night was a big one, on my way home from work I grabbed a few things from the motorcycle shop to finalize the neck, I just needed a new bearing cup set so that I had two sets to save removing the other off the chassis that will ride to the salt, while I had the top triple clamp off I slid the old “clip ons” on that I had on my old black 250 Café racer, I flipped them so that the bars sit on the inside of the forks and it looks just right! I mounted up the stock front brake lever assembly that will work the rear brake and it fits great, the clutch side also fits great but I want to change the fitting to a 90 degree banjo instead of the straight that’s currently on it. So happy with the look of the front end now, it’s hard to believe it’s nearly all stock motocross gear.
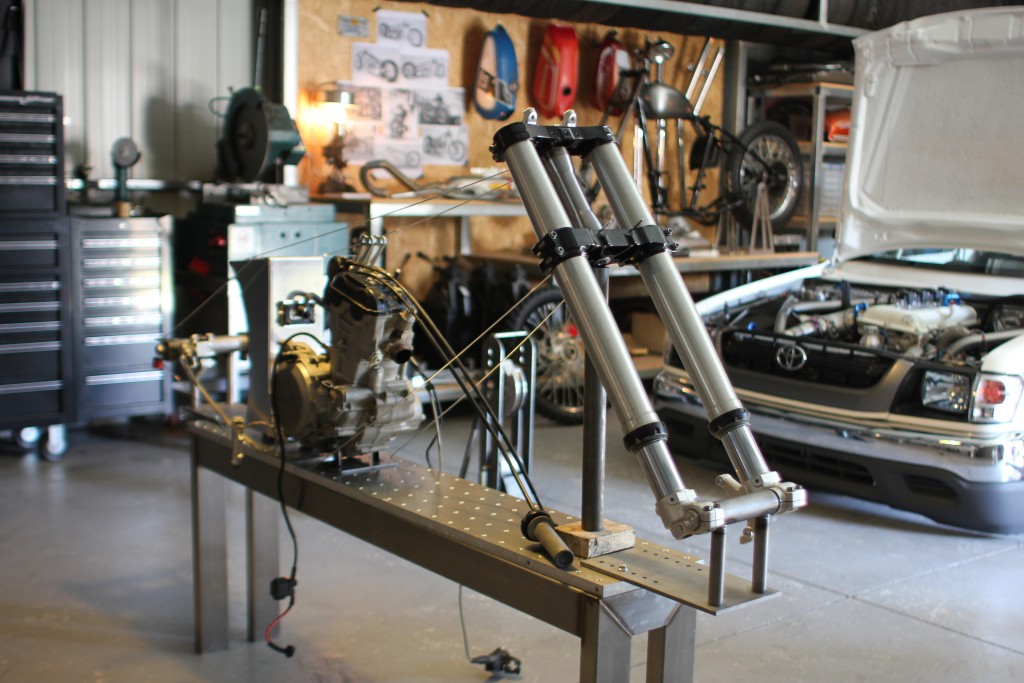
I double and triple checked the alignment of the front and rear wheel positions, I moved the rear wheel position up another 65mm to make the bike lower and have a little more rake, I am measuring everything off the diameter of the tyre I want to run, it’s a M&H Racemaster vintage slick, measuring 26.6 inches tall it should be on its way from the USA as I speak.

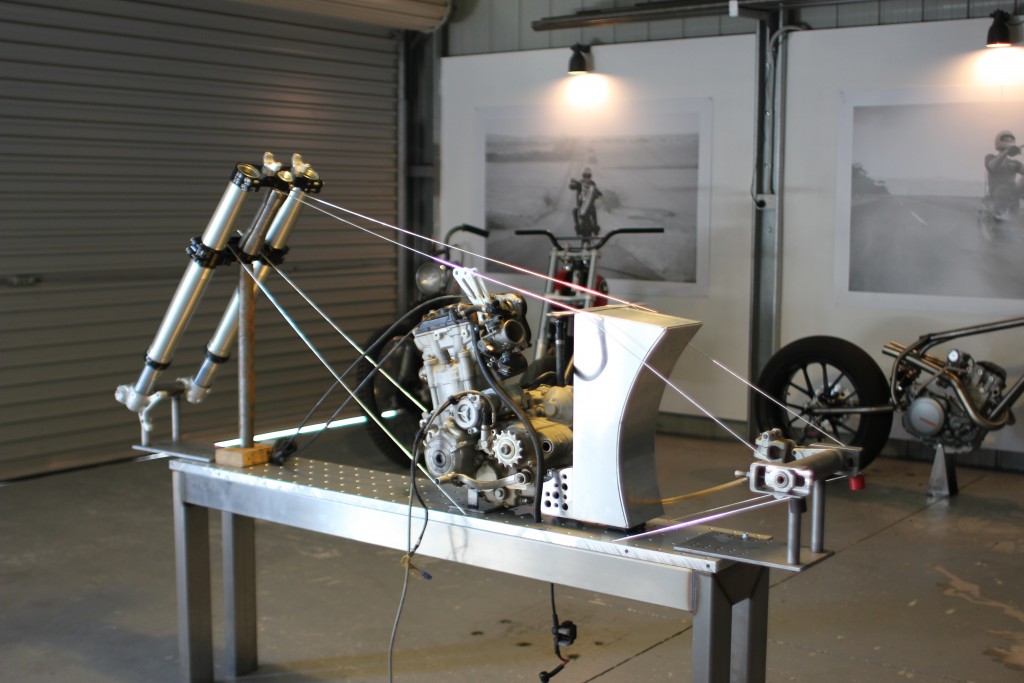
Happy with the front end, the neck, the rear wheel position and the tank I could now start the frame to tie everything together. I put myself under strict styling conditions for this part, it’s a fine line what I am doing here, I am using modern day parts, technology and processes with styling that dates back nearly 60 years, the frame is the bike, it’s the lines and the strength, there’s no plastic that covers it so everything must be equal, neat and have lines that suit what I believe will be the finished product.
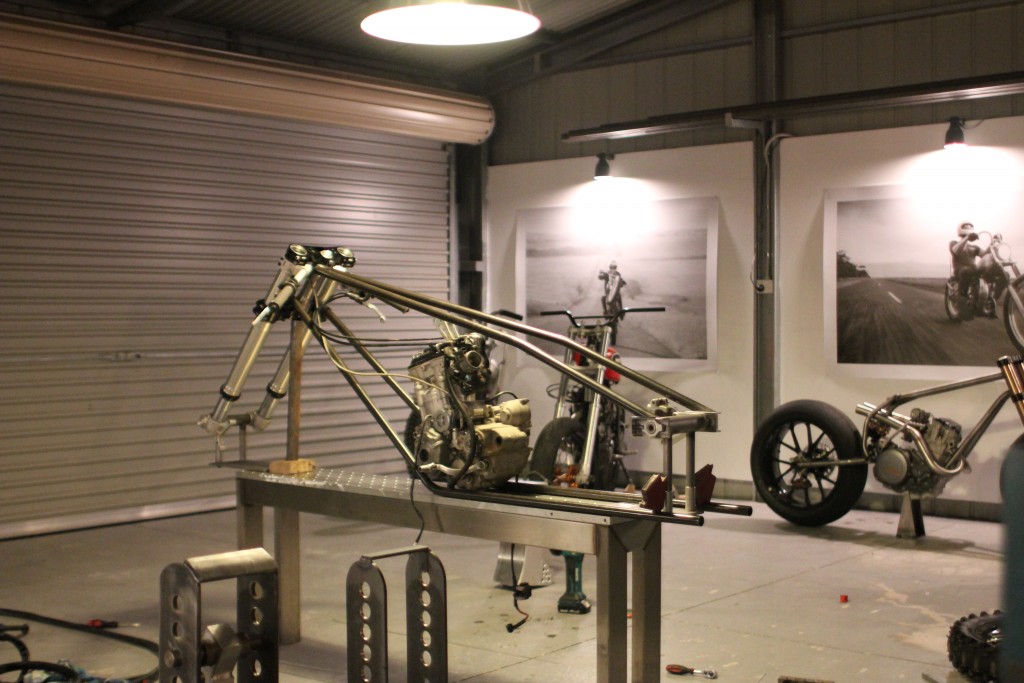
I bent up the top chromoly frame section, just a 10 degree bend 1200mm from the neck, it’s not the bending on these that is tricky it’s the notching into the frame. After what felt like 200 trips into my grinding bay I finally had the line and notches correct, I stood back and was overcome with excitement, this is going to look good!
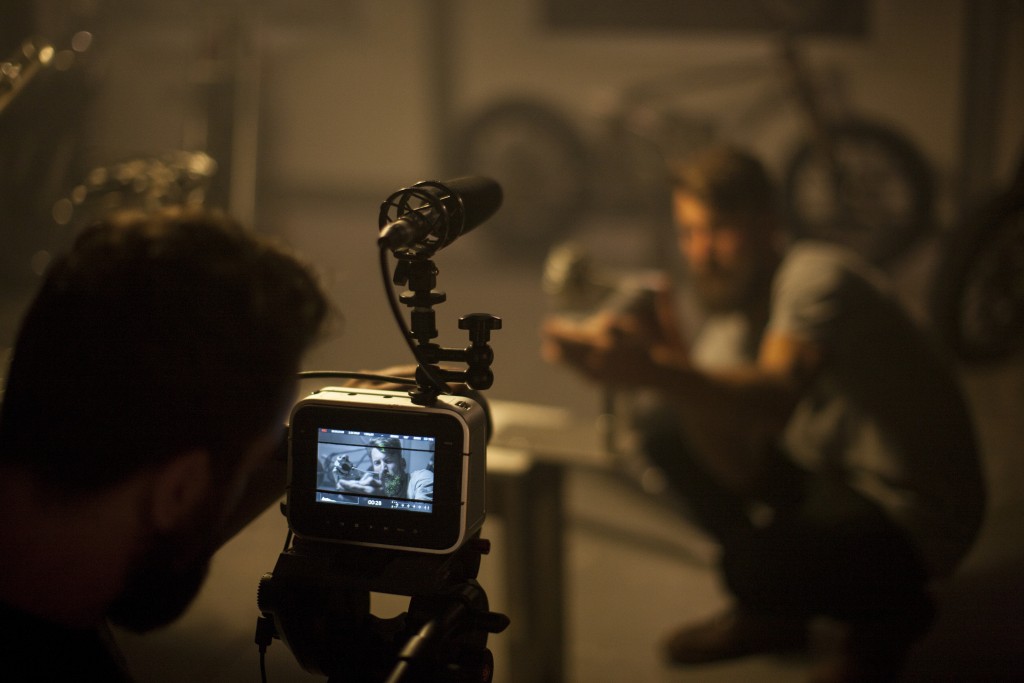
Sign up to www.flatsmovie.com to be notified of the finished product, the build and the journey in the upcoming film.