October was a pretty wild month, after my trip up the east coast of Australia I am starting to find my routine again. Last weekend I took the little TS185 2 stroke Chopper up to Kustom Kommune for the Oil Stained Brain show. It got lots of great comments but it seems to divide people. Theres a group of people who hate it and theres a group of people who love it, those that love it get what I was doing, its a simple vision executed with simple tools and ideas, it was a build that took days not weeks to complete, a very small amount of money and has been an absolutely enjoyable ride.
From Chopped, to Matsuri, to WTAC then Oil Stained Brain there are a lot of different cultures throughout all of these events and I dont seem to fit into any but enjoy them all. I get this question a lot “are you a bike or a car guy?” I struggle with people who separate the two, I couldn’t do one without the other, I couldn’t deal with the stresses of building a car if I didn’t have a motorcycle to ride. Building motorcycles is far harder than building a car, well in the stylistic sense anyway, a motorcycle has so few parts that each one needs careful consideration as to what role it plays in the build, a car on the other hand has so many parts that most parts get lost in the overall build.
Its this fact that I feel makes a motorcycle more like art, the epitome for me has always been to build a car from the ground up, I did that with the Hilux and always wanted to do it with a motorcycle, it wasn’t until I finished the Hilux that I believed I could build the motorcycle. I knew it couldn’t be rushed though, its been a project for a while now, every single part has been under consideration for a lot longer than it took to make it come to life.
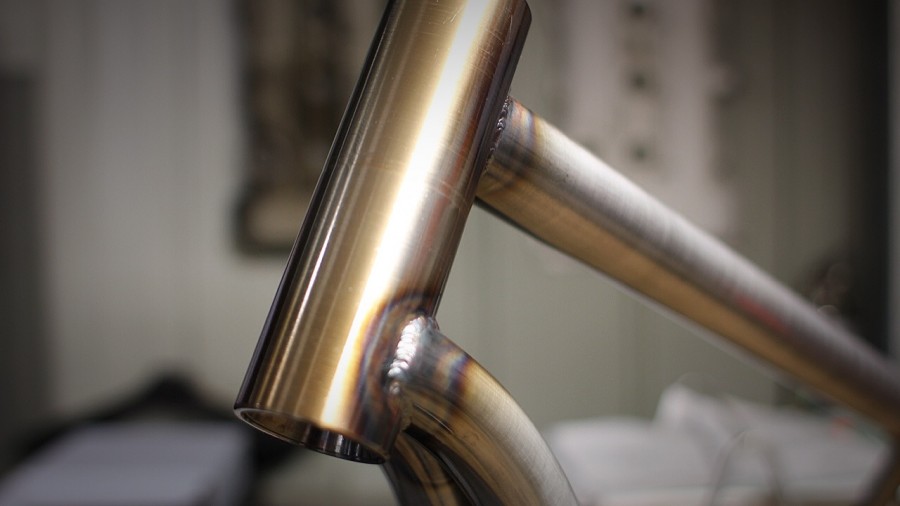
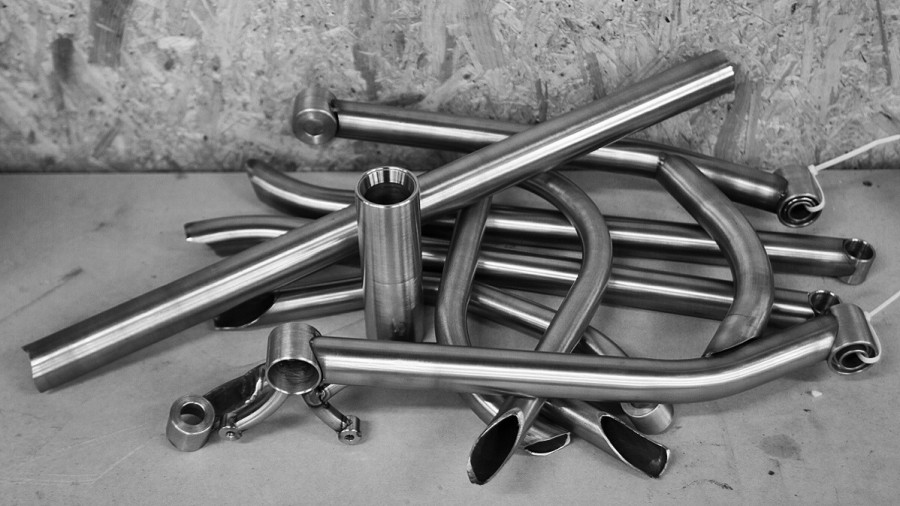
Before October I knew I wouldn’t have a chance to get back onto the build till November, so leading up to Chopped I broke all the tack welds, polished all the chromoly tube, then welded up the chassis. I also gave it a coat of pressure pack clear to protect the new finish, its easy to wipe off with thinners and does the best job at keeping the rust away.
So now its November and I had some time to spend on a few key areas.
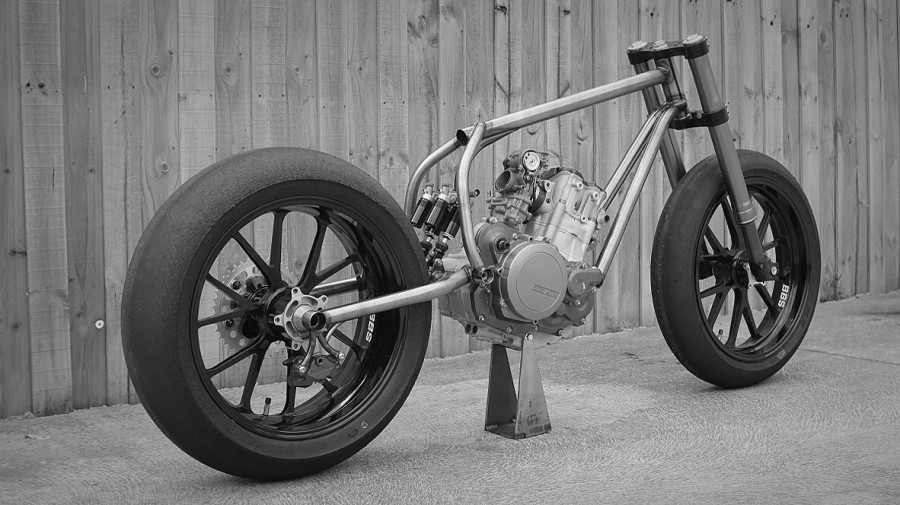
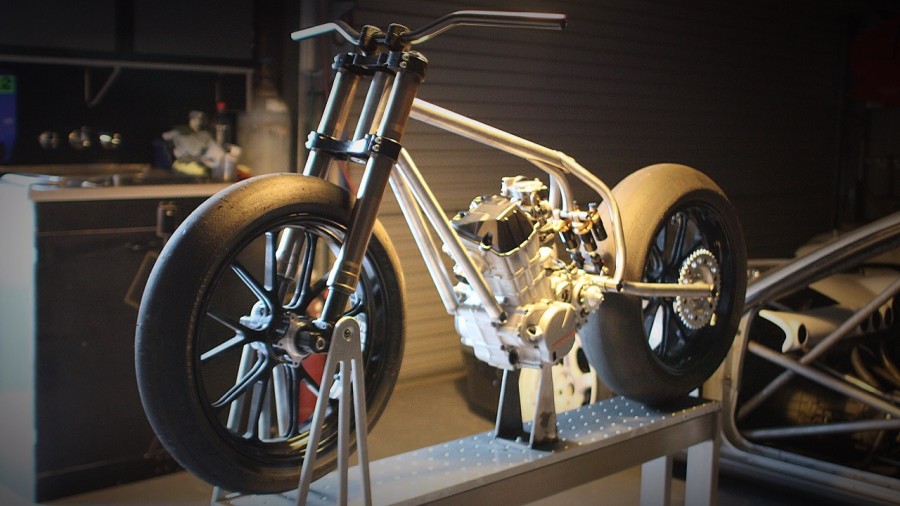
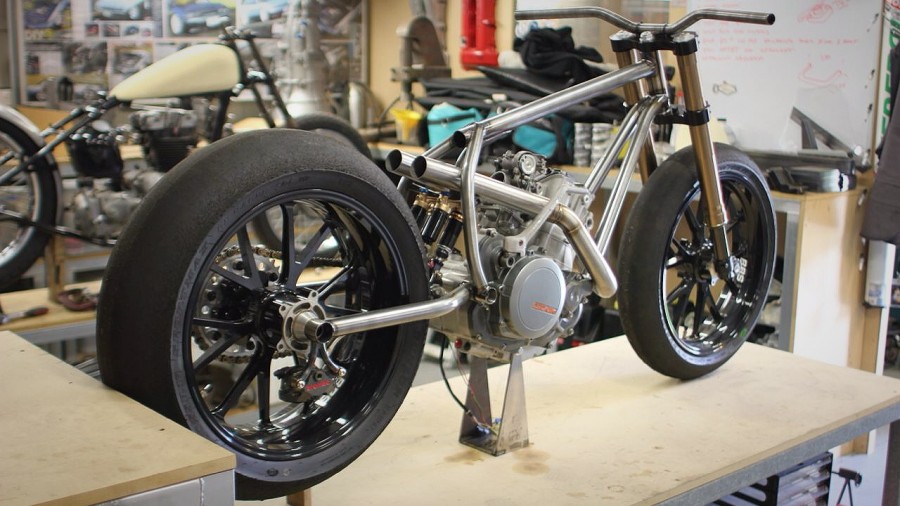
With the chassis now rolling (but not finished) it was a good chance to get an idea about how it would sit.
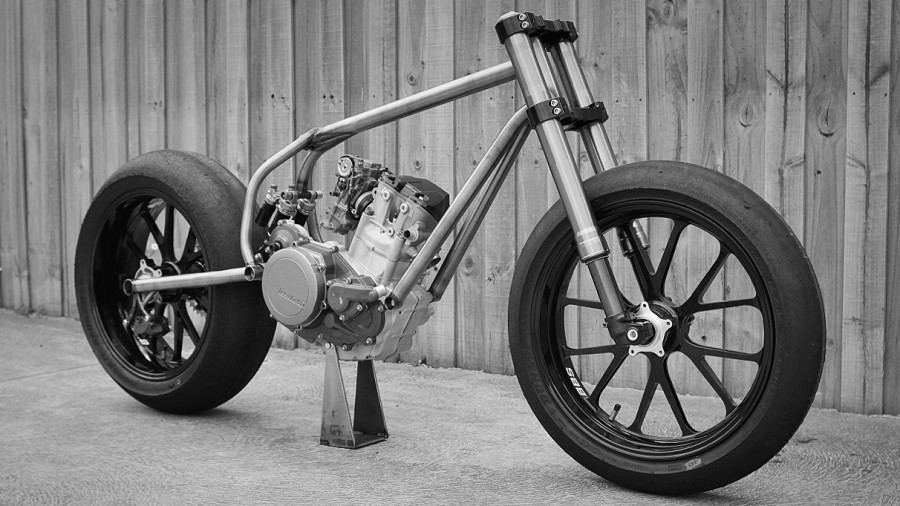
Its a very small bike, keeping in mind I dont draw anything before making it the actual size was never known, the wheels are 17″ diameter and the motors relatively small too, both these needed to be the feature and the rest had to encase them.
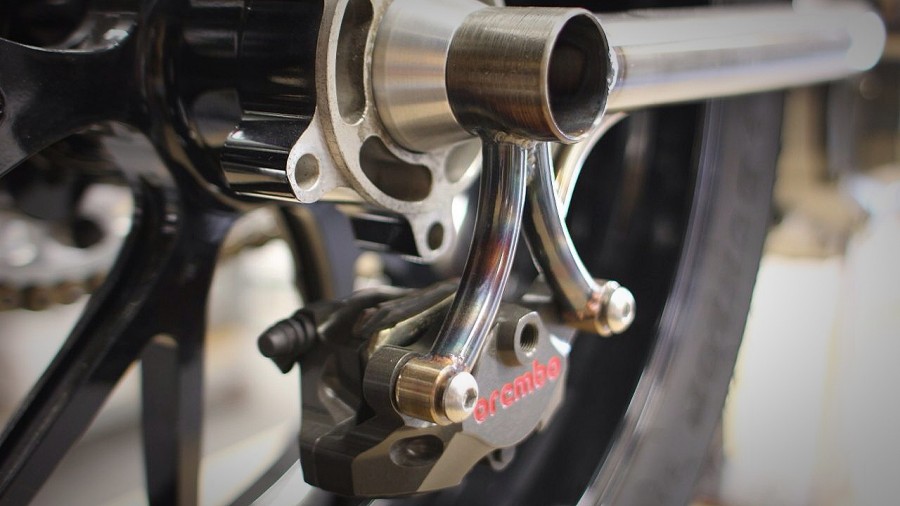
With the rear brake hung and mounted I needed to sort out some rear suspension, I decided to use some MTB shocks, used more as a bump stop than actual suspension they will have very heavy springs and allow the rear end to soak up large hits.
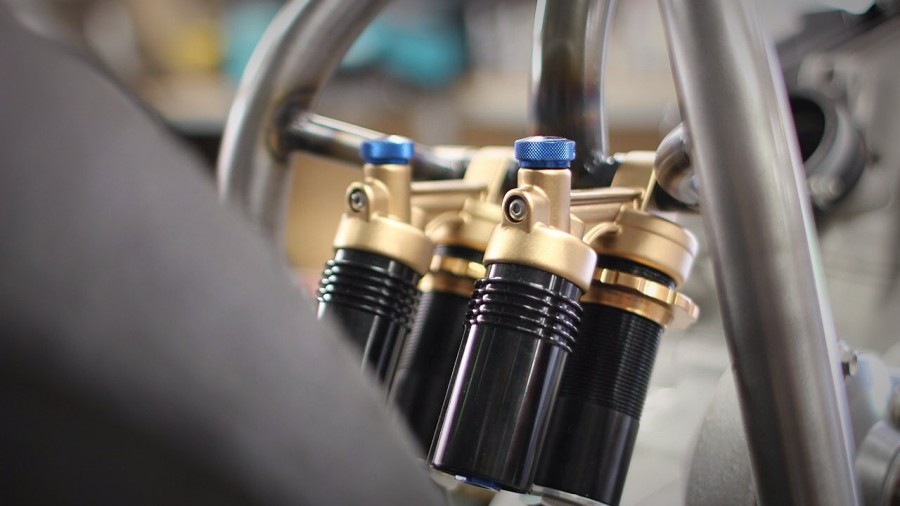
I used two to keep the symmetrical, a very important factor I believe.
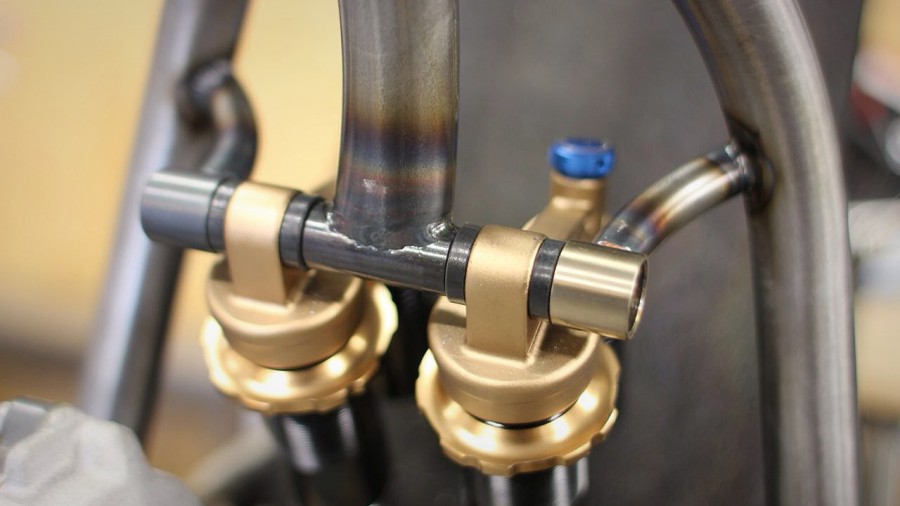
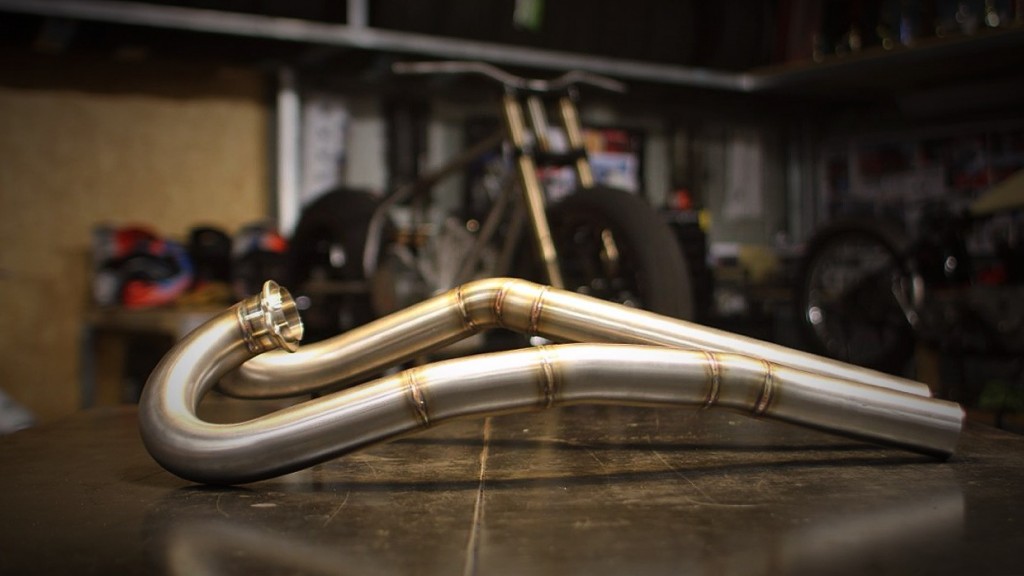
Also I wanted to run the pipes through the gap at the top.
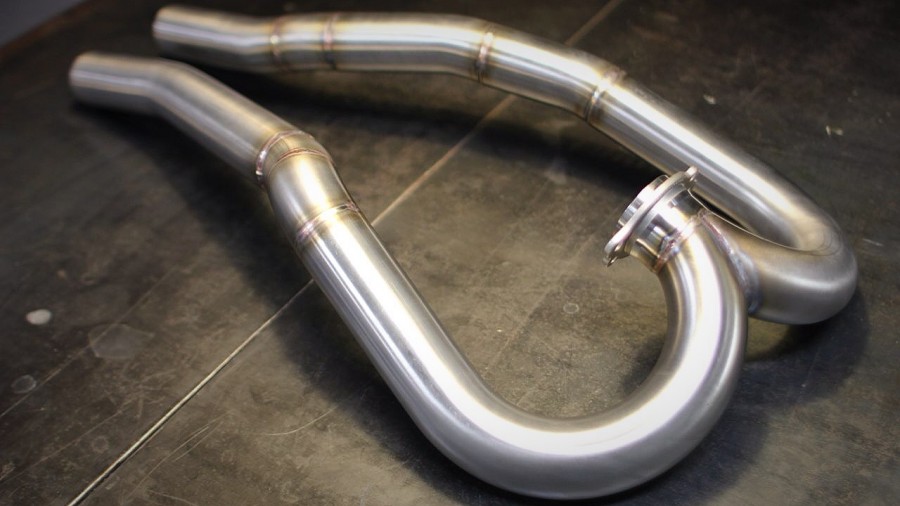
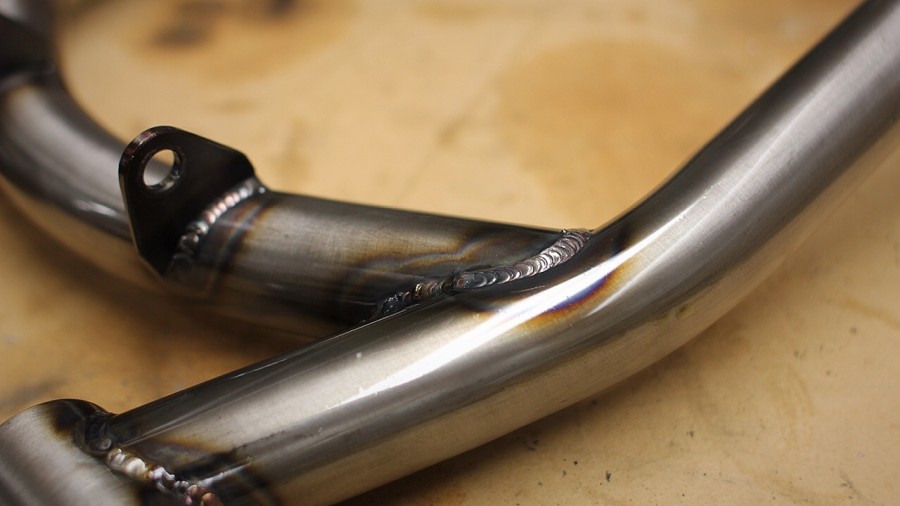
Using the bends I had made for the SR20DE headers I made the exhaust.
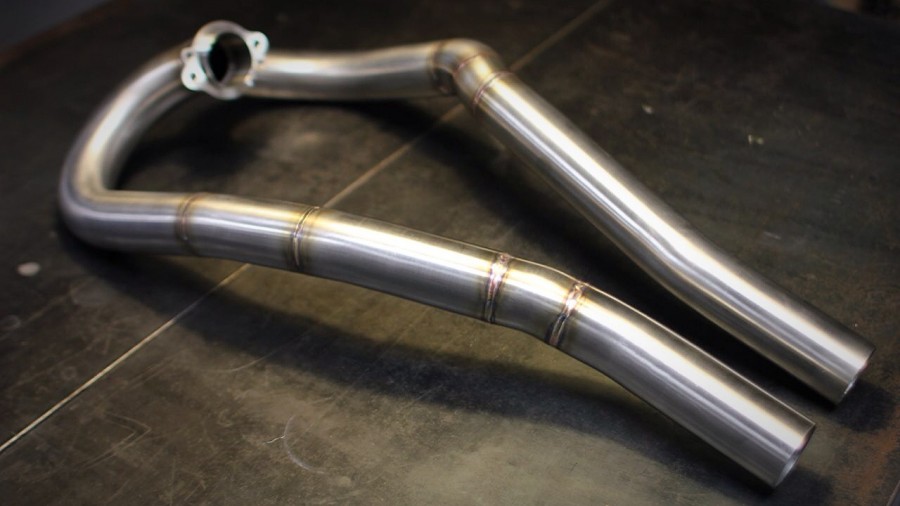
The KTM flange starts the one into two exhaust that I intricately put together.
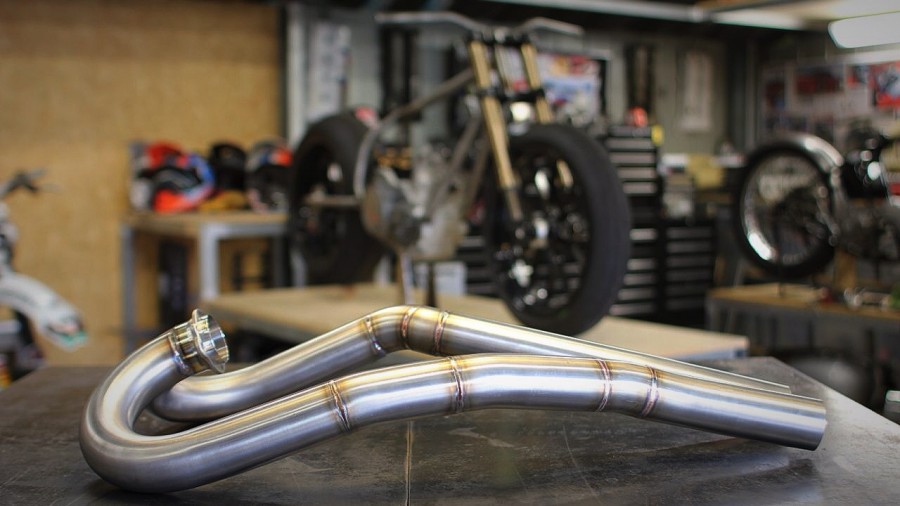
It took a lot of thought to make an exhaust and have it be removed easily too.

It had to also clear a lot of things including the water pump and kick starter.
Then making its way through the gap I left above the shocks.

Im not sure if this is where it will end or if I will add a slip in section to then continue the pipes over the rear wheel.
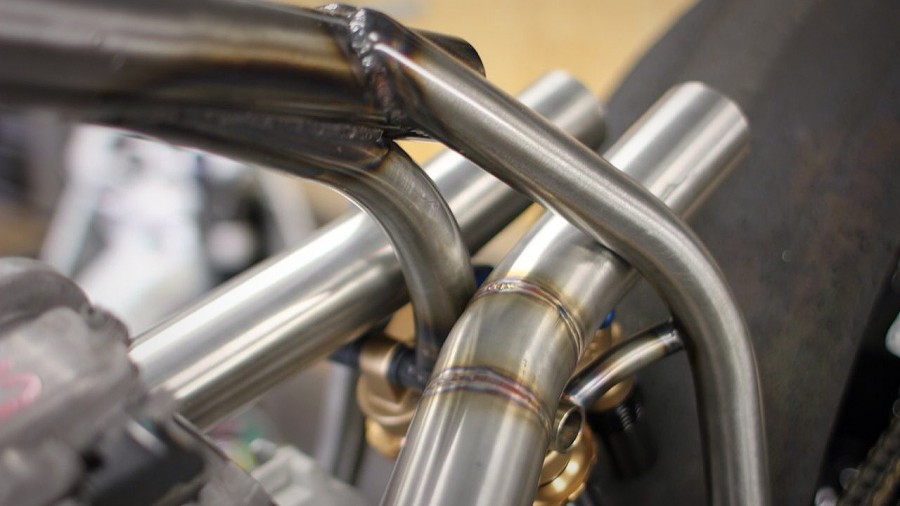
But I am really happy with how they turned out.
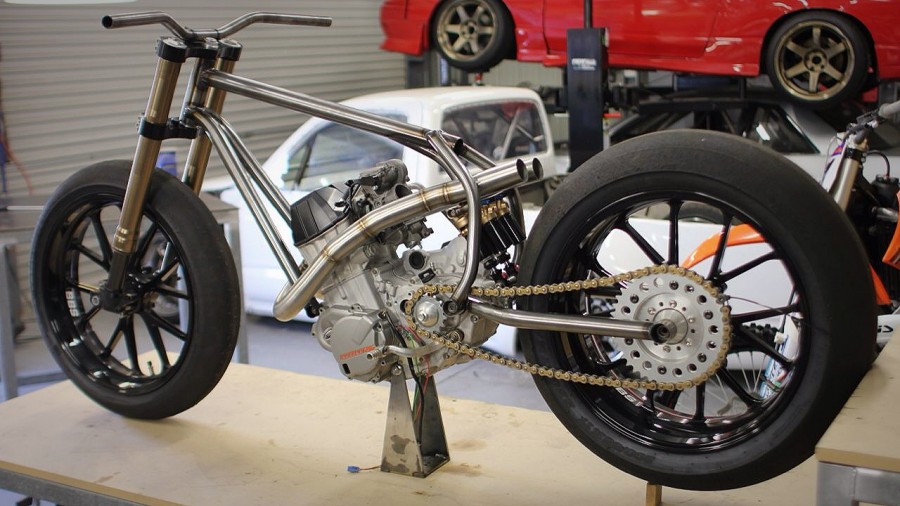
Theres a whole heap of jobs I want to do before I start on bodywork, theres a few parts I need to buy, my budget is non existent right now (after purchasing all the repair parts for the Hilux gearbox) so I will just press on with the minor jobs before I get it running and riding.