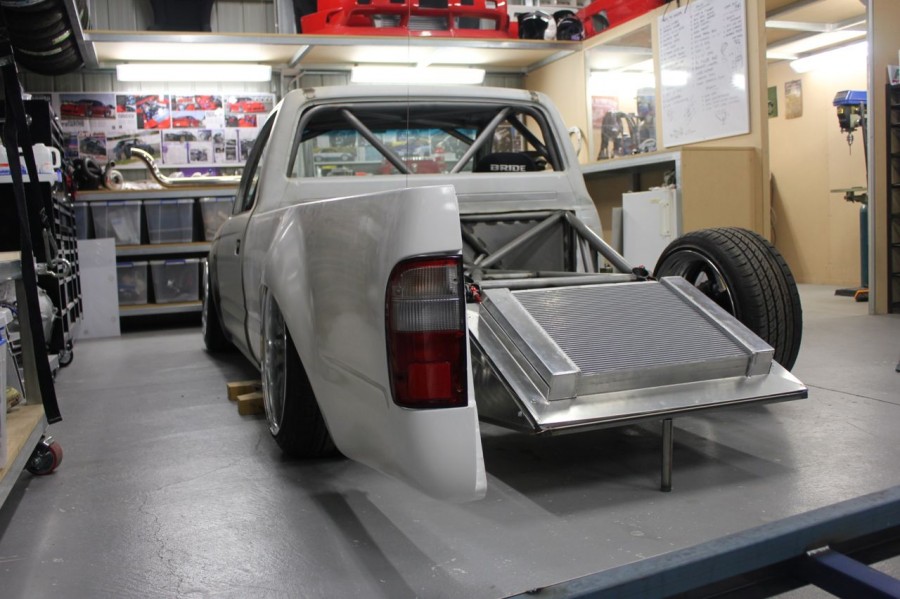
I am proud to announce that the Hilux has hit the ground. I woke up this morning and went through all the steps to get this rolling again, i needed to remove all the rear arms, remove the rear knuckles, remove the radiator under tray, then shift the 180SX, let the hoist down, shift the Silvia, remove one side of the hoist, roll the jig over to the hoist, refit one side of the hoist, lift the hilux off the jig, remove the jig, refit the arms, refit the knuckles, do a spanner check, remove the wheels from the trailer, fit the wheels on the hilux and then lower it on to the ground and check how the suspension, sway bars and everything else works with weight on it.
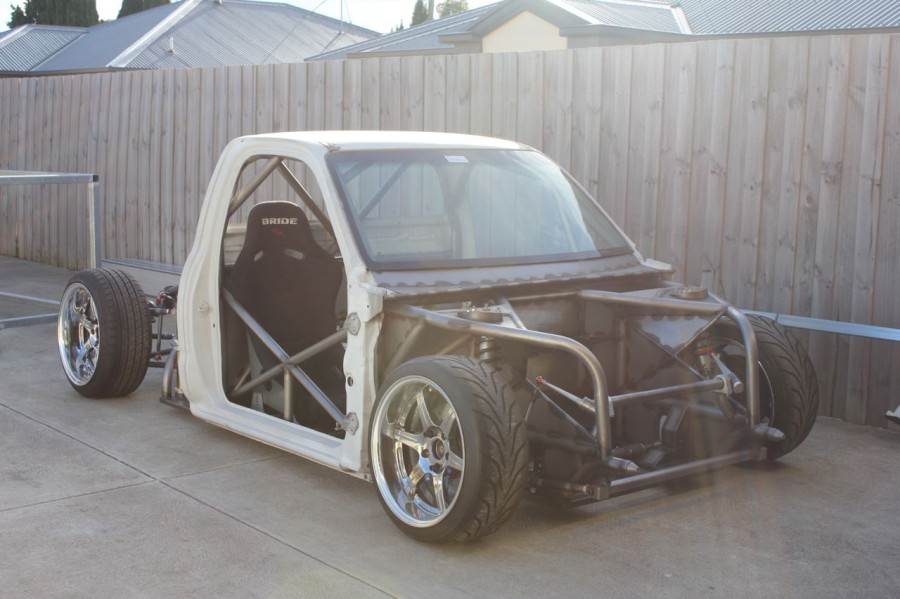
After spending a couple of hours doing all that (thanks for your help Greg) it was an amazing feeling to have it all on the ground again.
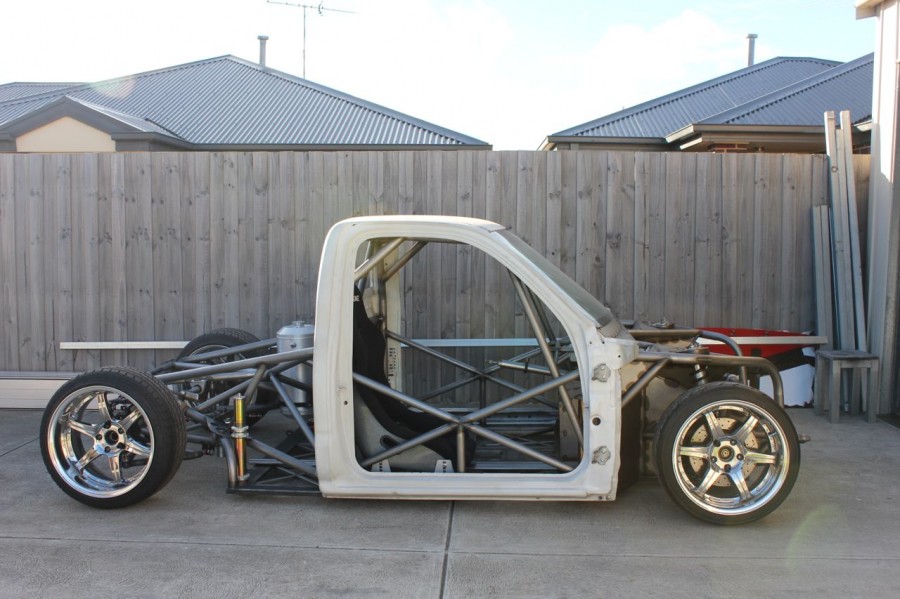
If you have been following the build for over a year you would have already seen this rolling but seeing it in this state of build was another thing all together, the entirely new suspension setup just looks amazing and to see it all working and holding weight just makes those months of late nights all worth it.
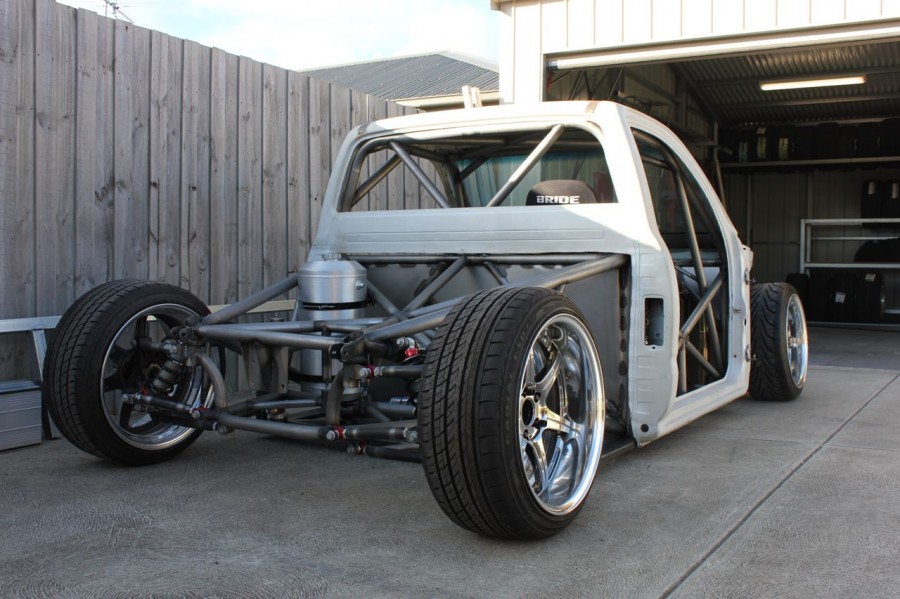
The alignment seemed pretty right with a few toe adjustments (which were easy) to get it rolling smoothly, the amount of adjustment on the rear makes aligning very simple, i have never had a rear end sit so happily with everything evenly weighted.
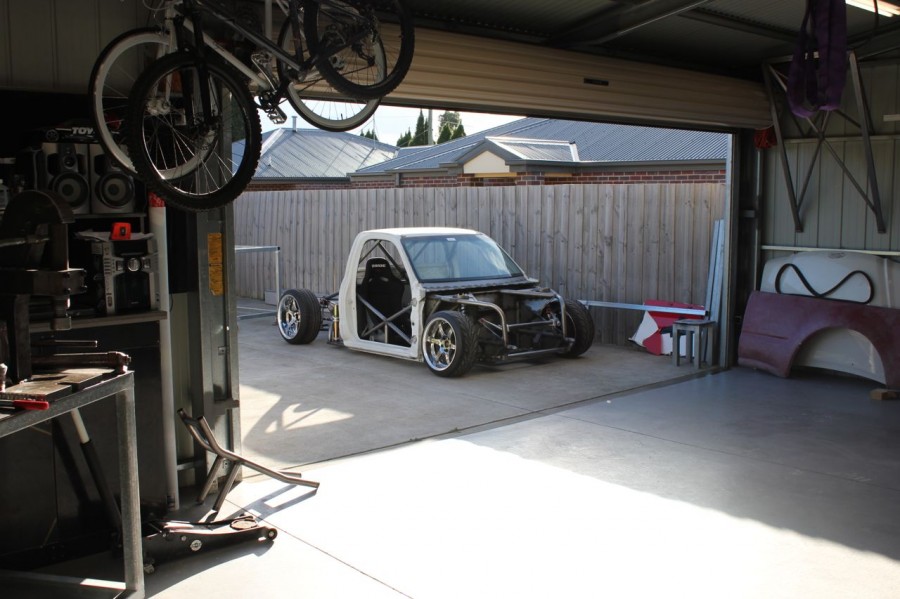
I just never get sick of looking at it, from each foot step away i get a different angle to look at, i sometimes forget the amount of time spent building it. Thats enough daylight for one day, time to roll back in the shed, love that word, ROLLING and not on the jig!
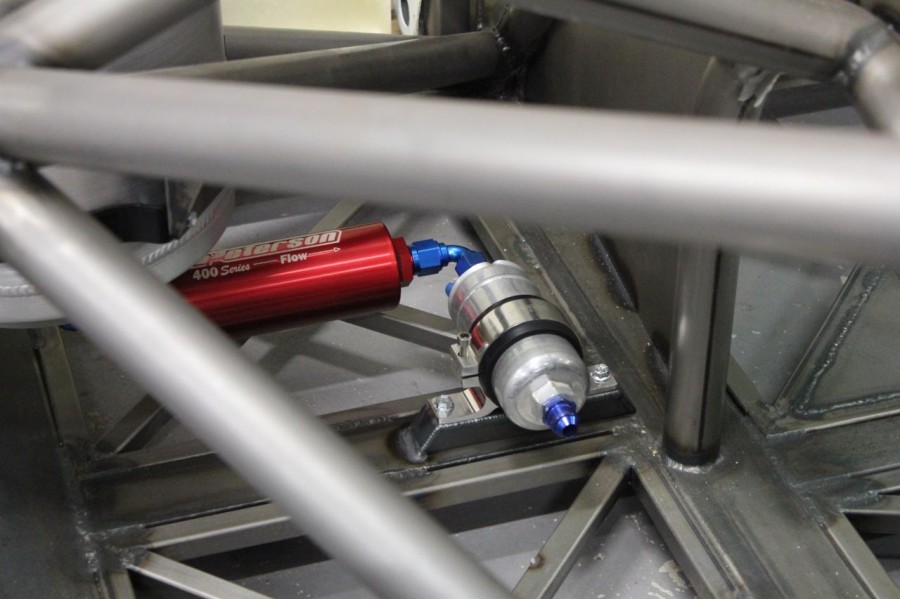
The fuel pump mount is also something new that you have not seen, i bought a generic 044 alloy mount (because seriously for $17.95 why would you build one) then made up a neat little 1.6mm sheet mount for the mount. Thats the difference with this build, its that extra step that i always take to make the most of every little feature, its bordering on an art piece now.
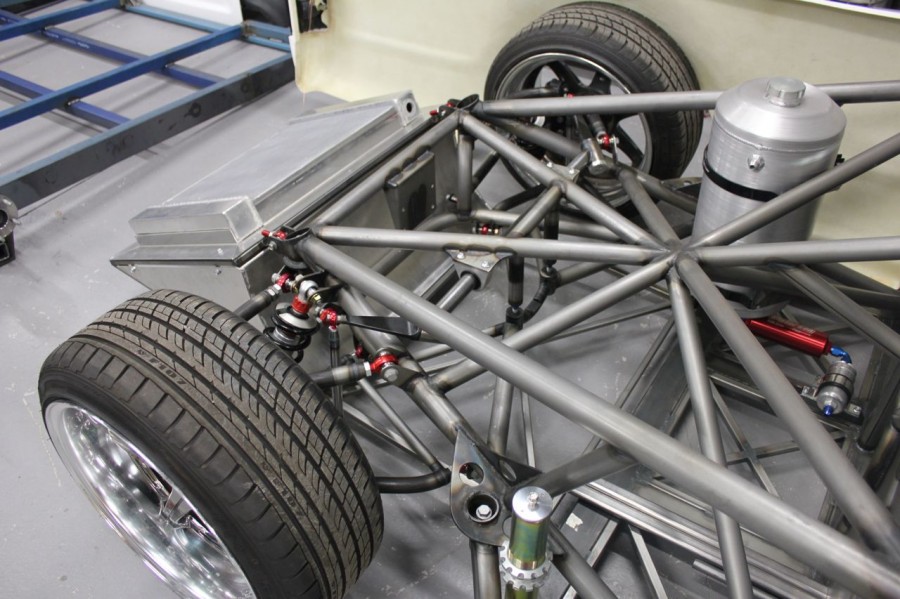
I refitted the rear underfloor and radiator to see how we were looking for clearances, it all looks good and now i have a heap more work to do.
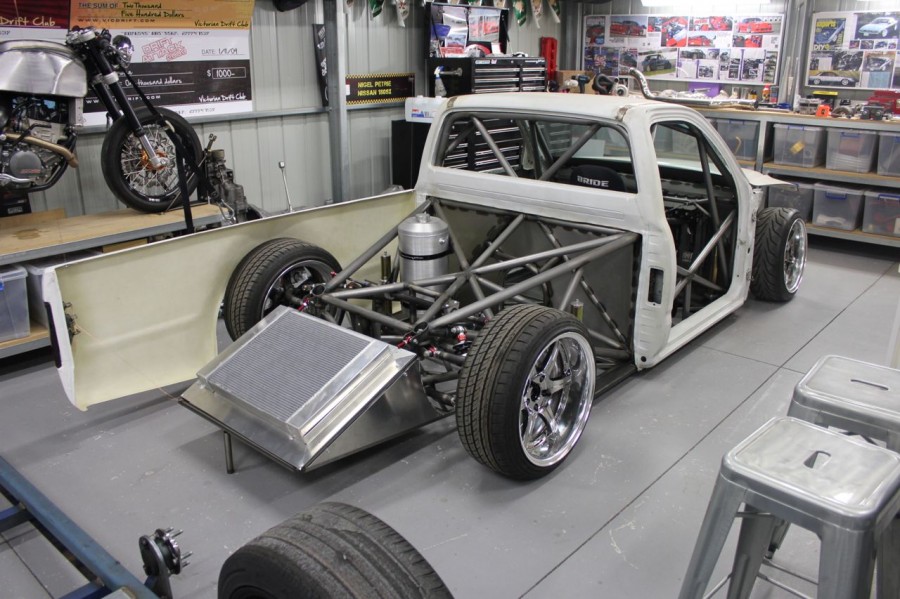
After feeding about 10 meters of MIG wire out of my MIG (gas off of course) we hung the rear quarter panel from the roof of the garage, it was a nervous time for me as i wasn’t 100% sure on the width of the new rear end, i knew it would be close and i hoped everything would line back up, you get an idea for the amount of overhang i have, from here i have to build an entire tube structure to hang the rear panels and alloy diffuser from, theres a stack of work needed now!
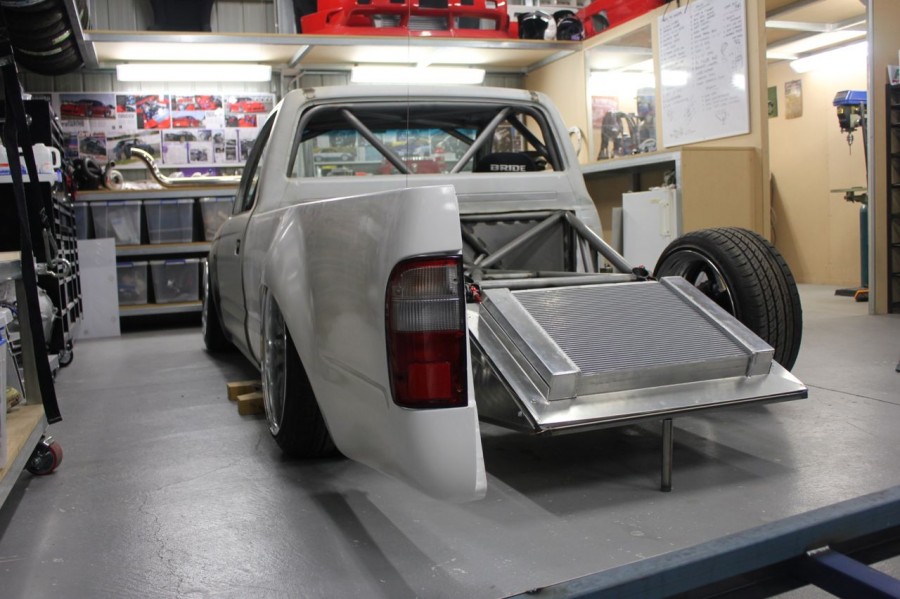
I was stoked with the guard fitment, the front guards were also trial fitted (higher radius cut) so now i have an idea on how much to pump the fronts now. We also fitted the bonnet on the new Toyota bonnet hinges. I have months of work ahead of me to have all the panels permanently on and staying that way. Step by step its really getting there.
So so happy to be rolling on 100% hand fabricated front and rear suspension now.


Oliver
The world has a new superhero. So much time and effort, finally paid off and looks incredible.
Solid job dude, past couple years have been worth it.
Nigel
Thanks mate, see you in August again?
Oliver
You know it!
Ryan
Just lost for words…its rolling, YEAAAH!!
david
My god thats came a long way sence u started. Its a work of art
daniels14
looks great!
btw what wheels are those?
Nigel
They are Bridgestone Driftmasters
Mykel
Mate, this is the pinnacle of what someone can do when their determined, well done mate, good to see it rolling. If you were in w.a. Id buy you a beer or twenty.
Nigel
Its saturday night i could do with 20 beers 😉
Simon
Awesome stuff Nigel, very inspirational!
anthony
I have seen the little blogs of this build and have got to say that you my friend are a true artist,enthusiast and visionary. It has been a awesome build so far and it is good to see someone take the time passion and that little bit extra (where in all honesty in the automotive world is the the difference between a masterpiece and a dodgy hack) and look forward to seeing the end result. good luck with the rest of the build
Nigel
Thanks Anthony, I’m so pleased that people get enjoyment from the build, i know i do 🙂
Greg
See ya for more tomorrow arvo
Nigel
Cheers mate, today went so fast didn’t it, cheers for the hand.
Ben
Can’t wait to see those rear guards filled with rubber , and i see your work room is filling up with equipment aswell.
good work Nigel …
Nigel
Slowly Ben, theres about $200,000 of metalwork gear i would like but that won’t fit in this shed 🙂
michael
i cant wait to see those guards filled with shredded rubber and tire smoke 🙂
luke janssen
awsome work man. great to see it finnaly off the table 🙂
any thought of doing a story on the shed? looks like there is some awsome things going on there behind the scenes!
M
Congrats for getting her rolling Nigel! Now, are we gonna see her running this year @ WTAC? =P
Anyway…am building a ‘Stance’ trike from a Huffy Slide Machine as a school project (nothing compare to your Ute of course) and am determined to get her rolling this holiday! Fingers-crossed lol…
KEEP UP THE GOOD WORK!!! XD
TallPaul
madness nigel….. will you be displaying this at wtac this year?
Spud
I have to say, that is one of the nicest race cars i have seen. very impressive fabrication and the thought of it being a ute is just the Icing on the cake.
I will be looking forward to seeing this thing going. and will definately keep up on the build brogress.
Good job. and look me up if you ever come to the west!
SPUD
Kamikaze BottleRockets
So happy for you!! I’m learning a lot watching your build progression. This has to be one of the most influential builds in drifting history, cheers!
BBZ
well done nigel. looks unreal mate cant wait to see it driving next
S13 Silvia
Looks awesome man, will we be able to expect it at the nationals next year??
Nigel
What nationals are you talking about? Thanks mate
Dylan
hey mate looking amazing as always just wondering why youv decided to run all that over hang on our deck do u like the look of the long wheel base hilux better then short? and also will u always have he deck on as it looks tough as f*#k with just that mind blowingly perfect jungle gym on display out the back im hoping we will get to this this in the flesh over in nz in the future keep up the good work cheers
Nigel
Thanks Dylan, would love to bring it to NZ, have to get the thing roasting tyres first :), i will explain the length for you.
The factory single cab hilux wheelbase measures 2850mm, the factory S13 wheelbase is 2550mm, now to make the hilux the same wheelbase it would require me to run a “Shorty” tub which is a Hilux extra cab tub, i think these look wrong so i started looking at a similar wheelbases car that would perform well and suit the length i need. I looked at JZX100s and they measure 2700 which is in-between an S13 and a regular hilux, they perform really well but just suffer from excess weight, so i decided to run the wheelbase at 2700mm, this allowed me to run an extra cab tub and add 150mm into it, this makes it look just right, not too long and not too short.
I had to keep the overhang the same as factory, any alterations would have looked wrong, Hiluxs are one of the best body lines around so i wanted to not mess with it.
Marcus
I second Dylan, I really hope you bring this over to New Zealand, you will blow some serious minds!!
Greg Kruse
You’re an inspiration mate. Seriously in aw of this thing!
Alex Butti
Hey Nigel, your Hilux looks bonkers! Seeing all that fab-work, that’s just awesome……but…….it looks heavy to me. Definitely super strong and everlasting, but it might not perform as good as you’d like).
I hope you’re keeping an eye on weigh, tubing, and all that stuff.
BTW, I’m building a very similar Toyota (Tacoma) here in the US:
http://www.flickr.com/photos/20733247@N06/sets/72157626814106072/
Best of luck!
Nigel
Im not really worried about weight Alex, hence i havnt even weighed it yet. You would be surprised how light it is, the chassis can be lifted by two men easily and thats with the body on!
Neal
I think your fuel filter is sitting in the wrong direction …
Tiltin
Awesome progress man, been following this build since day one..Bring this thing over to the D1NZ finals next year..?
Ben
Nigel, I get drift and totally rate this project, although I would love to see you have a crack at a open/ closed wheel space frame race car. I think you would also get easily five fold exposure and appreciation of your craftsmanship for doing so…. maybe you have this in a 10 year plan.
Also wondering if your going to have a crack at vacuum bagged carbon fiber one day for the hilux rear quarters?
benny
Soooo epic
Jordan
I can’t wait to see it perform. Lightweight JZX wheel base is going to look so gangster sideways
Miles
Thanks again for showing me around the shed last week dude!
Was a real honour :).
I was repping the ETS hat all weekend too ;).
Also, Neal, the fuel filter has to be infront of the pump, otherwise the pump could get filled with crap.
Then no pump..
jay
Nigel, congrats, on such an awsome build, I was stoked to find out, that such an artist of metal work came from my home town, just like you I started building custom cars in my shed ( nothing to level you have ),and know for a living in Qld, glad you chose the hilux as a base ,I had a black one running boyd’s when I lived in belmont. your skills are just inspiring I find myself study’n the pics ( with a stupid grin ). keep up the great work. I’m sure there a big things for you in this industry. I’ll keep an eye out ma be I’ll spot the ute next time I’m down that way, for now just stand back an admire you work it is all part of job. well done
Matty
Love this build. One thing, i might be wrong and you probably haven’t finished it yet, but i think your fuel pump is back to front…
kurt
are you going to make those fibre glass sides for the tray to sell im keen to buy some